
Step-by-Step: How to Remove Rust from Fabrics Without Harsh Chemicals
Rust stains can be an eyesore, particularly when they appear on your favorite clothing or upholstery. It’s common for everyday items, such as metal furniture or tools, to inadvertently leave behind these unsightly marks when they come in contact with fabric. The good news is that you don’t have to rely on harsh chemicals packed with toxins to remedy this issue. With a little ingenuity and some readily available natural ingredients, you can tackle rust stains effectively. In this guide, you’ll learn how to harness the power of nature to eliminate these stains, preserving both your fabrics and the environment. Get ready to bring your fabrics back to life!
Before diving into the methods, it’s helpful to understand the science behind rust stains. When iron comes into contact with moisture and oxygen, it undergoes a process called oxidation, leading to that familiar orange or brown color we recognize as rust. Once these stains set into the fabric, they can be particularly stubborn and challenging to remove. However, understanding the characteristics of rust can guide you in choosing the right natural remedy. Armed with this knowledge, you can not only effectively treat existing stains but also take preventative measures for the future.
Understanding Rust Stains

Rust isn’t just a simple stain; it represents a chemical reaction that can be tough on fabrics. This oxidation process leads to bonds formed between the iron and the fabric fibers. Often, rust stains can be exacerbated by washing clothing in hot water or drying them in high heat, which sets the stain further. Knowing how to treat these stains as soon as they appear can save you time and frustration. To tackle rust effectively, we need to rely on safe, natural remedies that can break down these stubborn oxidized compounds without damaging the fabric itself. This approach is not only safer for your family but also for the environment.
Natural Solutions for Rust Removal

Nature provides us with plenty of effective tools to combat stubborn stains like rust. In this section, you’ll find a list of common natural ingredients that can help eliminate rust stains from your beloved fabrics. Each ingredient works by utilizing its inherent properties to break down or lift the rust particles from the fabric fibers.
- Lemon Juice: Its acidity helps break down rust effectively.
- Salt: Acts as a gentle abrasive, enhancing the rust removal process.
- Cream of Tartar: A powerhouse when combined with other acidic substances like lemon juice.
- Baking Soda: Not only does it deodorize, but it also helps remove stains.
Let’s go into more detail about how to apply these natural solutions effectively to get rid of rust stains for good. Preparation is key to ensuring a successful outcome, so make sure to gather all your materials first. Here is a quick checklist of what you will need:
- Fresh lemon juice
- Coarse or sea salt
- Soft cloths or sponges
- Cold water
Step-by-Step Guide to Remove Rust Stains
The process of removing rust stains may seem daunting, but it can be broken down into manageable steps. Follow these easy-to-understand procedures to effectively tackle your rust stains without damaging your fabrics:
Preparation
Before you start treating the rust stains, it’s essential to prepare accurately. First, ensure that you are working in a well-ventilated area, particularly if your chosen cleaning remedy has a strong scent, such as lemon. Gather all your materials, including the natural rust-removal ingredients. Next, it’s crucial to test the chosen solution on an inconspicuous area of the fabric first. This precaution will help you avoid any potential discoloration or additional damage to the fabric.
Application of Natural Remedies
With your preparations complete, you can now apply your chosen method for rust removal. Below, you’ll find effective methods using two of the natural ingredients listed earlier.
| Method | Steps to Follow |
|---|---|
| Lemon Juice and Salt |
|
| Baking Soda Paste |
|
In addition to these two main solutions, there are alternative methods you can explore. Incorporating the hot iron technique can sometimes transfer rust stains to paper towels effectively, while regular maintenance and proper laundry practices can help prevent future stains from occurring.
Conclusion
Removing rust stains from fabric doesn’t need to involve harmful chemicals. With a little bit of patience and knowledge of natural remedies, you can successfully eliminate rust stains while keeping your home and the environment safe. Whether you opt for lemon juice and salt, baking soda, or another alternative, following these steps can yield excellent results. Remember to act quickly when a stain occurs, and always do a spot test on fabric to ensure the safety of your delicate pieces. By adopting these gentle methods, you’ll not only be able to keep your fabrics looking pristine but also contribute to a healthier household.
Frequently Asked Questions
- Can I use vinegar to remove rust stains? Yes, vinegar can also be effective. Apply it similarly to lemon juice and rinse thoroughly.
- What types of fabric are most susceptible to rust stains? Cotton and linen are particularly prone to rust stains, often due to metal components in washers or dryers.
- How can I prevent rust stains in the future? Store metallic items separately from fabrics and regularly inspect your laundry appliances for rust.
- Are there any fabrics that should never be treated with these methods? Always check care labels; silk and certain synthetics might require special care.
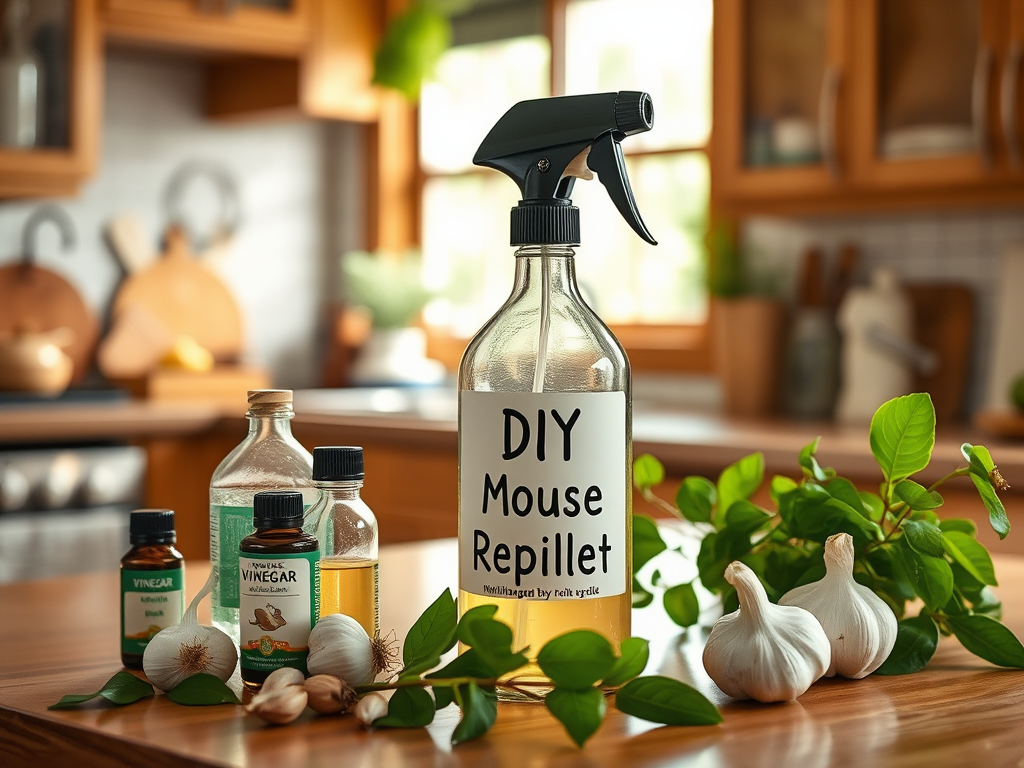
DIY Mouse Repellent: The Power of Smells to Keep Your Home Safe
When the adorable little house mouse starts to make itself at home in your cozy space, it can quickly become an unwelcome guest. Not only do these furry critters carry various diseases, but they can cause significant damage to your belongings and living environment. Thankfully, there’s no need to immediately reach for toxic chemicals or expensive traps. You’re in control with a myriad of natural solutions that are effective, safe, and often delightful in scent. Here, we explore the fascinating interaction between smell and mouse behavior. You’ll discover powerful aromas that can repel these pesky intruders, allowing you to maintain a serene, pest-free home.
Understanding the mouse’s psyche is crucial when devising a plan for prevention. Mice rely heavily on their sense of smell to navigate and assess their environment. They are creatures of habit, often returning to familiar places where they feel secure. This innate behavior can benefit us; by leveraging specific scents that mice dislike, we can alter their paths and make our homes uninviting. As we delve into the world of smells, you’ll learn how various essential oils and natural fragrances serve as potent deterrents. With a little creativity, you can create your own effective mouse repellent, empowering you to take charge of your living space.
Understanding Mouse Behavior

Mice possess a keen sense of smell that exceeds that of humans, making it their primary tool for exploration. They use scent to find food, communicate with other mice, and avoid danger. By comprehending how they respond to different smells, you can strategically design your defenses. Mice are particularly sensitive to pungent odors, which can overpower their natural instincts and disorient them. This gives us a unique advantage in our battle against these invaders. Understanding this behavior can transform your approach to pest control from reactive to proactive.
A number of factors contribute to the effectiveness of scents in repelling mice. Various odors can dissuade them from approaching certain areas. They can actively perceive these smells even at a distance, which means your home can act as a deterrent before they even step inside. As you implement your methods using pleasant yet potent aromas, remember that consistency is key. Regular application will ensure that your efforts are ongoing, keeping your environment persistently unwelcoming for mice. Now that you grasp the significance of smells in mouse behavior, let’s explore some of the most effective scents.
Essential Oils for DIY Mouse Repellent

Essential oils are concentrated plant extracts known for their powerful fragrances and various purposes. They not only provide natural pest control but can also impart pleasant smells to your home. Let’s focus on some particularly effective essential oils that serve as natural mouse repellents:
- Peppermint Oil: Known for its strong scent, peppermint oil confuses and deters mice.
- Eucalyptus Oil: A sharp, refreshing aroma that mice find overwhelming and unpleasant.
- Cinnamon Oil: Known for its warm scent, cinnamon acts as both a repellent and a delightful air freshener.
Each of these oils carries distinct properties that repel mice effectively. They work by disrupting the perceived safety that mice associate with your home, encouraging them to seek refuge elsewhere. Additionally, the pleasant scents of these oils can enhance your living space, giving you dual benefits. Why not turn pest control into a fragrant affair?
Creating an effective mouse repellent spray is easier than you think. Below is a simple recipe you can follow:
| Ingredients | Measurements |
|---|---|
| Peppermint essential oil | 10-15 drops |
| Water | 1 cup |
| White vinegar | 1 cup |
| Spray bottle | 1 (empty) |
To prepare, simply mix the ingredients in a spray bottle, shake well, and your DIY mouse repellent will be ready for application. Don’t forget to spray in key areas where you suspect mice may be entering or residing. These areas may include windowsills, around food storage, and entry points like doors and vents. Always apply this solution liberally to maximize effectiveness. It’s crucial to keep your home safe and welcoming, while also protecting it from unwelcome guests.
Other Natural Smells that Deter Mice
Besides essential oils, several common household items can be beneficial in keeping mice at bay. Here’s a quick list of additional smells that mice thoroughly detest:
- Vinegar: Strong and acidic, vinegar is a potent repellent when used in areas where mice might gather.
- Garlic: Known for its distinctive smell, garlic can discourage mice from venturing into your territory.
- Cloves: The earthy aroma of cloves is often reported as a turn off for many pests, including mice.
Incorporating these items is simple: just place them in small bowls and set them around your home. Alternatively, you can create a mixture by blending vinegar and water and spray the affected areas. Using these strong scents in tandem with essential oils can amplify the effects and provide comprehensive coverage to deter mice from your space.
Application Tips for Maximum Effectiveness
For your DIY mouse repellent to work effectively, strategic application is key. Focus on high-risk areas such as kitchens, storage spaces, and entryways where mice are likely to invade. Regularly check for new entry points and modify your application accordingly. Remember, the more consistently you apply these aromas, the more effective they will be. A well-timed reapplication following heavy cleaning or even seasonal deep cleaning can be the ticket to maintaining a pest-free home.
Combining different methods is also an excellent strategy. You may use traps alongside natural repellents. This multi-faceted approach can be particularly effective, as it creates a layered defense to combat these persistent pests. With proactive measures and natural aromas in your arsenal, you can significantly reduce the chances of an infestation.
Conclusion
Utilizing DIY mouse repellents anchored in the power of smells offers a safe and effective means of keeping your home free from unwanted rodent guests. The holistic approach of integrating essential oils with other natural scents creates an inviting atmosphere for you while simultaneously discouraging pests. Choosing natural methods over chemical solutions not only enhances your living space but also promotes better health for you and your family. By understanding mouse behavior and how they interact with scents, you are empowered to take action. Create your repellent, apply it strategically, and enjoy the peace of mind that comes with a mouse-free home.
Frequently Asked Questions
- What essential oils are best to repel mice? Effective oils include peppermint, eucalyptus, and cinnamon.
- How often should I reapply mouse repellent? Typically, you should reapply every few days or after cleaning.
- Can I use DIY repellents safely around pets? While natural, always use caution and consult a vet regarding essential oils.
- Are there any scents that attract mice? Yes, strong food scents like cheese or fruit can attract mice.
- How can I prevent mice from entering my home in the first place? Seal entry points, keep food stored properly, and maintain cleanliness in your home.

5 Common Mistakes to Avoid When Using Gnat Traps
Gnat traps are often seen as the first line of defense against those tiny, persistent insects that seem to invade our spaces uninvited. Their ease of use and relatively low cost make them a popular choice among homeowners and gardeners alike. However, their effectiveness can be drastically reduced by common mistakes that many people make. In this article, we will delve into the five most frequent pitfalls to avoid when utilizing gnat traps, ensuring that you get the most out of your gnat-fighting efforts. Understanding these mistakes not only helps improve trap performance but also contributes to a larger strategy for pest management.
Understanding Gnat Traps

Before diving into the common mistakes, it’s essential to understand what gnat traps are and how they work. Gnat traps function by drawing in these pesky insects through scents or visual cues, usually leading to their demise. For effective management, different traps target various types of gnats, including fruit flies and fungus gnats. Using the right trap in conjunction with others can provide comprehensive control. The success of a trap largely depends on factors such as placement, maintenance, and the type of gnat being targeted. By knowing how gnat traps operate, you’ll be better equipped to use them wisely.
Mistake: Choosing the Wrong Type of Gnat Trap

One of the principal mistakes made is opting for the wrong type of gnat trap. Each trap is designed for specific types of gnats, and recognizing the differences is vital. When you select a trap that doesn’t match the species, you risk wasting time and resources. The efficacy of gnat traps can be affected by several factors, including:
- Type of Gnat: Identify which gnat type is causing the problem — fruit flies, fungus gnats, or others.
- Environment: Consider whether your traps will be used indoors or outdoors, as they serve different purposes.
- Attraction Methods: Different traps utilize different attractants, such as light or specific scents; choose wisely based on the gnat species.
Doing a little homework on the specific type of gnat in your situation will ensure that you select the most effective trap. This careful selection process can drastically increase the potential for catching unwanted insects and restoring a peaceful environment.
Mistake: Poor Placement of Traps
Another common error is placing traps in suboptimal locations. This mistake often diminishes their effectiveness and prolongs your gnat problem. Many people will set traps without consideration of the gnat’s behavior, leading to reduced catch rates. Proper placement can significantly increase success, and some factors to consider include:
- High Traffic Areas: Place traps in spots where gnats are likely to gather, such as close to fruit bowls or drainages.
- Competing Scents: Avoid setting traps near strong odors (like foods or perfumes) that can distract gnats from the traps.
- Height and Angle: Positioning your traps at the right height can make a difference; eye-level settings often yield better results.
Mistake: Ignoring Maintenance
Overlooking the maintenance of gnat traps leads to decreased effectiveness. While people often become optimistic about their traps, they sometimes forget that traps need attention. Regular upkeep will help maintain their attractant properties and ensure that they remain working effectively. Key maintenance practices include:
| Maintenance Task | Frequency | Importance |
|---|---|---|
| Checking Water Levels (if applicable) | Weekly | Prevents drying out |
| Replacing Sticky Traps | Every 2-4 weeks | Maintains catch effectiveness |
| Cleaning Surrounding Areas | Bi-weekly | Reduces new gnat attraction |
Mistake: Over-Reliance on Traps
Many individuals make the mistake of solely relying on gnat traps without considering comprehensive strategies for pest control. While traps can certainly mitigate the gnat population, they should be part of a broader pest management plan. To truly eliminate gnats from your space, it’s crucial to adopt additional prevention measures. Strategies should include:
- Identify Breeding Grounds: Gnats frequently reproduce in damp places; checking your home for excess moisture can help stop them in their tracks.
- Implement Cultural Controls: Dispose of overripe fruits and ensure proper waste management to limit food sources for gnats.
- Utilize Multiple Trap Types: Combining different types of traps can enhance your likelihood of capture significantly.
Mistake: Not Monitoring Trap Effectiveness
Monitoring the effectiveness of your traps is crucial, yet it is often overlooked. By failing to assess traps regularly, individuals can find themselves caught in a cycle of annoyance. After setting traps, it is essential to observe how many gnats are being caught and make adjustments accordingly. Use a tracking method such as a simple chart, noting:
- Types of traps used
- Number of gnats caught each week
- Changes in gnat presence or behavior
Conclusion
By steering clear of these common mistakes, you’ll find greater success in using gnat traps effectively. It’s essential to choose the right type, place them properly, and maintain them regularly. Complementing traps with a comprehensive management strategy is key to eliminating these nuisances. Remember to monitor your traps and adapt as necessary. In doing so, you’re not just fighting a temporary battle; you’re claiming back your space.
Frequently Asked Questions
- What types of gnat traps are available? Sticky traps, liquid traps, and electric traps are common options.
- How often should I replace gnat traps? Replace them every few weeks or as they become full.
- Can I make my own gnat traps? Yes, homemade traps using vinegar and dish soap can be effective for catching gnats.
- Are gnat traps safe for pets and children? Most commercial gnat traps are safe, but always check labels for specific safety information.
- What should I do if my gnat problem persists after using traps? Consider consulting a pest control professional or reassessing your environment to eliminate breeding sources.

Why Snake Plants are Perfect for Beginners: Low Maintenance and High Rewards
When stepping into the fascinating world of houseplants, choosing the right species can make or break your experience. Many novice plant enthusiasts often find themselves overwhelmed with options, ultimately leading to their discouragement. Enter the snake plant, a true superstar among houseplants that balances beauty with ease of care. This resilient plant not only enhances your living space but also contributes positively to your indoor air quality. Its unique characteristics and minimal requirements make it a prime candidate for anyone starting their plant journey. Thus, the snake plant stands out, particularly in a society where busy schedules often put personal interests on hold.
The Characteristics of Snake Plants

Snake plants, also known as Sansevieria, are well-loved for their striking visual appeal and robust nature. These plants feature long, sword-like leaves that emerge vertically, adding a dramatic effect to any room. Furthermore, they come in various sizes and colors, making it easy to find an option that suits your style. Snake plants are perennial, meaning they return year after year, contributing to their reputation as a low-maintenance choice. Additionally, they are known for their ability to thrive in a variety of conditions, whether in dimly lit corners or sunny windowsills. Their adaptability makes them an attractive choice for any household.
One of the remarkable aspects of snake plants is their diversity. Ranging from the classic Sansevieria trifasciata, commonly known as the mother-in-law’s tongue, to more unique varieties like Sansevieria cylindrica and Sansevieria trifasciata ‘Moonshine,’ each type brings its own charm. These plants can sport vivid green leaves, often interspersed with sculptural markings of yellow or silver, creating a captivating aesthetic. This natural variety allows plant owners to curate different looks and feels in their home or office spaces. You can easily pair them with different interiors, from bohemian to modern minimalism, making them a versatile favorite. Most importantly, their low growth habit means they fit into tight spaces without becoming overwhelming.
Low Maintenance Requirements

Many beginners shy away from houseplants due to fears of excessive care requirements that can lead to stress or plant death. However, snake plants shine in this category, as they are renowned for their low maintenance needs. They can flourish with infrequent watering, and their resilience against neglect makes them exceptionally perfect for those with busy lifestyles. Additionally, snake plants can adapt to varied light conditions, thriving in both low light and bright indirect light. Their ability to withstand drought—sometimes going weeks without water—sets them apart from many other houseplants. With just a few basic care guidelines, even the most inexperienced plant owner can achieve success in cultivating these beauties.
Understanding the watering and light preferences of snake plants is crucial for their well-being. Below is a breakdown of their needs:
- Watering: Water every 2-6 weeks, depending on the season. Always let the soil dry completely between waterings.
- Light: Ideal conditions include bright indirect light, but they can survive well in low-light environments.
- Temperature: They prefer temperatures between 60°F and 80°F, making typical household climates suitable for their growth.
Health Benefits of Snake Plants
In addition to their visual appeal and ease of care, snake plants offer numerous health benefits that make them even more desirable. Research indicates that some houseplants can help purify the air by absorbing toxins. Snake plants are particularly effective at filtering harmful substances like formaldehyde, xylene, and benzene. This property is not only beneficial for the plant owner’s well-being but also for the overall indoor environment. The people adverse to allergens and toxins will particularly appreciate having snake plants in their homes. It’s fascinating how much a simple plant can improve air quality and enhance one’s living experience.
Studies conducted by NASA have shown that snake plants excel in their air purification abilities. Some key points to note:
| Toxin Filtered | Effect on Air Quality |
|---|---|
| Formaldehyde | Reduces symptoms of headaches and irritation in eyes and throat. |
| Xylene | May decrease potential risks of respiratory issues. |
| Benzene | Improves overall indoor air quality and reduces fatigue levels. |
Easy Propagation Methods
For those looking to expand their snake plant collection, propagation is as easy as pie. This feature adds to their appeal, allowing beginners to cultivate new plants effortlessly. Snake plants can be propagated either through leaf cuttings or by division, both of which are straightforward methods. Leaf cuttings involve severing healthy leaves and placing them in water or soil until roots form. Division, on the other hand, entails separating an established plant into smaller sections, each with roots and leaves. For beginners, these methods provide an accessible way to multiply their houseplant collection without the stress of complicated procedures. With just a little patience and care, you can watch your plant family grow!
Here’s a quick comparison of the two primary propagation methods:
- Leaf Cuttings: Cut healthy leaf into sections; place in water or soil to root.
- Division: Separate established plants when repotting; ensure each piece has roots and leaves.
Conclusion
In summary, snake plants present an unbeatable option for plant beginners due to their low maintenance requirements and notable health benefits. Their visual charm enhances the aesthetic of any space, providing a welcoming atmosphere. Coupled with their ability to purify the air and easy propagation techniques, they truly embody a high-reward houseplant choice. Whether you’re a newbie or just want a plant that doesn’t demand much time or effort, snake plants fit the bill perfectly. So, why wait? Dive into the wonderful world of this remarkable plant and enjoy the numerous advantages it brings.
Frequently Asked Questions
- Are snake plants safe for pets? No, snake plants can be toxic to pets if ingested.
- How often should I water my snake plant? Water your snake plant every 2 to 6 weeks, depending on the season and the environment.
- What type of light do snake plants prefer? Snake plants thrive in indirect light but can tolerate low light conditions.
- Can snake plants grow outside? Yes, snake plants can be grown outdoors in warm climates, but they should be protected from extreme temperatures.
- How do I know if my snake plant is healthy? Healthy snake plants will have firm, upright leaves with vibrant colors and no signs of pest infestations or discoloration.

Best Weed and Grass Killer for Large Areas: Coverage Made Easy
Taking control of a vast expanse of land overrun by stubborn weeds and uncontrolled grasses can feel like an uphill battle. Landowners often find themselves grappling with the time-consuming and labor-intensive process of keeping their landscapes pristine. It’s no secret that the right weed and grass killer can make all the difference, turning a daunting task into a manageable chore. While there are countless products on the market, each claiming to be the best, it’s essential to select one tailored for extensive coverage. Understanding the features and benefits of different types helps create a more effective and efficient approach to landscape maintenance. Whether you are an amateur gardener or a seasoned property manager, making an informed choice is crucial in achieving a weed-free environment.
In this guide, we’ll explore some of the best options available that convey ease of application, extensive coverage, and safety. We will examine various types of weed killers, highlight key features to consider, and provide you with top recommendations from our research. Furthermore, we’ll share practical application tips and maintenance strategies to sustain your efforts over time.
Understanding the Importance of Choosing the Right Weed and Grass Killer
Maintaining greenery requires more than just grass seed and water; it necessitates a proper understanding of weed management. Diverse types of weeds can infest a large area quickly, stealing nutrients and sunlight away from your plants. By selecting the most appropriate weed and grass killer, you reduce unnecessary time and effort spent on battling these pests. For extensive landscapes, this choice is even more critical, as you need a product that can cover large areas effectively. Understanding the different categories of these killers is the first step in enhancing landscape care. Let’s delve into the types available and their unique benefits.
- Post-emergent Herbicides: These are excellent for targeting weeds that are already visible and actively growing.
- Pre-emergent Herbicides: Effective for preventing weed seeds from germinating, making them ideal for proactive weed control.
- Non-selective Herbicides: These products kill any vegetation they come into contact with, perfect for large areas that need complete clearing.
Top Features to Look for in Large Area Weed Killers

When investing in a weed killer, certain features should take precedence to ensure you are selecting a product that best suits your needs. One of the most critical factors is the coverage area; larger canisters or concentrated formulas often yield better coverage for expansive landscapes. Additionally, safety is paramount when choosing a product, particularly if pets or children frequent the area. Evaluating a product’s environmental impact can save you from contributing harmful chemicals to your surroundings. Lastly, consider how easy the product is to apply; effective application can make a significant difference in the outcome. These factors combined will streamline your weed management process.
The coverage area directly influences how many applications are necessary to achieve effective results. When tackling a large space, selecting a weed killer that offers extensive coverage will save time and money. Meanwhile, ensuring that the product is safe for pets and the environment will help you feel at ease while treating your land. Before making a purchase, check product labels for safety certifications and follow any usage precautions. We want effective solutions, but they shouldn’t compromise safety for your loved ones or the environment.
Our Top Recommendations for Best Weed and Grass Killers
This section features some of the most effective products on today’s market designed specifically for large areas. The following table includes essential details such as coverage area and key ingredients, empowering you to make an informed decision.
| Product Name | Coverage Area | Key Ingredients |
|---|---|---|
| WeedAway Max | 2 acres | Glyphosate |
| GreenGuard Organic | 1.5 acres | Clove Oil |
| Nature’s Answer | 1 acre | Acetic Acid |
Each product listed stands out for its unique formulation and ability to cover substantial areas with ease. By investing in one of these efficient weed killers, you enable yourself to maintain a tidy and flourishing outdoor space while spending less time battling unwanted growth.
Application Tips for Large Areas
After you’ve chosen the right product, applying it effectively is just as important as the selection process. To optimize your results, consider these best practices for application. Timing is crucial; apply your weed killer during temperate weather and when there’s no imminent rain to ensure uninterrupted absorption. Using the appropriate equipment for the size of your property will facilitate a more uniform application. Equipment like backpack sprayers or hose-end sprayers can be particularly useful for larger plots.
- Choose a calm day to prevent wind drift, which can carry herbicides to desirable plants.
- Watering before application can enhance the absorption of pre-emergent herbicides.
- Follow the dosage instructions precisely to minimize harm to surrounding plants and the environment.
Conclusion
Choosing the best weed and grass killer for large areas doesn’t have to be overwhelming. With the right product, you can ensure that your landscape remains beautiful and vibrant year-round. Taking into consideration the type of weeds you’re dealing with and the size of your area will help you pinpoint the most suitable solution. From coverage area to safety features, several aspects come into play for a successful weed management strategy. Keep in mind the application tips discussed for optimal results and consider a regular maintenance routine to maintain your hard work. A healthy, flourishing landscape not only enhances your property but can invigorate your overall outdoor experience.
Frequently Asked Questions
- What is the best time of year to apply weed killer? The best time is typically in the spring or fall when weeds are actively growing.
- Can I use weed killer around my garden plants? It depends on the product; some are selective, while non-selective herbicides will kill all plants in their path.
- How long does it take for weed killers to work? Most products show results within a few days to a few weeks, depending on the type used.
- Are there organic options for weed and grass killers? Yes, there are several organic options available that are effective and safer for the environment.
- How often should I apply weed killer? Follow the manufacturer’s instructions, but generally, it’s advisable to reapply every season as needed for persistent weeds.

How to Organize Meat in Your Chest Freezer: An Expert’s Guide
Finding the right strategy for organizing meat in your chest freezer can profoundly impact your kitchen efficiency and reduce waste. Many people underestimate the importance of a well-structured freezer, often leading to forgotten items and over-purchasing. By implementing a systematic approach, you can create an organized space that not only keeps your meats fresher for longer but also ensures you can quickly access the ingredients needed for your meals. Whether you’re a meal prep enthusiast or just looking to optimize your food storage, this guide will provide expert tips to help you transform your freezer into a model of organization.
In this guide, we will explore various methods of categorizing, storing, and maintaining your meat inventory efficiently. You will discover how to clean and prepare your freezer, categorize your meats effectively, and create a system that works for you. Additionally, we will delve into labeling techniques and inventory management strategies that will elevate your freezer organization game. Let’s dive in and turn that chest freezer from chaotic to organized!
Understanding the Benefits of Proper Freezer Organization

Organizing your chest freezer can significantly improve your food preservation and streamline your cooking process. A well-organized freezer allows you to quickly locate your meats, which is particularly advantageous during busy weeknights. Moreover, it helps in reducing food waste by encouraging you to use older items first, minimizing the chances of expiring products lingering at the bottom. Notably, accessing ingredients becomes less stressful when everything is in its rightful place.
Another significant benefit is that a neatly organized chest freezer can also save you money. By knowing exactly what you have on hand, you can avoid purchasing duplicates and ensure you utilize ingredients before they go bad. Additionally, having an inventory list will make grocery shopping more efficient, allowing you to purchase only what you need. This holistic approach not only saves time and money but also fosters a more enjoyable cooking experience.
Preparing Your Chest Freezer

Before diving into organization techniques, it’s essential to prepare your chest freezer for effective storage. Start by cleaning the unit thoroughly to promote a hygienic environment. A clean freezer will prevent cross-contamination and improve your food’s overall safety. Remove any ice buildup, expired items, or spills that may have occurred over time. This endeavor helps set a solid foundation for an organized space.
Cleaning Your Freezer
- Unplug the unit and allow it to thaw if there is significant ice buildup.
- Use a mild detergent and warm water solution to wipe down all surfaces.
- Don’t forget to clean shelves and any removable bins.
- Make sure to dry everything thoroughly before plugging the freezer back in.
Choosing the Right Storage Containers
Investing in quality storage containers is key to maximizing your freezer organization. Containers designed for freezing, such as vacuum-sealed bags, sturdy plastic bins, and stackable containers, can optimize space and keep your meat fresh for longer periods. Vacuum-sealing meat not only reduces freezer burn but also saves space compared to traditional storage methods. Always select materials that are labeled as freezer-safe to ensure they withstand low temperatures.
Categorizing Your Meats
Identifying how to categorize your meats is crucial for easy access and organization. To facilitate an efficient meal prep routine, sort your meats into primary categories: red meats, poultry, and seafood. This separation streamlines the retrieval process and reduces time spent searching through a cluttered freezer. Not only does this help during meal planning, but it can also become a habit that simplifies your grocery shopping too.
Within each category, break down your meats further by type and cut. For example, red meats can include steaks, roasts, and ground beef, while poultry can be organized into whole birds, breasts, and thighs. Organizing your meats in this manner guarantees that you quickly grab the specific type you need without rummaging through disorganized packages. A well-planned categorization system can save you valuable time during meal preparation.
| Meat Type | Recommended Storage Duration | Best Packaging Method |
|---|---|---|
| Beef | 6-12 months | Vacuum-sealed bags |
| Poultry | 1 year | Freezer containers |
| Fish | 3-6 months | Freezer-safe bags |
Labeling and Inventory Management
Proper labeling and inventory management are vital to keeping track of your supplies. Start with effective labeling techniques, as this practice helps to eliminate the often-dreaded “mystery meat” problem. Using waterproof labels or a permanent marker, label each package with the type of meat, the date of freezing, and the portion size. This simple step can significantly reduce confusion when accessing items in your freezer.
Alongside labeling, maintaining a freezer inventory list is crucial for effective food management. Consider using a spreadsheet, an app, or even a simple notepad to track what’s in your freezer, along with quantities and expiration dates. Regularly updating this list allows you to plan meals accordingly and make smarter grocery purchases. Being proactive in this manner helps you use older items first and ensures that nothing gets lost in the depths of your freezer.
Maximizing Freezer Space
Make the most of your chest freezer’s space for efficient organization by utilizing various storage methods. Stackable bins and baskets can create layers of accessibility and maximize vertical space. Moreover, a well-arranged layout not only enhances airflow but is crucial for preserving meat quality. As a result, you’ll find that organizing becomes less of a chore and more of a straightforward process that delivers excellent results.
Consider using dividers within your bins to keep different types or cuts of meat separate. This approach minimizes the chances of cross-contamination and helps keep similar items grouped together. Utilizing such dividers ensures that you remain organized and can quickly find exactly what you’re looking for. In this way, meal prep and cooking become more efficient, allowing you to enjoy the process.
Conclusion
Organizing your chest freezer may appear daunting, but with the right strategies in place, it can significantly simplify your cooking routines, reduce food waste, and extend the shelf life of your stored meats. By categorizing, labeling, and maintaining an inventory of your freezer, you can ensure easy access to your favorite meats, making meal prep hassle-free. Enjoy the benefits of a well-organized freezer, where everything is right at your fingertips!
Frequently Asked Questions
- What are the best containers for freezing meat?
- Vacuum-sealed bags
- Sturdy plastic containers
- BPA-free zip-top bags
- How long can meat be stored in a chest freezer?
- Beef: 6-12 months
- Poultry: 1 year
- Fish: 3-6 months
- Is it better to freeze meat in bulk or smaller portions?
- Smaller portions are preferable as they thaw faster and reduce waste.
- How often should I organize my chest freezer?
- It’s advisable to review and organize your freezer every 3-6 months, or whenever you notice upcoming expiration dates.
- Can I refreeze meat after thawing?
- Yes, but only if the meat was thawed in the refrigerator and not left out at room temperature.

How to Replace Wax Seals in a Wobbly Toilet
There’s nothing quite as frustrating as a wobbly toilet. Not only does it disrupt your comfort, but it also raises concerns about leaks and plumbing issues that could escalate if left unaddressed. One of the primary culprits behind this instability is often a worn or damaged wax seal. This essential component acts as a barrier, sealing the connection between your toilet and the floor to prevent water from leaking. If you’re puzzled about how to replace a wax seal, you’re in the right place. In this article, we’ll walk you through the process step-by-step, empowering you to fix your toilet and restore it to its former glory.
Understanding the mechanics of a toilet is crucial when it comes to DIY repairs. The wax seal fundamentally serves multiple purposes beyond just keeping the toilet stable. It also helps to contain odors and prevent sewer gases from infiltrating your home. Over time, this wax seal can degrade due to environmental factors such as moisture and pressure. In many cases, homeowners overlook the importance of periodic maintenance, leading to increased repair costs down the line. Often, a thorough understanding and a bit of elbow grease can make all the difference in maintaining your bathroom’s tranquility.
Understanding Wax Seals and Their Importance

A wax seal is not just a mere piece of material; it plays a vital role in ensuring your toilet operates efficiently. Here’s what you need to know:
- What a wax seal is and how it functions.
- The importance of maintaining a good wax seal.
- Indicators that suggest your wax seal may need replacement.
Tools and Materials Needed

Before you embark on the mission to replace your wax seal, it’s essential to gather all the necessary tools and materials.
Essential Tools
Here’s a list of basic tools that will assist you in this DIY project:
- Wrench
- Socket set
- Putty knife
- Screwdrivers (flathead and Phillips)
- Gloves
- Old towels for cleanup
Recommended Types of Wax Seals
Choosing the right wax seal will enhance the longevity and functionality of your toilet. Consider these options:
| Type | Description | Pros |
|---|---|---|
| Standard Wax Seal | Regular wax seal ideal for most toilets. | Reliable and affordable. |
| Extra Thick Wax Seal | Thicker than standard, useful for uneven floors. | Improved sealing capacity. |
| Wax-Free Seal | Rubber or foam alternative to wax. | Durable and easy to install. |
Step-by-Step Guide to Replacing the Wax Seal
Replacing a wax seal may seem daunting, but with a little preparation and the right approach, it’s a task you can undertake confidently. Begin by preparing the workspace.
Preparing for the Replacement
Preparation sets the foundation for a successful project. Start by shutting off the water supply to prevent any mishaps during the process. Next, flush the toilet to empty the tank, and then use a sponge to soak up any remaining water in the bowl. This step ensures a dry and manageable workspace. After that, you will need to remove the toilet bolts, which anchor your toilet to the floor.
Removing the Toilet
Next, you’ll be ready to lift the toilet off its base. Begin by disconnecting the water supply line with a wrench. After that, carefully rock the toilet back and forth to loosen it from the wax seal. Lift the toilet straight up and set it aside. This step is crucial for inspecting the flange for any damage and cleaning the area thoroughly.
Installing the New Wax Seal
Now that the old seal is removed, it’s time to install the new one. Position your new wax seal onto the flange, ensuring it sits flat. Carefully set the toilet back onto the flange, ensuring the bolts fit through the corresponding holes on the toilet base. Finally, tighten the toilet bolts securely but avoid over-tightening, as this can cause future issues.
Conclusion
Replacing a wax seal is an empowering task that can enhance your toilet’s functionality and stability. Armed with the right knowledge and tools, any homeowner can successfully complete this DIY project. Regular inspections and maintenance can prevent complications and costly repairs in the future. Take pride in your ability to handle home repairs effectively, and enjoy the peace of mind that comes with a job well done.
Frequently Asked Questions
- What are the signs that a wax seal needs to be replaced?
- Water leakage around the toilet base.
- A wobbling toilet.
- Foul odors emanating from the toilet.
- Can I use a different type of seal instead of wax?
- Yes, alternatives exist such as rubber seals or foam gaskets, but wax is most commonly used due to its reliability.
- Is it necessary to replace the wax seal if my toilet is wobbling?
- If the wobbling is caused by a compromised wax seal, then replacement is necessary to prevent leaks and further issues.
- How often should I check my toilet’s wax seal?
- It’s advisable to inspect the seal every few years or at the first sign of any leaks or instability.
- Can I replace the wax seal by myself, or do I need a plumber?
- Most homeowners can perform this task themselves with basic plumbing knowledge and tools, but hiring a plumber is an option if you are uncomfortable with DIY repairs.

The Pros and Cons of Using a Fake Fireplace Heater
Imagine curling up on a chilly evening, a warm mug of cocoa in hand, the soft glow of a fireplace flickering in the background. The charm of a real fire is undeniable, but in today’s fast-paced world, many are turning to fake fireplace heaters as a cozy alternative. These devices promise to deliver warmth and ambiance without the hassles of smoke, ash, or wood. However, as with any home appliance, they come with their own set of advantages and disadvantages. Understanding these can help homeowners make an informed decision when considering this modern heating option.
Fake fireplace heaters evoke a sense of nostalgia while blending seamlessly into contemporary living spaces. The allure lies in their aesthetic appeal combined with functionality. Many people find the idea of a traditional fireplace romantic, but when reality sets in—considering installation, maintenance, and safety—options like electric fireplaces emerge as practical solutions. In this article, we’ll delve deep into the myriad of factors surrounding fake fireplace heaters. They’ve captured the attention of homeowners looking for convenience, affordability, and style.
Advantages of Fake Fireplace Heaters

Aesthetic Appeal
One of the most significant benefits of fake fireplace heaters is their aesthetic appeal. They provide the visual charm of a traditional fireplace without the need for extensive installation or ongoing maintenance. Available in various designs, from modern and sleek to rustic and traditional, these heaters can enhance any room’s decor. Many models come with realistic flame effects that replicate the mesmerizing visuals of a real fire. Additionally, they often include adjustable brightness settings to cater to different moods.
Energy Efficiency
Energy efficiency is a hot topic in today’s environmentally conscious world. Many electric fireplace heaters are designed with this in mind, which can potentially lower heating bills compared to conventional heating solutions. Utilizing electric heat ensures that energy is drawn only when needed, which can translate to cost savings. This efficiency also aligns well with sustainability goals, making it an appealing choice. While they may not be suitable for heating large areas completely, they effectively warm smaller spaces.
Safety Features
Safety is a number one priority for many homeowners, particularly those with children and pets. Unlike traditional fireplaces that pose risks of burns or house fires, fake fireplace heaters come equipped with several safety features. Typically, these include overheat protection, cool-to-the-touch surfaces, and automatic shut-off mechanisms. Such precautions offer peace of mind, allowing families to enjoy the ambiance without the inherent risks of an open flame. This makes them an attractive option for anyone concerned about home safety.
Portability
Another significant advantage of fake fireplace heaters is their portability. Most models are lightweight and can be easily moved from one room to another. Whether you’re enjoying a warm night in the living room or need extra warmth in the bedroom, these heaters provide the flexibility to do just that. This convenience is especially beneficial during seasons when temperatures fluctuate. Some units even come with wheels, making mobility effortless.
| Feature | Fake Fireplace Heaters | Traditional Fireplaces |
|---|---|---|
| Installation | Easy (Plug & Play) | Complex (Requires Construction) |
| Maintenance | Minimal (Occasional Dusting) | High (Chimney Cleaning, Wood Supply) |
| Ambiance | Decent (Electric Flame Simulation) | Excellent (Real Flames & Sounds) |
| Heating Capacity | Limited (Good for Small Spaces) | High (Can Heat Large Areas) |
Disadvantages of Fake Fireplace Heaters

Limited Heating Capacity
Despite their advantages, fake fireplace heaters often struggle with limited heating capacities. While they can efficiently warm small to medium-sized rooms, they may fall short in larger spaces. Homeowners in colder climates might find these units insufficient as a primary heating source. It’s essential to consider the size of the area you wish to heat before making a purchase. Relying solely on a fake fireplace heater could lead to discomfort during harsh winters.
Lack of Realism
For some homeowners, the experience of a traditional fireplace—complete with crackling logs, the flicker of flames, and the earthy scent of burning wood—creates an atmosphere that a fake fireplace simply cannot replicate. No matter how advanced the technology becomes, there tends to be a noticeable difference in the ambiance provided. The charm, the warmth, and the emotional connection of a real fire are unparalleled. This factor can lead to disappointment for those who prioritize an authentic experience.
Dependency on Electricity
Most fake fireplace heaters operate solely on electricity. This reliance can pose challenges during power outages or in remote locations without access to electrical outlets. The inability to provide warmth without a reliable power source may deter some buyers. Traditional fireplaces, meanwhile, can be started with wood even in the most challenging circumstances, which adds to their appeal in terms of reliability. Understanding this dependency is crucial for potential buyers.
Initial Cost
Although fake fireplace heaters may offer convenience and efficiency, they can also come with a higher initial cost. Depending on the model, features, and brand, the price can be quite substantial compared to traditional heating solutions. Budget-conscious homeowners should thoroughly evaluate their options and consider the long-term costs versus initial investments. For some, this price tag may act as a barrier in their purchasing decision.
Conclusion
Ultimately, the decision to use a fake fireplace heater comes down to personal preferences and heating needs. While they offer distinct advantages in terms of aesthetics, safety, and portability, their limitations in heating capacity and realism should be carefully considered before making a purchase. These modern appliances can beautifully complement contemporary living while providing a warm atmosphere, but it’s essential to weigh the pros and cons effectively. Assess your unique circumstances and choose wisely, ensuring your home remains a warm and inviting sanctuary throughout the year.
Frequently Asked Questions
- Are fake fireplace heaters safe to use? Yes, they are generally safe due to the absence of real flames and additional safety features.
- How do I choose the right fake fireplace heater for my space? Consider the room size, heating capacity, design style, and additional features like remote control and Wi-Fi connectivity.
- Can fake fireplace heaters be used for heating large spaces? No, they are better suited for small to medium-sized rooms as they may not provide adequate heat for larger areas.
- Do fake fireplace heaters require maintenance? Minimal maintenance is needed compared to traditional fireplaces, but regular cleaning is recommended for optimal performance.
- Is it possible to use a fake fireplace heater during a power outage? Generally, no. These heaters depend on electricity and will not operate during a power failure.

Troubleshooting Common Issues with Whole House Humidifiers
When the air in your home is dry, especially during the colder months, a whole house humidifier can become a lifesaver. This system works tirelessly to maintain a comfortable humidity level throughout your space, helping to alleviate issues like dry skin and respiratory discomfort. However, what happens when this essential device doesn’t function as intended? Understanding how to troubleshoot common issues is crucial for ensuring that your humidifier performs efficiently, providing you with the maximum comfort and health benefits you deserve. In this comprehensive guide, we will delve into the various problems that can arise with whole house humidifiers and offer effective troubleshooting solutions that you can implement yourself.
Homeownership often comes with a unique set of challenges, and appliances like humidifiers are no exception. When cooling air meets heated interiors, humidity levels can fluctuate dramatically, leading to various operational challenges. Learning how to identify and resolve these issues is not just about convenience, but it’s also critical for maintaining a healthy indoor environment. Who wouldn’t want to breathe easy and live comfortably? Let’s explore this subject further, uncovering the dos and don’ts of whole house humidifier maintenance and troubleshooting.
Understanding Whole House Humidifiers

Whole house humidifiers are sophisticated devices that integrate with your HVAC system to maintain ideal humidity levels across every room in your home. Unlike portable humidifiers, which typically serve just a single area, these units work on a larger scale. They can significantly enhance indoor air quality, reducing issues such as dry skin, static electricity, and even damage to household items like wood furniture. Also, there’s the added benefit of improved air comfort, allowing you to enjoy a cozy interior without excessive fluctuations in humidity. As these systems can vary by model and brand, understanding their basic components and functionalities will empower you to manage them better in case of any issues.
Common Problems with Whole House Humidifiers

Despite their many benefits, whole house humidifiers aren’t immune to problems. Homeowners frequently face specific issues that can hinder the device’s performance and effectiveness. Below are some of the most commonly reported problems associated with these systems:
- Low humidity levels
- Water leakage
- Excessive humidity
These issues can stem from various factors, including improper installation, lack of maintenance, or even defective components. To tackle these problematic scenarios, first, you must understand the symptoms they’re exhibiting and what may be causing them. Starting with low humidity levels, inadequate output can lead to various discomforts, including dry skin and breathing difficulties. A unit that is leaking water can result in further damage, not only to the humidifier but also to your home. Conversely, if there is excessive humidity, it creates an environment conducive to mold growth, presenting health hazards.
Diagnosing Your Humidifier Issues
To effectively troubleshoot your whole house humidifier, it’s essential to diagnose the issue correctly. Here’s how you can pinpoint the problem areas:
- Check the humidistat to ensure it’s functioning correctly.
- Inspect the water supply lines for any leaks or blockages.
- Review your maintenance logs to identify any missed tasks.
Begin by checking the humidistat, which controls the humidity levels in your home. If it’s malfunctioning, you may experience fluctuating humidity levels. Next, inspect the water supply system. Ensure there are no obstructions or damage to the water lines, as these can disrupt the flow. Finally, look into your maintenance logs. Regular maintenance is critical; missed cleanings or filter changes can contribute solidly to the issues you’re experiencing.
| Problem | Possible Causes | Quick Fix |
|---|---|---|
| Low Humidity | Malfunctioning humidistat, blocked water supply | Adjust settings or clear obstructions |
| Water Leak | Loose connections, worn-out parts | Tighten fittings or replace parts |
| Excessive Humidity | Improper settings, humidistat failure | Decrease settings; calibrate humidistat |
Common Solutions
Once you have diagnosed the problem, there are several common solutions to restore your humidifier’s functionality effectively. Implementing these solutions can save you time and money:
- Adjust the humidistat settings accordingly.
- Conduct a thorough cleaning of the entire system.
- Regularly replace worn or damaged parts.
Adjusting the humidistat is often the first step in correcting issues with humidity levels. A simple turn can make a significant difference. Regular cleaning is crucial to ensure that there’s no build-up of minerals or debris that could affect performance. Additionally, inspecting and replacing worn components will go a long way in avoiding future issues, and it’s essential to follow the manufacturer’s recommendations for timing on these replacements.
Conclusion
Whole house humidifiers can greatly enhance your home’s comfort and air quality, but they require attention and maintenance to operate effectively. By understanding the common issues that can arise and how to troubleshoot them, you empower yourself to address problems head-on. Regular inspections, effective cleaning, and timely replacements of worn components will contribute significantly to the longevity and efficiency of your humidifier, keeping your indoor environment pleasant throughout the year. Remember, a little preventive care goes a long way in ensuring consistent performance.
Frequently Asked Questions
- What should I do if my humidifier is leaking water? Check all connections and ensure there are no blockages or broken parts causing the leak.
- How often should I clean my whole house humidifier? It’s recommended to clean your humidifier at least once a month during the heating season or more frequently if you notice mineral build-up.
- Why is my humidifier not increasing humidity levels? This may be due to a malfunctioning humidistat, a blocked water supply, or dirty filters. Check these before seeking professional help.
- Can I use tap water in my whole house humidifier? While some humidifiers can use tap water, distilled water is often recommended to avoid mineral build-up.
- What is the ideal humidity level for my home? A humidity level between 30% and 50% is generally considered optimal for comfort and health.

How to Assess Whether Your Dishwasher Filter Needs Cleaning
Every modern kitchen is equipped with a dishwasher, a convenience that has transformed meal cleanup into a hassle-free experience. However, many homeowners overlook one essential component that directly impacts its efficiency: the dishwasher filter. This small but crucial device prevents food particles and debris from recirculating onto your clean dishes and helps the appliance function at its best. Neglecting the filter can lead to unpleasant odors, poor cleaning results, and even costly repairs. Recognizing when your filter is due for a cleaning can be the difference between a shiny dishware experience and a frustrating one. Let’s delve into how you can assess whether your dishwasher filter needs some attention, ensuring your appliance runs smoothly and your dishes remain spotless.
Understanding the Importance of a Clean Dishwasher Filter

The dishwasher filter is designed to trap food remnants, grease, and sediment during the wash cycle. Over time, these elements can accumulate, limiting the filter’s efficacy. For instance, a dirty filter may allow food particles to linger in the machine, leading to unappetizing results on your dinnerware. Moreover, a clogged filter can prevent the dishwasher from draining properly, causing water to pool at the bottom. Regular assessment and cleaning of this filter are integral to maintaining not only the quality of your dishes but also the lifespan of your appliance. In this article, we will guide you through the signs of a dirty filter, how to check it, and effective cleaning methodologies.
Signs That Your Dishwasher Filter Needs Cleaning

Identifying the need for filter cleaning can save you from bigger headaches down the road. Observing specific symptoms as they arise will help you figure out if you need to roll up your sleeves and get to work. Some common indicators include:
- Poor Cleaning Performance: If your dishes come out with food particles still stuck, the filter might be clogged.
- Unpleasant Odors: A build-up can create foul smells, suggesting the filter needs cleaning.
- Water Drainage Issues: If there’s standing water at the bottom post-wash cycle, your filter could be obstructed.
These signs are crucial to monitor for the ongoing health of your dishwasher. It’s essential to act promptly if you encounter any of these symptoms, as they typically indicate a clogged filter needing immediate attention.
The Basics of Checking Your Dishwasher Filter
Knowing how to check your dishwasher filter correctly can make a significant difference in maintaining its performance. It’s a straightforward process, but several steps need to be followed carefully. First, you need to locate the filter, which is typically situated at the bottom of the dishwasher. Consult your user manual if you’re unsure about its exact location. Once located, gently remove the filter by twisting or pulling it out, being cautious not to damage surrounding components. Inspect it for visible debris and any signs of damage. An undamaged filter that is simply dirty can be cleaned effectively, while damaged ones may need replacement.
How to Clean Your Dishwasher Filter
Cleaning your dishwasher filter is not only vital for its operation but also surprisingly simple. With just a few steps, you can restore your filter to optimal condition:
| Step | Action |
|---|---|
| 1 | Rinse off loose debris using warm water and a soft brush. |
| 2 | Soak the filter in warm water mixed with vinegar for 15 minutes. |
| 3 | Gently scrub the filter with a soft brush or cloth. |
| 4 | Thoroughly rinse with warm water and let it dry completely. |
By following these steps, you can ensure that your dishwasher filter is clean and functioning optimally, leading to better overall dishwasher performance. Remember that cleanliness equals efficiency, making year-round maintenance paramount.
Conclusion
Regular assessment and cleaning of your dishwasher filter are essential for maintaining appliance efficiency and ensuring sparkling clean dishes. By recognizing the signs of a clogged filter, knowing how to check its condition, and learning how to clean it effectively, you can prolong the life of your dishwasher and enhance its performance. This simple maintenance task can save you time, money, and the frustration of dealing with poorly cleaned dishes or malfunctioning appliances. Make this part of your regular kitchen maintenance routine to enjoy the full benefits of your dishwasher.
Frequently Asked Questions
- How often should I clean my dishwasher filter? It is recommended to clean your dishwasher filter every 1-3 months, depending on usage.
- Can I run my dishwasher without a filter? No, running your dishwasher without a filter can lead to dirty dishes and potential appliance damage.
- What should I do if my dishwasher still has issues after cleaning the filter? If cleaning the filter doesn’t resolve the problem, check for clogs in the spray arms, drain, or consult a professional technician.
- Is using vinegar a safe method for cleaning my dishwasher filter? Yes, vinegar is a natural and safe cleaning agent that effectively removes grease and odors.
- Do all dishwashers have filters? Most modern dishwashers come equipped with filters. If yours doesn’t, it likely has a different drainage system that doesn’t require manual cleaning.