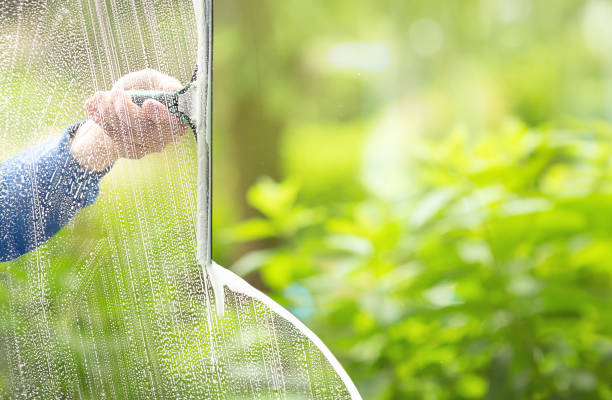
How to Make the Best Homemade Window Cleaner with Simple Ingredients
Are you tired of spending money on commercial window cleaners that are filled with chemicals and leave streaks on your windows? The best window cleaner can be created right in your kitchen using simple and natural ingredients. This article will guide you through the steps to create an effective homemade window cleaner that is both eco-friendly and budget-friendly.
Why Choose a Homemade Window Cleaner?
Homemade window cleaners are not only cost-effective but also free of harsh chemicals that can be harmful to your health and the environment. Many commercial cleaners contain ammonia and other toxic substances. By choosing a homemade solution, you can ensure that your family stays safe from harmful fumes and residues. Additionally, using everyday household items to clean your windows is a more sustainable and eco-friendly option.
Essential Ingredients for Your Homemade Window Cleaner
Creating a homemade window cleaner is simple and requires only a few basic ingredients that you likely already have in your kitchen. These ingredients include:
- White vinegar
- Distilled water
- Liquid dish soap
- Lemon juice (optional)
- Essential oils (optional for fragrance)
White vinegar is a powerful cleaning agent that can dissolve grease and grime. Distilled water ensures that no mineral deposits are left behind. A small amount of liquid dish soap helps to break down dirt, while lemon juice can add a fresh scent and boost cleaning power.
How to Make Your Homemade Window Cleaner
Follow these simple steps to create your DIY window cleaner:
- Mix one part white vinegar with one part distilled water in a spray bottle. For example, use one cup of vinegar and one cup of water.
- Add a few drops of liquid dish soap to the mixture. This helps to remove stubborn dirt and grease.
- If you prefer a pleasant scent, add a few drops of lemon juice or your favorite essential oil. This step is optional but can enhance your cleaning experience.
- Shake the spray bottle gently to combine all ingredients thoroughly.
And there you have it! Your homemade window cleaner is ready to use. It’s simple, effective, and free of unnecessary chemicals.
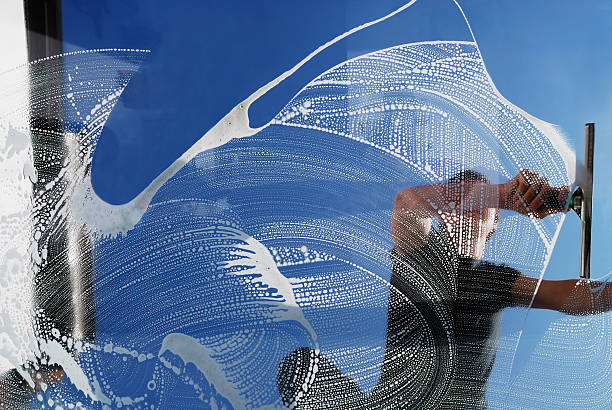
Tips for Using Your Homemade Window Cleaner
For optimal results, use these techniques when cleaning your windows:
- Always clean windows on a cloudy day or when the sun is not directly hitting them to avoid streaks.
- Spray the cleaner generously on the window and use a lint-free cloth or newspaper to wipe it clean. Avoid paper towels as they may leave lint behind.
- Wipe in a circular motion to remove dirt, and then use vertical or horizontal strokes to polish the glass.
- Don’t forget the window frames! Use the same solution to clean the frames and sills.
By following these tips, you can achieve a streak-free shine on your windows every time.
Conclusion
There’s no need to rely on expensive and chemical-laden commercial window cleaners when the best solution can be found right in your kitchen. By using white vinegar, distilled water, and a bit of dish soap, you can create an effective, natural, and eco-friendly window cleaner. Not only will this DIY cleaner save you money, but it will also provide a safer environment for your family. So, give it a try and enjoy sparkling clean windows with minimal effort.
FAQs About Homemade Window Cleaner
1. Can I use tap water instead of distilled water?
While you can use tap water, distilled water is preferred because it prevents mineral deposits and streaks that could be left by the minerals in tap water.
2. Is the homemade window cleaner safe on tinted windows?
Yes, this homemade cleaner is safe for tinted windows as it does not contain harsh chemicals that could damage the tint.
3. What should I do if my windows are still streaky?
If your windows are still streaky, try using a clean, lint-free cloth or newspaper, and ensure you are cleaning on a cloudy day to prevent the solution from drying too quickly.
4. Can I add essential oils for fragrance?
Yes, you can add a few drops of your favorite essential oil to the cleaner for a pleasant fragrance. Lemon oil and lavender oil are popular choices.
5. How long can I store the homemade window cleaner?
You can store the homemade window cleaner for up to a month. Be sure to shake the bottle before each use to mix the ingredients thoroughly.
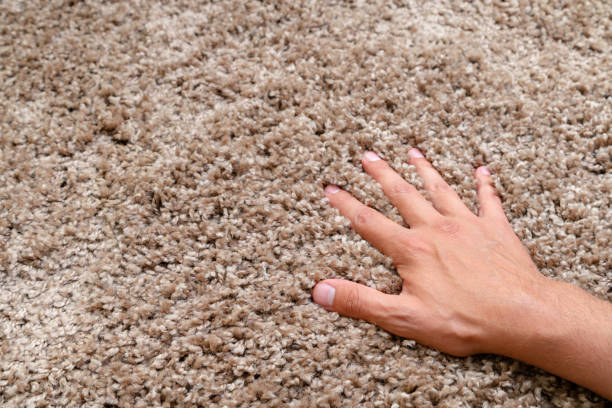
Ultimate Guide: How to Remove Any Stain from Your Carpet
Getting stains out of carpet can seem like a daunting task, but with the right techniques and products, you can make your carpet look as good as new. The key is to address the stain as soon as possible and use the appropriate method for the type of stain you’re dealing with. In this article, we’ll cover various types of stains and offer step-by-step guides on how to remove them effectively.
Identifying the Type of Stain
Before you start scrubbing away, it’s essential to identify the type of stain you are dealing with. Different stains require different treatment methods. Common types of stains include food and drink spills, pet accidents, dirt and mud, and oil-based stains. Knowing the stain type will help you choose the right cleaning solution and technique, ensuring the best possible results without damaging your carpet fibers.
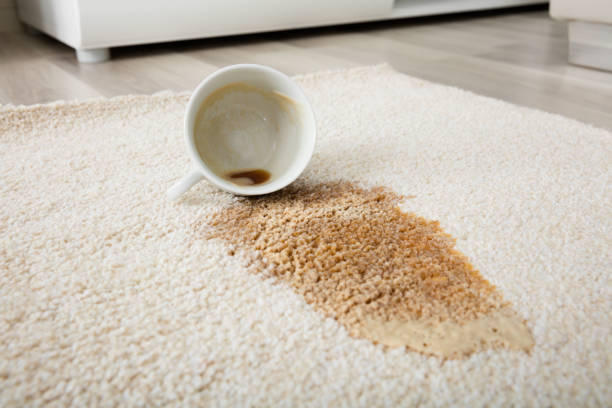
Food and Drink Spills
Spills from food and drinks are among the most common carpet stains. Whether it’s coffee, wine, or a sauce, timely action is crucial. Start by blotting the spill with a clean cloth to soak up as much liquid as possible. Avoid rubbing as it can push the stain further into the carpet fibers. Next, apply a mixture of mild detergent and warm water to the area, blotting gently. Rinse with clean water and blot dry.
- Blot the spill, don’t rub
- Use mild detergent and warm water
- Rinse and blot dry
Pet Accidents
Pet accidents can be particularly tricky due to the odor and potential for bacteria growth. Start by removing any solid waste and blotting the area to remove as much moisture as possible. Follow up with an enzyme-based cleaner specifically designed for pet stains; these cleaners help break down the proteins in urine, neutralizing odors and preventing bacteria growth. After applying the enzyme cleaner, let it sit for the recommended time before blotting it up and rinsing with clean water.
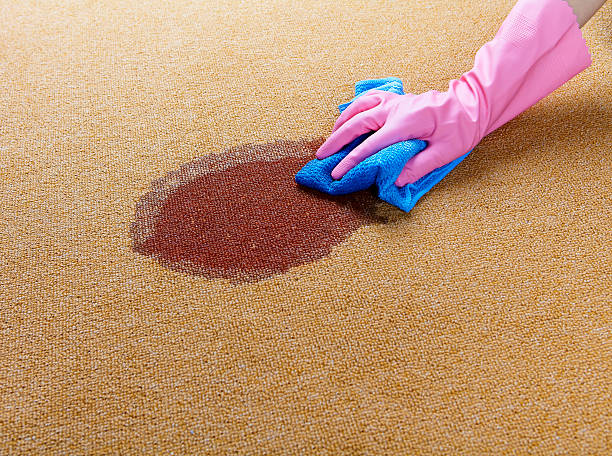
Dirt and Mud
Dirt and mud stains are often brought in on shoes or by pets. Allow the mud to dry completely before attempting to clean it. Once dry, vacuum the area thoroughly to remove as much dirt as possible. For any remaining stain, use a mixture of baking soda and water to form a paste, apply it to the stain, and let it sit for a few minutes. Blot with a clean cloth, rinse with water, and then blot dry.
Oil-Based Stains
Oil-based stains, such as those from grease or makeup, require a different approach. Start by blotting the stain with a clean cloth to soak up as much oil as possible. Sprinkle baking soda or cornstarch onto the stain and allow it to sit for at least 15 minutes to absorb the oil. Vacuum the area, then apply a small amount of rubbing alcohol or a dry-cleaning solvent to a cloth and blot the stain gently. Rinse with water and blot dry.
Conclusion
Removing stains from your carpet may require some effort, but it’s entirely possible with the right approach. By identifying the type of stain and using specific cleaning methods, you can tackle almost any stain effectively. Remember to act quickly, use appropriate cleaning solutions, and always blot rather than rub to avoid spreading the stain further. With these tips, your carpet can remain clean and stain-free, no matter what life throws at it.
FAQs
Can I use bleach to remove carpet stains?
Using bleach on carpet is generally not recommended as it can discolor the fibers and damage your carpet. Stick to using mild detergents and specialized carpet cleaning solutions.
How often should I clean my carpet?
For general maintenance, vacuum your carpet once a week and deep clean at least twice a year, or more frequently if you have pets or high traffic areas.
Are homemade cleaning solutions effective?
Yes, many homemade solutions such as vinegar and baking soda or mild soap and water can be effective for treating carpet stains. However, always test a small area first to ensure it doesn’t damage the carpet fibers.
What is the best way to prevent stains on a carpet?
Preventive measures include placing doormats at entryways, removing shoes before walking on the carpet, and attending to spills immediately to prevent them from setting in.
Is professional carpet cleaning worth it?
Professional carpet cleaning can be a worthwhile investment, especially for deep cleaning and tough stains. Professionals have the expertise and equipment to thoroughly clean and extend the life of your carpet.

Eco-Friendly Showerhead Cleaning: Easy Tips Using Vinegar and Baking Soda
If you have noticed a decrease in water pressure or erratic spray patterns from your showerhead, it might be time for a deep clean. Using common pantry items like vinegar and baking soda, you can easily restore your showerhead’s performance without the need for harsh chemicals.
Why Clean Your Showerhead?

Over time, mineral deposits from hard water, soap scum, and mold can clog the tiny holes in your showerhead, diminishing water flow. A clean showerhead ensures efficient water pressure and consistent spray, making your daily showers more enjoyable. Additionally, regular cleaning can prolong the lifespan of your showerhead, preventing the need for costly replacements.
Common Pantry Ingredients for Cleaning
Many people are surprised to learn that they already have all the necessary ingredients to clean their showerhead right in their pantry. The main ingredients you will need are white vinegar and baking soda. White vinegar is an excellent natural disinfectant and descaler, while baking soda’s abrasive nature can help dislodge stubborn deposits. Let’s take a look at how to use these ingredients in a step-by-step cleaning process.
Step-by-Step Guide to Cleaning Your Showerhead
-
Remove the Showerhead:
If possible, unscrew your showerhead using a wrench. This will make it easier to clean. If it’s not removable, don’t worry; you can still clean it effectively. -
Prepare the Cleaning Solution:
Mix equal parts white vinegar and water in a bowl or container. For added cleaning power, add a tablespoon of baking soda to the mixture. -
Soak the Showerhead:
Place the showerhead in the solution and let it soak for at least 30 minutes. For non-removable showerheads, fill a plastic bag with the solution and secure it around the showerhead with a rubber band. -
Scrub and Rinse:
After soaking, use an old toothbrush to gently scrub away any remaining deposits. Rinse the showerhead thoroughly with warm water. -
Reattach and Test:
Reattach the showerhead and turn on the water to check the improvement. Your showerhead should now spray evenly and with optimal water pressure.
Additional Tips for Maintenance
To keep your showerhead in optimal condition, consider giving it a quick clean every month using the vinegar solution. Make it a habit to wipe down the showerhead after every few showers to prevent soap scum buildup. If you live in an area with particularly hard water, use a water softener to reduce mineral deposits.
Conclusion
Cleaning a showerhead using basic pantry ingredients is an easy and effective way to improve your shower experience. By regularly maintaining your showerhead, you ensure consistent water pressure, prevent buildup, and extend its lifespan. Embrace this eco-friendly cleaning method and enjoy a satisfying and refreshing shower every time.
FAQs
How often should I clean my showerhead?
It’s recommended to clean your showerhead at least once every three months. However, if you notice a decline in water pressure sooner, it may be beneficial to clean it monthly.
Can I use other types of vinegar for cleaning?
While white vinegar is most commonly used, apple cider vinegar can also be effective. However, apple cider vinegar may leave a slight scent compared to the more neutral smell of white vinegar.
Is it safe to use these ingredients on all types of showerheads?
Yes, white vinegar and baking soda are gentle enough to be used on most types of showerheads, including metal and plastic. However, always check the manufacturer’s recommendations for your specific showerhead.
What should I do if my showerhead is still clogged after cleaning?
If your showerhead remains clogged, try repeating the soaking and scrubbing process. In some cases, using a pin or needle to gently poke through the holes can help dislodge stubborn mineral deposits.
Can I use this method to clean other bathroom fixtures?
Absolutely! The vinegar and baking soda solution is also effective for cleaning faucets, drains, and other bathroom fixtures. It’s a versatile and eco-friendly cleaning method for various surfaces.

Ultimate Guide: Cleaning Your Outdoor Umbrella for a Fresh, Long-lasting Look
Outdoor umbrellas can add a touch of elegance to any patio or garden, but they are also magnets for dirt, mildew, and other forms of buildup. Cleaning your outdoor umbrella not only improves its appearance but also extends its life. In this article, we’ll explore effective methods to clean an outdoor umbrella thoroughly, ensuring it remains in pristine condition.
Materials You Will Need

Before diving into the cleaning process, it’s essential to gather the required materials to streamline the task. Here’s a list of things you’ll need:
- Soft-bristle brush
- Mild detergent or soap
- Baking soda
- Vinegar
- Warm water
- Garden hose
- Clean, dry towels
Having these materials ready will ensure you don’t have to stop halfway through the cleaning process to find something you need.
Initial Preparation
Preparation is key to effective cleaning. Start by opening the umbrella fully and placing it on a flat surface that won’t be damaged by water or cleaning solutions. If the umbrella is extremely dirty, you might want to give it a preliminary rinse with a garden hose to remove loose dirt and debris. This step will make the cleaning process easier and more effective.
Ensure to check for any damages like tears or broken parts. Addressing these issues initially will prevent further damage during cleaning. Also, remove any detachable parts, like the canopy, if possible, to facilitate a thorough cleaning session.
Cleaning the Fabric
The fabric of the umbrella is most susceptible to dirt and stains. Mix warm water with mild detergent or soap in a bucket. Dip a soft-bristle brush into the solution and scrub the fabric gently but thoroughly. Pay extra attention to any stained or particularly dirty areas. For stubborn stains, create a paste using baking soda and water, and apply it to the problem areas.
Let the paste sit for about 15 to 20 minutes before scrubbing it off. For mildew or mold, blend a solution of one part vinegar to four parts water and apply it using a spray bottle. Scrub the affected areas and rinse thoroughly with a garden hose. Ensure to rinse off all soap and cleaning solutions to prevent them from weakening the fabric over time.
Cleaning the Frame
While often overlooked, the frame of the umbrella also needs cleaning. Use a soft cloth soaked in warm, soapy water to wipe down the frame. Scrub any spots with a soft-bristle brush, especially around the joints where dirt is likely to accumulate. If the frame is made of metal and shows signs of rust, a commercial rust remover can be applied following the manufacturer’s instructions.
After cleaning, rinse the frame with water from a garden hose and dry it thoroughly with a clean towel. This step is crucial to prevent rust and maintain the longevity of the frame.
Final Steps: Drying and Maintenance
Once the cleaning process is complete, it’s essential to dry the umbrella thoroughly. Leave the fabric open in a sunny, well-ventilated area to air dry. Avoid closing the umbrella while it is still wet, as this can lead to mildew growth. Use clean, dry towels to wipe off any remaining moisture from the frame.
Perform regular maintenance by cleaning the umbrella every few months, especially in periods of heavy use. During off-seasons, store the umbrella in a dry, covered place to protect it from the elements and reduce the frequency of deep cleanings.
FAQs
1. How often should I clean my outdoor umbrella?
It’s recommended to clean your outdoor umbrella every few months, especially during high usage periods. Regular cleaning prevents buildup and extends the life of your umbrella.
2. Can I machine wash the umbrella fabric?
Check the manufacturer’s label before machine washing. While some umbrella fabrics are machine washable, many are not. Hand cleaning is generally safer and prevents damage.
3. What’s the best way to store my umbrella when not in use?
Store your umbrella in a dry, covered place away from direct sunlight and moisture. Using a storage bag can also help protect it from dust and dirt.
4. What if my umbrella has stubborn mold or mildew stains?
For stubborn mold or mildew stains, use a mixture of one part vinegar to four parts water. Spray it on the affected area, scrub gently, and rinse thoroughly.
5. Can I use bleach to clean my outdoor umbrella?
Bleach is not recommended as it can weaken the fabric and damage its color. Stick to mild detergents and natural solutions like vinegar and baking soda for the best results.

Easy DIY Jewelry Cleaning Tips Using Everyday Household Ingredients
Cleaning your jewelry doesn’t have to be a hassle or an expensive trip to the jeweler. With a few common ingredients you likely already have at home, you can restore your jewelry’s shine and maintain its beauty. This article will walk you through several effective methods to clean your cherished pieces using typical household items.
Using Baking Soda and Vinegar
Baking soda and vinegar are not just for baking and cooking; they are also a powerful cleaning duo. Start by mixing one part baking soda with one part water to create a paste. Apply this paste to your jewelry using a soft toothbrush. Scrub gently to avoid scratching the surface.
Next, soak the jewelry in a solution of one cup of vinegar and one cup of water for about 10 minutes. This combination helps to further break down dirt and grime. After soaking, rinse the jewelry thoroughly under warm water and dry it with a soft cloth. This method is particularly effective for silver jewelry, as it helps restore its shine and removes tarnish.
Cleaning with Dish Soap and Warm Water
Another easily accessible cleaning method involves dish soap and warm water. Fill a small bowl with warm water and add a few drops of mild dish soap. Place your jewelry in the bowl and let it soak for 15-20 minutes. This soak helps to loosen any dirt and debris trapped in crevices.
After soaking, use a soft toothbrush to gently scrub the jewelry, paying extra attention to detailed areas. Rinse the pieces under warm running water and pat them dry with a lint-free cloth. Dish soap is gentle enough for most types of jewelry, including pieces with gemstones, and is safe for regular use.
Polishing with Toothpaste
Toothpaste can also be an effective cleaner for jewelry, especially for bringing back the shine. Use non-gel, non-abrasive toothpaste for this method. Apply a small amount of toothpaste to a soft cloth or brush and gently polish your jewelry. Avoid using toothpaste on soft stones like pearls or opals, as it can damage them.
Once you’ve polished each piece, rinse thoroughly with warm water to remove any residue. Dry the jewelry completely with a soft cloth to prevent water spots. This method is excellent for metal pieces and can also help remove minor scratches.
Harnessing the Power of Lemon Juice
Lemon juice, with its natural acidity, is fantastic for cleaning jewelry. Create a mixture of one part lemon juice and two parts water. Submerge your jewelry in this solution for 5-10 minutes. The acid in the lemon juice will help dissolve any build-up of grime.
After soaking, gently scrub the jewelry with a soft toothbrush. Rinse thoroughly with cold water and dry with a soft, lint-free cloth. Lemon juice is particularly good for gold jewelry and helps to maintain its bright, yellow hue.
Tips for Maintaining Your Jewelry
Regular maintenance can keep your jewelry looking its best. Here are some tips:
-
Store Properly:
Keep your jewelry in a dry, soft-lined box or pouch to prevent scratches and tarnish. -
Avoid Chemicals:
Remove jewelry before swimming, bathing, or using cleaning products, as chemicals can damage the metal and stones. -
Polish Regularly:
Use a jewelry polishing cloth to remove fingerprints and minor tarnish. -
Check for Damage:
Regularly inspect your jewelry for loose stones or clasps that might need repair. -
Professional Cleaning:
While home cleaning is effective, periodic professional cleanings can help maintain your jewelry.
Conclusion
Cleaning your jewelry at home is both practical and cost-effective. With simple ingredients like baking soda, vinegar, dish soap, toothpaste, and lemon juice, you can easily keep your cherished pieces looking their best. Following these methods will save you time and money while ensuring your jewelry maintains its sparkle and shine.
FAQs
1. Can I use ultrasonic cleaners for all types of jewelry?
Ultrasonic cleaners can be effective, but they are not suitable for all types of jewelry, especially those with porous stones like pearls and opals or fragile antique pieces. Always check if it’s safe for your specific jewelry before use.
2. How often should I clean my jewelry at home?
It’s a good practice to clean your jewelry at least once a month. However, pieces that you wear daily may need more frequent cleaning to maintain their appearance.
3. Is it safe to clean costume jewelry with these methods?
Costume jewelry often has glued stones, which can be damaged by water and harsh cleaners. It’s best to use mild dish soap and water, and keep them brief, ensuring the jewelry is dried completely afterward.
4. How can I prevent my silver jewelry from tarnishing?
Storing your silver jewelry in an airtight bag with anti-tarnish strips or silica gel packets can help prevent tarnish. Additionally, wearing your silver jewelry regularly can also reduce tarnish buildup.
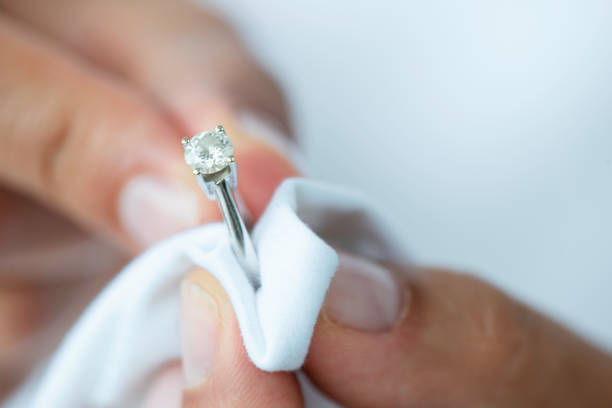
5. Can I use these home cleaning methods for diamond rings?
Yes, these home cleaning methods are generally safe for diamond rings. However, avoid harsh abrasives and always check for any loose stones before cleaning to ensure they don’t fall out.
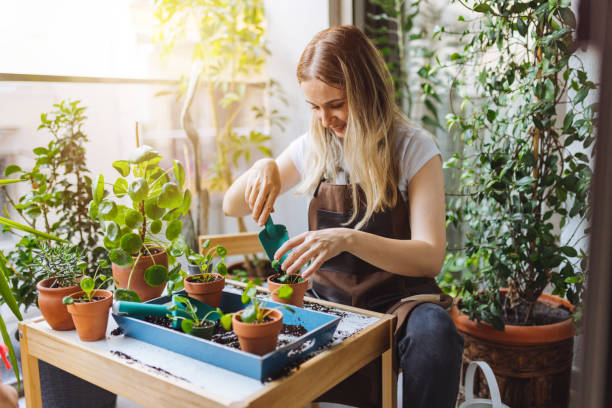
5 Hacks for Balcony Gardening
Balcony gardening is an excellent way to create a green oasis in limited space. Whether you’re a seasoned gardener or just starting out, these 12 hacks will help you maximize your balcony space and create a thriving garden. From choosing the right plants to utilizing vertical space, this article offers practical tips and strategies to transform your balcony into a lush and productive garden.
1. Choose the Right Plants
Selecting the right plants is crucial for a successful balcony garden. Opt for plants that thrive in containers and can adapt to the environmental conditions of your balcony. Consider sun exposure, wind, and the amount of space available. Herbs, small vegetables, and compact flowering plants are excellent options for most balcony settings. Make sure to research the specific needs of each plant to ensure they receive the appropriate care.
2. Utilize Vertical Space
When space is limited, think vertical! Utilize walls, railings, and hanging planters to maximize your gardening area. Vertical gardens not only save space but also add a unique aesthetic to your balcony. Use trellises, shelves, and wall-mounted planters to grow more plants without occupying valuable floor space. Additionally, climbing plants like beans and ivy can add greenery without taking up too much room.
3. Efficient Watering Techniques
Proper watering is essential for the health of your balcony garden. Over-watering and under-watering can both be detrimental. Consider using self-watering containers or drip irrigation systems to ensure your plants receive consistent moisture. Additionally, grouping plants with similar water needs together can simplify your watering routine and prevent overwatering. Mulching is another effective technique to retain soil moisture and reduce the need for frequent watering.
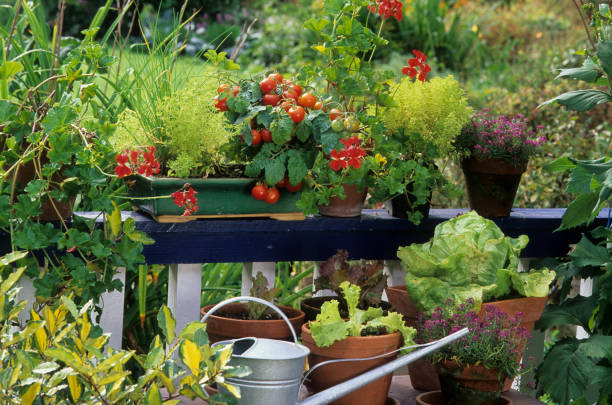
4. Use Quality Soil and Fertilizers
High-quality soil can make a significant difference in the success of your balcony garden. Invest in a good potting mix that provides proper drainage and nutrients. Regularly fertilize your plants to keep them healthy and productive. Organic fertilizers, compost, and liquid feed are excellent options for container gardening. It’s also important to refresh the soil every year or when replanting to ensure your plants have access to essential nutrients.
5. Create a Functional Layout
A well-thought-out layout can make your balcony garden more enjoyable and manageable. Start by assessing the available space and creating a layout plan. Arrange taller plants at the back and shorter ones at the front to ensure all plants receive adequate sunlight. Consider the mature size of the plants to prevent overcrowding. Incorporate pathways and seating areas to make the space functional and inviting.
Conclusion
Balcony gardening may seem challenging, but with the right strategies and hacks, you can create a beautiful and productive garden in any limited space. By choosing the right plants, utilizing vertical space, employing efficient watering techniques, using quality soil, and planning a functional layout, you can transform your balcony into a green retreat. Start small, experiment with different plants and techniques, and enjoy the process of nurturing your own little garden oasis.
FAQs
1. Can I grow vegetables on my balcony?
Yes, you can grow a variety of vegetables on your balcony. Choose compact varieties and ensure they receive enough sunlight and proper care.
2. How often should I water my balcony garden?
The watering frequency depends on the types of plants, weather conditions, and pot size. Generally, you should water when the top inch of soil feels dry.
3. What are the best plants for a shady balcony?
Shade-loving plants like ferns, begonias, and hostas are great choices for shady balconies. These plants thrive in low-light conditions.
4. How can I prevent pests in my balcony garden?
Regularly inspect your plants for pests and use natural deterrents like neem oil or insecticidal soap. Keeping your garden clean and well-maintained can also help prevent pest infestations.
5. Can I grow fruit trees on my balcony?
Yes, dwarf varieties of fruit trees like citrus or fig trees can be grown in large containers on your balcony. Ensure they have enough sunlight and appropriate care to thrive.
How to Pick Out the Perfect Area Rug
Choosing an area rug can be a daunting task given the myriad of options available. However, by focusing on your specific needs and preferences, you can select the perfect rug to complement your space, adding both style and comfort. This article will guide you through the important aspects to consider when picking out an area rug for your home.
Understanding Your Space
The first step to choosing the perfect area rug is understanding the space it will occupy. Consider the size and function of the room. Is it a high-traffic area like a hallway or a living room, or a cozy spot like a bedroom or study? For high-traffic areas, durability is key. You’ll want a rug that can withstand constant use without showing too much wear and tear. On the contrary, in a low-traffic area, you can prioritize luxury and comfort.
Also, take into account the dimensions of the room. A rug that is too small can make the room look disjointed, while an excessively large rug can overwhelm the space. Ideally, you should measure the area you want the rug to cover and consider the placement of your furniture to ensure a balanced look.
Choosing the Right Material
Area rugs come in a variety of materials, each with its own unique characteristics. Your choice of material should be influenced by the room’s function and your lifestyle. Here are some common materials along with their advantages:
- Wool: Known for its durability and softness, wool is a great choice for high-traffic areas.
- Cotton: Cotton rugs are easy to clean and usually more affordable. They are perfect for casual spaces.
- Synthetic Fibers: Materials like nylon and polyester are often stain-resistant and ideal for homes with pets or kids.
- Natural Fibers: Options like jute and sisal add an organic feel to the room but are generally less comfortable underfoot.
Consider your preferred balance between aesthetics, comfort, and practicality when selecting the material.
Colors and Patterns
The color and pattern of your rug will significantly impact the room’s overall aesthetic. Start by assessing the existing color palette of your space. Do you want your rug to blend in or stand out as a focal point? Neutral tones can create a soothing atmosphere, while vibrant patterns can inject energy and character. Patterns can also be practical for camouflaging stains and wear.
When in doubt, consider this rule of thumb: if your furniture and walls are neutral, a colorful rug can add excitement. Conversely, if you have bold furnishings, a neutral rug can provide balance. Remember, though, that your personal taste is paramount—choose something you love that will bring you joy every day.
Determining the Right Size
Rug size is crucial in achieving the desired look and feel in a room. Here are some general guidelines on rug sizing:
- Living Room: Ideally, the rug should be large enough to fit under the front legs of all main pieces of furniture, or large enough for all furniture legs to be on the rug.
- Dining Room: Ensure the rug extends at least 24 inches beyond the edges of the table to allow chairs to slide in and out comfortably.
- Bedroom: Place a large rug under the bed, extending at least three feet on either side, or opt for smaller rugs on each side of the bed.
Taking the time to measure and plan will ensure that the rug enhances the room rather than detracts from it.
Maintenance and Care
Once you’ve picked out the perfect area rug, maintaining it properly will ensure its longevity. Rugs require regular cleaning to prevent the buildup of dirt and allergens. Depending on the material, cleaning methods will vary:
- Vacuuming: Regular vacuuming helps remove surface dirt. For wool rugs, use a vacuum with a brushless suction to avoid damaging the fibers.
- Spot Cleaning: Attend to spills immediately with a mild detergent or a rug-specific cleaning product to avoid stains setting in.
- Professional Cleaning: Consider having your rug professionally cleaned every year or two, especially for high-traffic areas.
- Rotation: Rotate your rug every few months to ensure even wear and prevent one area from becoming worn out.
Proper care and maintenance will help preserve your rug’s appearance and functionality for years to come.
Conclusion
Picking out the perfect area rug involves considering your space, choosing the right material, selecting colors and patterns, determining the appropriate size, and planning for maintenance and care. By paying attention to these factors, you can make an informed decision that enhances your home’s look and feel. Ultimately, the perfect area rug is one that suits your lifestyle and brings you joy every time you enter the room.
FAQs
What size rug should go under a dining room table?
The rug should extend at least 24 inches beyond the edges of the table to allow chairs to slide in and out comfortably.
How often should I clean my area rug?
It is recommended to vacuum your rug regularly and have it professionally cleaned every year or two, depending on the amount of traffic it receives.
What material is best for a high-traffic area?
Wool and synthetic fibers like nylon and polyester are generally the best choices for high-traffic areas due to their durability and stain-resistant properties.
Can I use an area rug on carpet?
Yes, you can layer an area rug on top of a carpet to add visual interest, define a space, or introduce different textures and colors.
How do I prevent my rug from slipping?
You can use a rug pad beneath your area rug to prevent slipping and add extra cushioning, which also extends the life of the rug.
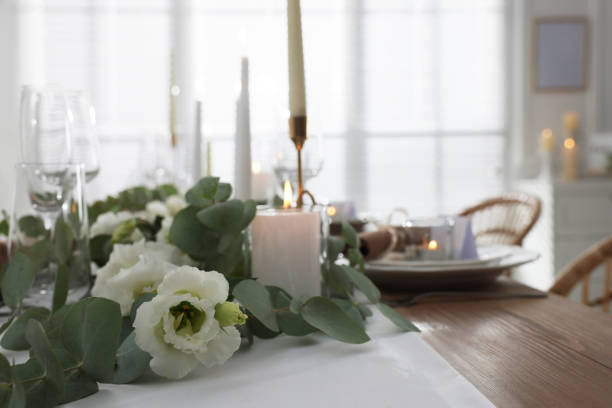
7 Table Decorations to Create the Perfect Dining Arrangement
Creating the perfect dining arrangement goes beyond just having delicious food and good company. The right table decorations can transform a simple meal into a delightful experience. Here, we explore seven table decoration ideas that can elevate your dining setup to truly impress your guests and create a memorable occasion.
1. Elegant Centerpieces
Centerpieces serve as the focal point of your dining table. Choose items that reflect the tone of your event, whether it is formal or casual. For formal settings, consider floral arrangements or candles in elegant holders. For more casual gatherings, rustic potted plants or a tray filled with fruits or decorative objects work well. The key is to ensure the centerpiece adds visual interest without obstructing the view across the table.
2. Sophisticated Table Runners and Cloths
Table runners and cloths set the stage for your table decorations. Choose materials and colors that complement your overall theme but also differ slightly to add texture and depth. A luxurious velvet runner can add warmth to a winter dinner, while a light linen cloth is perfect for summer. For added visual appeal, layer a runner over a tablecloth or use placemats to define each setting.
3. Eye-catching Place Settings
Place settings are not just functional—they are an opportunity to infuse style into your dining arrangement. Start with elegant plates and add matching cutlery and glasses. Napkin rings, name cards, or small decorative items like sprigs of rosemary or festive ornaments can add a personal touch. Make sure the items are arranged neatly and symmetrically for a polished look.
4. Charming Lighting
The right lighting can dramatically affect the ambience of your dinner. Use a combination of overhead lighting and candles for a cozy, inviting glow. Consider stringing fairy lights across the table or hanging pendant lights above. Candleholders of varying heights can add dimension and interest to the table. Soft lighting creates a warm and intimate atmosphere, perfect for evening meals.
5. Decorative Plates and Chargers
Decorative plates and chargers can enhance the visual appeal of your table. Chargers are larger plates that sit underneath the dinner plates and can add color and style to your place settings. Opt for patterns that match your theme but also add an element of surprise. Mixing and matching modern and traditional designs can result in a unique and sophisticated look.
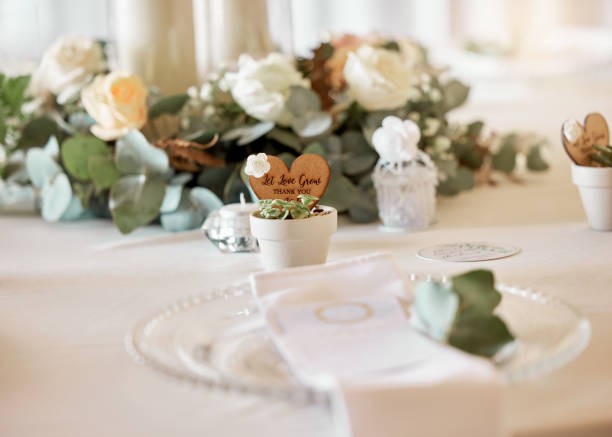
6. Personalized Touches
Adding personalized touches to your table decor can make your guests feel special. Customized name cards, tailored menu cards, or even small gifts at each place setting show thoughtful consideration. Personalization can also extend to the menu itself, offering dishes that have significance to your guests. These details do not go unnoticed and can significantly enhance the dining experience.
7. Fresh Accents
Incorporating fresh elements like flowers, herbs, or seasonal fruits can bring life to your table setting. Use fresh flowers for a vibrant touch, arranging them in simple vases or jar. Herbs like rosemary or sage can double as decor and a delightful aromatic addition. Seasonal fruits add color and can be used as part of the meal, making the decor both beautiful and functional.
Conclusion
Decorating your dining table is an art that enhances the overall dining experience. From elegant centerpieces to personalized touches, each element plays a crucial role in making your meal memorable. By carefully selecting and combining these seven table decorations, you can create a dining arrangement that not only looks stunning but also makes your guests feel cherished and welcomed.
FAQs
1. How do I choose the right centerpiece for my table?
Consider the occasion, theme, and table size. For formal events, floral arrangements or elegant candles work best. For casual gatherings, opt for rustic elements like potted plants or a tray of fruits.
2. Can I mix and match table runners and cloths?
Yes, mixing and matching can add texture and depth to your table. Ensure the colors and materials complement each other and fit the overall theme of your dining arrangement.
3. What kind of lighting is most appropriate for a dinner party?
Soft, inviting lighting is ideal for dinner parties. Combine overhead lighting with candles or fairy lights to create a cozy atmosphere. Candleholders of varying heights can add visual interest.
4. How can I personalize place settings?
Use name cards, tailored menu cards, or small gifts to personalize place settings. Even simple touches like napkin rings or decorative items that reflect the guest’s personality can make them feel special.
5. Are fresh flowers necessary for table decorations?
While not necessary, fresh flowers can add a vibrant and welcoming touch to your table. They mix well with other fresh elements like herbs or seasonal fruits to create a visually appealing and fragrant setting.
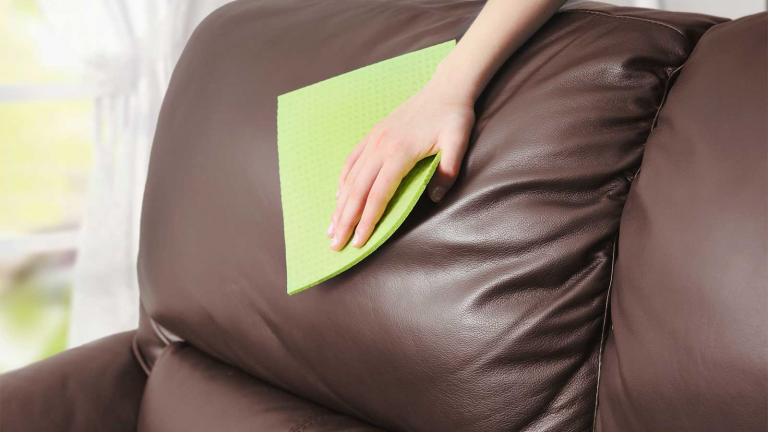
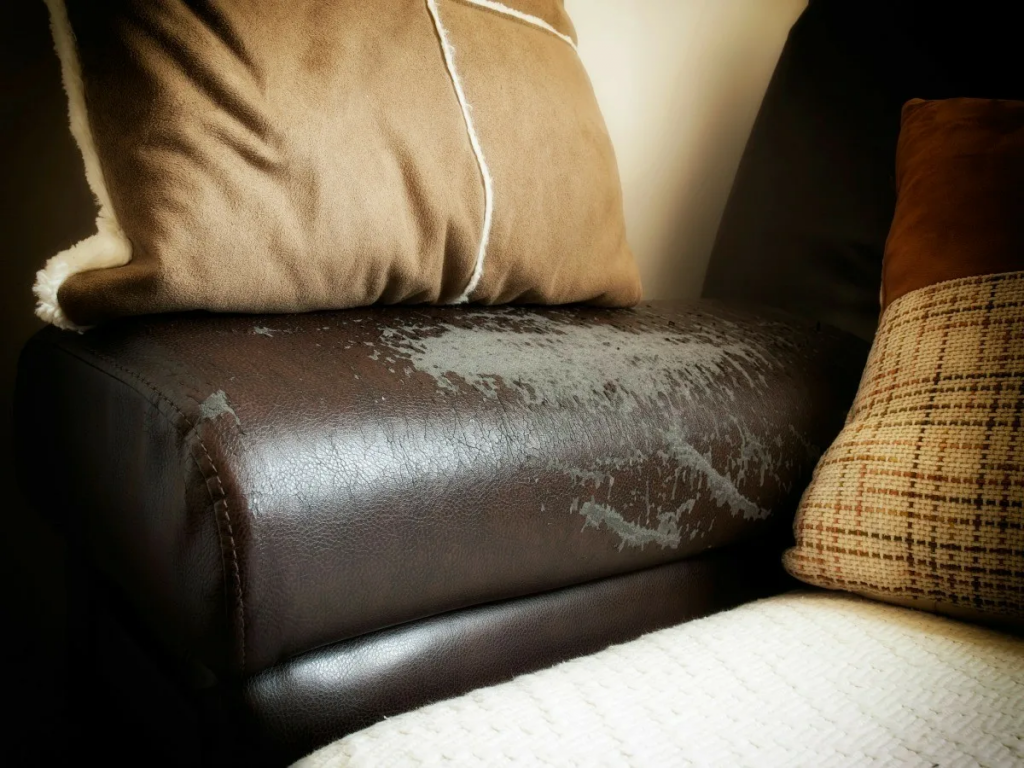
How to revive leather couch
If your cherished leather couch has seen better days and is starting to show its age with telltale signs such as fading, scratches, and dryness, there’s good news. Reviving your leather furniture is not only possible but also a rewarding project that can restore your couch to its former glory. In this article, we’ll cover the best ways to breathe new life into weathered leather, making sure your couch looks as good as the day you brought it home. With routine care, the right products, and a little effort, your leather couch can continue to be a centerpiece of comfort and style in your home for the longest time.
Preparing to Revive Your Leather Couch
The first step in the leather revival process begins with gathering the necessary supplies. You’ll need quality leather cleaner, conditioner, soft cloths, and a soft brush or vacuum cleaner with a brush attachment for removing surface dirt. Before you start the cleaning phase, it’s essential to remove loose dirt and dust, as doing so prevents scratching the leather when wiping it down.
The Cleaning Process
Removing the surface dirt is an effective way to prepare your leather for treatment. Vacuuming gently with an appropriate attachment can easily remove dust and dirt without causing damage. When choosing a leather cleaner, ensure it’s designed for use with your specific type of leather. Once you’ve chosen your cleaner, apply it to a soft cloth and gently rub it into the couch in a circular motion, taking care to cover the entire surface evenly to avoid water stains. After the leather has been cleaned, allow it to dry naturally—never use heat, as this could cause drying and cracking.
Nourishing Your Leather Couch
After thoroughly cleaning your leather, the next steps involve applying a leather conditioner. Conditioning leather helps prevent it from drying out and cracking by restoring its natural oils. It also helps maintain the leather’s flexibility. When selecting a conditioner, make sure it’s suitable for your couch and test it on a small area first. Apply the conditioner with a white cloth, gently buffing it into the leather. This may take some time, but ensuring the entire couch is conditioned will help protect your furniture in the long run. Once finished, buff away excess conditioner with a dry cloth for a new look.
Addressing Specific Leather Issues
For scratches and scuffs that might have marred your leather’s appearance, a good quality leather repair kit could help restore the damaged area. When fixing discoloration or fading color in smaller areas, you must match the color correctly with leather dyes or paints, which might require professional help for the best results. Cracks or dryness can be minimized with extra conditioning. However, severe damage such as tears or deep cracks might need more comprehensive repair processes.
Protecting Your Leather Couch Post-Treatment
Keeping your revived couch in good condition involves regular maintenance and avoiding habits that could lead to premature wear and tear. Leather protectors and conditioners not only soften the material but also protect it against spills and marks. To help keep your couch looking new, avoid placing it in direct sunlight or near heat sources, which will cause fading and drying. Additionally, consider using a professional leather protector spray, which helps shield against water damage and stains.

Conclusion
Reviving a leather couch can add years to its life and bring a sense of newness back to your living space. By following the outlined steps of cleaning, conditioning, repairing, and protecting, you’re ensuring that your leather furniture pieces remain in peak condition. Moreover, routine care and maintenance will help preserve the look and integrity of the couch, making it a cherished item in your home for years to come.
FAQs
Q1: How often should I clean and condition my leather couch?
A1: It’s recommended to clean and lightly condition your leather couch every 6 months. Increased usage requires more frequent care, possibly every 3-4 months.
Q2: Can I use any leather conditioner on my couch?
A2: No, it’s crucial to use a conditioner that is appropriate for your type of leather and always perform a spot test before full application.
Q3: How can I treat liquid spills on my leather couch?
A3: Blot liquid spills with a dry cloth immediately, then treat the area with a specially formulated cleaner for leather, following the product’s instructions.
Q4: How can I prevent my leather couch from fading?
A4: Limit exposure to direct sunlight and heat sources with curtains or blinds, and use a UV leather protectant spray to shield against fading.
Q5: Can I repair significant leather damage at home?
A5: Small scratches and fading can often be treated at home, but larger tears and serious damage should be entrusted to a professional for repair.
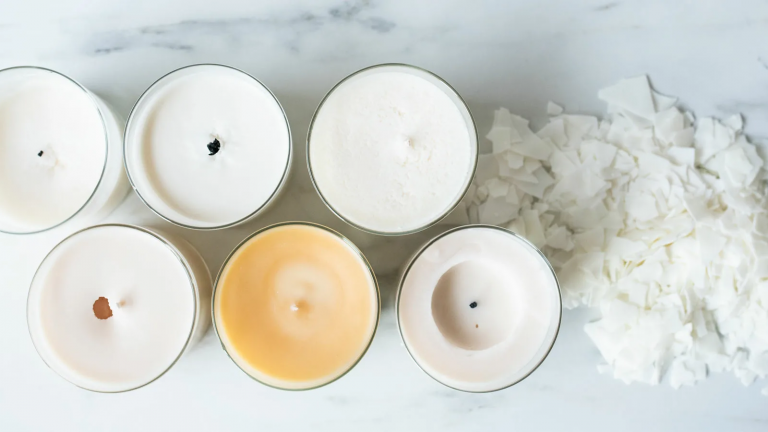
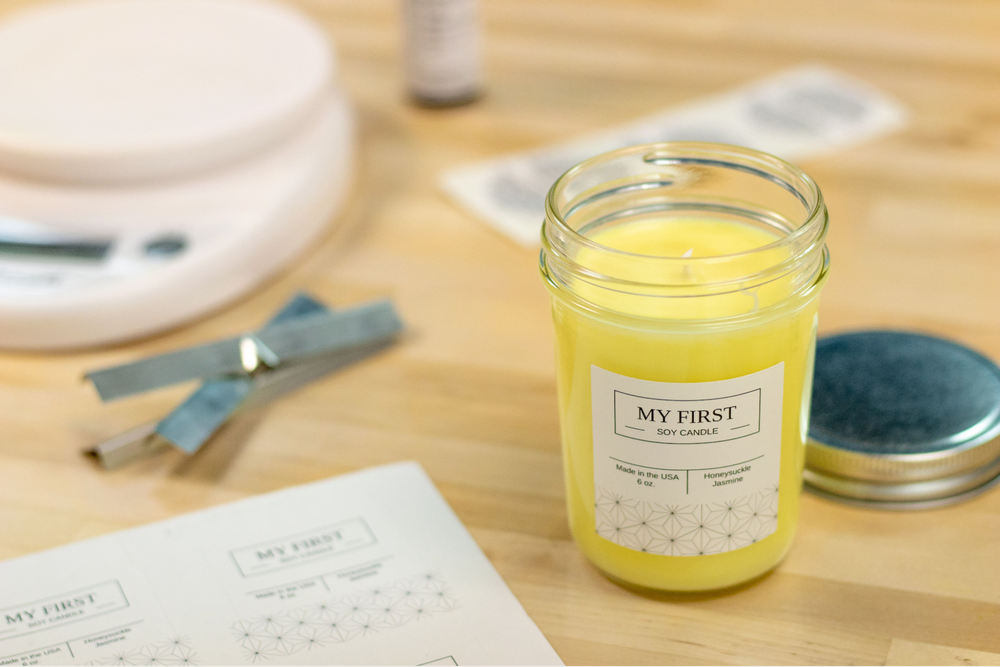
How to make soy candles for beginners
Have you ever considered making your own soy candles? These little beacons of light bring warmth to a room and fill the air with delightful fragrances, making them a fantastic addition to any home. Not only are they an eco-friendlier alternative to paraffin waxes, but homemade soy candles also offer endless customization options. This article will guide you through the simple steps of making soy candles, ensuring you get all the know-how for a successful DIY candle-making experience. Whether you’re just getting started or are looking to sharpen your skills, this guide to homemade candles is the perfect place to ignite your creativity.
Understanding the Basics of Soy Candle Making
Soy waxes have become increasingly popular as a natural alternative to traditional paraffin waxes. Derived from soybeans, soy wax is renewable, biodegradable, and burns cleaner, which means fewer soot particles are released into the air. This creates a healthier environment in your home and a longer burn time for your candles. Soy candles are not only better for the planet but by making your own soy candles, you’re also indulging in a craft that’s both sustainable and enjoyable.
Essential Tools and Materials for Your Soy Candle Project
Here’s what you will need to get started on your candle-making journey. Ensure to have all these items handy, making sure you’re prepped and ready to kickstart the process of making homemade soy candles.
- Soy wax flakes
- Cotton wicks
- Wick holders or adherent materials
- Fragrance oils or essential oils
- Heat-resistant containers (glass jars or tins)
- A double boiler or melting pot
- Thermometer
- Stirring utensil (e.g., a wooden spoon)
- Pouring pitcher
- Protective gloves
Step-by-Step Guide to Crafting Your First Soy Candle
Begin by choosing a clean and clutter-free area to work in. Cover your surface with newspaper or a drop cloth to catch any potential spills. Safety should be your top priority, so make sure the area is well ventilated and free from any flammable items. Keeping your workspace organized during the candle-making process will help ensure that everything goes smoothly and safely.
Melting Your Soy Wax Like a Pro
The first crucial step is to properly melt the wax flakes. Fill the bottom pot of your double boiler with water and place it on the stove. Put your soy wax flakes in the top pot or a heat-safe bowl sitting on top of the boiling pot. Over medium heat, allow the wax to melt, stirring occasionally. Use your thermometer to monitor the temperature; it should reach about 170-180 degrees Fahrenheit but not exceed 185 degrees. This ensures the wax is hot enough to bond with the fragrances without being too volatile.
Selecting and Adding Fragrances
Choosing the best fragrance oils or essential oils for your candle can be influenced by the mood you want to set or the season. Before adding fragrance to the wax, make sure it has completely melted and reached the right temperature. After ensuring this, pour in the fragrance oil and stir thoroughly for at least 2 minutes to evenly distribute the scent throughout the wax. This will give your homemade candles a good scent throw.
The Right Way to Use Wicks
The wick is the heart of the candle, and its proper placement is crucial for an even burn. Wick sizes vary, so choose one that matches the size of the container you’re using. Secure your wick to the bottom of the container using a wick holder or adhesive. To keep the wick centered while the wax cools, you could also use a wick centering tool or simply wrap the top end of the wick around a stick or pencil that sits atop the container.
Pouring and Curing Your Soy Candles
Once your wax is infused with fragrance and your wick is secured, it’s time to pour the wax into your container. Waiting until the temperature drops to about 135 degrees Fahrenheit will ensure a smoother top and reduce the chance of cracks. Once poured, let your candles cool at room temperature away from direct sunlight or drafts. The curing process takes about 1-2 weeks, allowing the wax and fragrance oils to bind and the scent to mature, providing a more robust fragrance once lit.
Customizing Your Soy Candles
Making homemade candles allows you to personalize every aspect of the process. Add dyes to the melted wax for a splash of color, embed dried herbs or flowers for a natural touch, or experiment with layering different scents for unique combinations. With so many possibilities, homemade soy candles can truly reflect your personality and style.
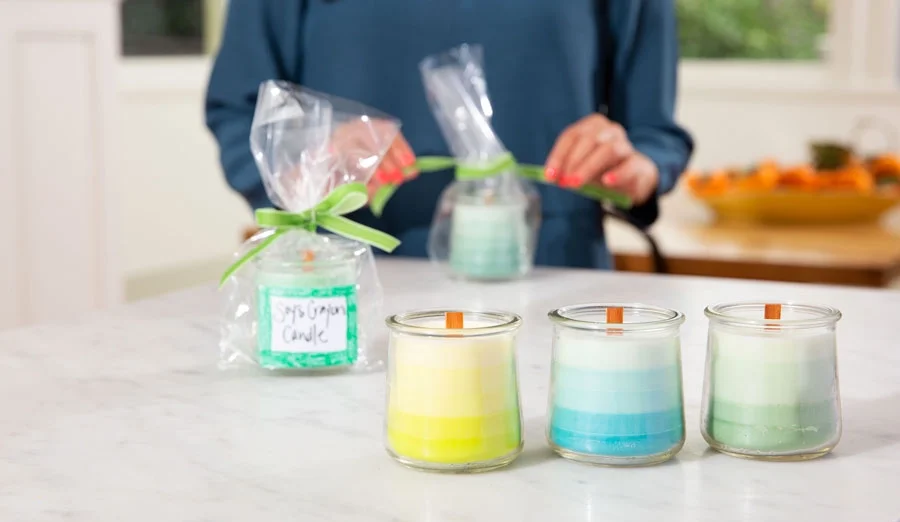
Packaging and Storing Your Soy Candles
Once your soy candles have cooled completely, they are ready for storage or to be gifted. Store them in a cool, dark place until you’re ready to use or package them. If you’re gifting your candles or starting a small business, consider creative packaging using decorative boxes, ribbon, or custom labels to add that personal touch to your candles.
Troubleshooting Common Soy Candle Making Issues
Addressing Common Challenges
Candle making is an art, and sometimes issues may arise. Below is a table outlining common problems and their solutions to help you overcome any hurdles in your candle-making process.
| Problem | Cause | Solution |
|---|---|---|
| Tunneling | Insufficient initial burn time | Ensure your first burn lasts until the wax melts across the entire surface |
| Frosting | Natural occurrence with soy wax | Consider it a unique characteristic of soy, or try a different wax batch |
| Cracks on top | Cooling too fast or pouring wax at too low a temperature | Pour at the right temperature and cool gradually away from drafts |
| Weak scent throw | Insufficient fragrance oil or improper mixing | Increase fragrance oil quantity slightly and ensure thorough mixing |
| Wick not burning | Wrong wick size for container or wax type | Choose the correct wick size, or test different wick types |
Conclusion
Making your own soy candles is a fulfilling DIY project that lets you create beautiful, natural, and personalized items for your home or to give as gifts. It’s a craft that’s both enjoyable and simple once you get the hang of it, and the possibilities for customization are endless. Remember, even if your first few candles aren’t perfect, each candle you make will teach you something new and bring you one step closer to mastering the art of candle making. Enjoy the process, and let your creativity shine with your custom soy candles!
FAQs
Q1: Why choose soy wax over other types of wax for candle making?
A1: Soy wax is a renewable resource that provides cleaner burning with less soot, is biodegradable, and offers a longer burn time compared to paraffin wax.
Q2: How can I prevent my soy candle from tunneling when it burns?
A2: To prevent tunneling, ensure the initial burn lasts until the entire top layer of wax has melted to the edge of the container, setting the stage for an even burn in future uses.
Q3: Can I use essential oils instead of fragrance oils for my soy candles?
A3: Essential oils can be used, but note that they may not be as strong as fragrance oils designed for candles and may offer a more subtle scent.
Q4: How long should I let my soy candles cure before using them?
A4: It’s best to allow your soy candles to cure for at least 1-2 weeks to ensure the best scent throw and burning quality.
Q5: Is it necessary to use a thermometer when melting soy wax?
A5: Yes, using a thermometer helps ensure that you’re melting the wax to the proper temperature, which is essential for safety and for creating a high-quality candle.