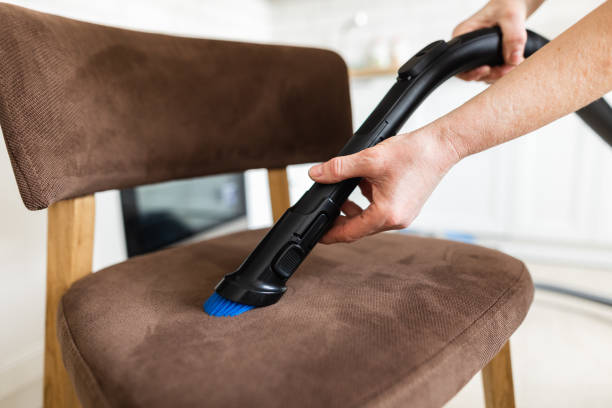
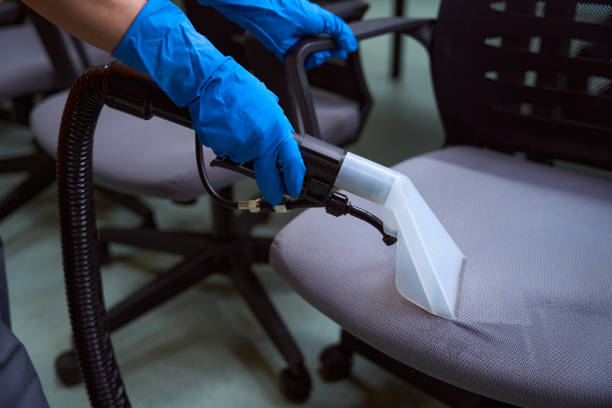
How to clean upholstery with a steam cleaner?
Upholstery is an integral part of your home’s comfort and aesthetics, but keeping it clean can be a challenge. Enter the ingenious world of steam cleaning—utilizing only heat and water, steam cleaners can provide a thorough and non-toxic clean, making them a popular choice for professional upholstery maintenance. Steam cleaning not only targets surface grime but also reaches deep into the fabric to eliminate hidden dirt and allergens, breathing new life into your furniture without the use of harsh chemicals.
The Benefits of Using a Steam Cleaner
The magic of steam cleaning lies in its simplicity and efficacy. Steam cleaners work by heating water to a high temperature to produce steam, which penetrates the fibers of your upholstery, breaking down dirt and debris that vacuum cleaners might leave behind. This method is highly effective for fabric sofas and chairs that accumulate dust and stains. The heat from the steam also sanitizes surfaces, killing bacteria and dust mites which are potential health hazards, especially to those with allergies.
Preparing for a Deep Clean: What You Need
To prepare for a steam cleaning session, you will need to gather a few essential items:
- A reliable steam cleaner suited for upholstery.
- Vacuum cleaner for pre-cleaning the upholstery.
- Clean microfiber cloths or dry cloths for blotting excess moisture.
- A small brush (optional) for tackling stubborn stains.
- Water for your steam cleaner’s reservoir.
Before diving into cleaning, make sure to consult your furniture’s care tag to ensure steam cleaning is an appropriate method; certain materials like suede or non-colorfast fabrics should not be exposed to high heat.

Step-by-Step Guide to Steam Cleaning Upholstery
Step 1: Selecting the Right Steam Cleaner
Selecting a steam cleaner is the first crucial step. There are various types on the market, from smaller handheld devices to professional-grade steam cleaners. Ensure the cleaner comes with upholstery attachments, as these will help to concentrate the steam and avoid over-saturating the fabric.
Step 2: Pre-cleaning Procedures
Before steam cleaning, remove any loose particles or debris from the surface by thoroughly vacuuming the upholstery — this simple action can help improve the effectiveness of steam cleaning. Pre-treatment of stains with appropriate cleaning solutions should also be considered; however, you should not mix chemical cleaners with the steam cleaning process. Here’s a quick checklist:
- Vacuum the upholstery, paying extra attention to crevices where dirt accumulates.
- Treat spots and stains with a suitable cleaner, then vacuumed up after the appropriate dwelling time.
- Clear the area around the upholstery to prevent any damage from steam exposure.
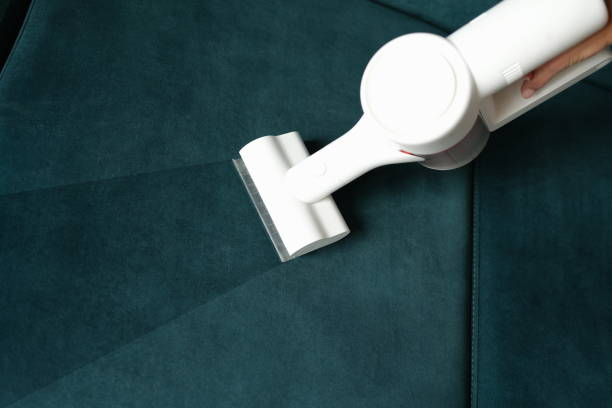
Step 3: Properly Using the Steam Cleaner
With the upholstery prepped, it’s time to fire up the steam cleaner:
- Fill the steam cleaner with water as instructed by the manufacturer and wait for it to heat up.
- Begin by gently steaming a small, inconspicuous area to test for colorfastness.
- Slowly move the steam cleaner across the upholstery’s surface, ensuring even coverage without over-wetting any section.
The steam will not only loosen grime but will also kill off unwanted bacteria and mites dwelling within the fibers. After steaming, use dry cloths to blot any excess moisture from the fabric.
The Drying Process
A crucial aspect of steam cleaning is allowing the fabric to completely dry after the process. This can help prevent any mold or mildew growth from residual moisture. Open windows or use fans to accelerate the drying process, which typically takes a few hours.
| Steps | Description |
|---|---|
| Select | Choose an appropriate steam cleaner with the necessary attachments. |
| Vacuum | Pre-clean the upholstery by vacuuming thoroughly. |
| Pre-treat | Spot treat any stubborn stains with suitable, non-chemical solutions. |
| Steam Clean | Gently steam the upholstery, working in sections and taking care not to oversaturate. |
| Blot and Dry | Use dry cloths to blot away excess moisture and then allow the upholstery to dry completely. |
Ensuring that your upholstery gets adequate time to dry can help prevent the development of odors and reduce the likelihood of needing a professional service intervention.
Tips for Effective Steam Cleaning
Steam cleaning, when done correctly, can leave your upholstery looking and smelling fresh. However, there are specific measures you should take to heighten the effectiveness of this cleaning method. When considering different upholstery materials, it’s essential to adjust the steam cleaner’s settings accordingly. Delicate fabrics may require a lower temperature and less direct steam exposure, while more robust materials like certain synthetics can tolerate higher heat for more rigorous cleaning.
Addressing stubborn stains and odors can sometimes be a challenge, but steam has the ability to conquer even the most resilient spots when combined with patience and the right technique. Should you encounter a particularly stubborn stain, multiple gentle passes with the steam cleaner could also be more beneficial than a single aggressive session which could potentially damage the upholstery.
Safety precautions are paramount when handling steam cleaners as they generate high heat that can cause burns if misused. Keep children and pets away during the cleaning process and always follow the manufacturer’s guidelines to avoid accidents. Never overfill the water tank, and be sure to unplug the device when refilling or changing attachments.
Maintaining Your Upholstery After a Steam Clean
Once your furniture has been steam cleaned, implementing a consistent maintenance routine will help extend the life and appearance of your upholstery. Routine maintenance tips include vacuuming the furniture regularly to prevent the accumulation of dust, which can become embedded in the fabric and eventually lead to deterioration.
Spot cleaning between deep cleanings is also necessary for maintaining your upholstery’s pristine condition. Attend to spills and spots quickly with a dedicated fabric cleaner and dry cloths, dabbing gently rather than rubbing to avoid spreading the stain or damaging the fibers.
There are instances when to hire a professional service is the most sensible course of action. If your upholstery is antique or made from delicate materials, such as silk, a professional upholstery cleaner will have the expertise and specialized equipment to handle these with care, ensuring that the cleaning methods will not damage your cherished pieces.
Conclusion: Enjoying Fresh, Clean Upholstery
The joy of having freshly cleaned upholstery cannot be understated; it revitalizes your furniture and contributes to a healthier home environment. Steam cleaning is a versatile and effective method to achieve professional-grade cleanliness. Remember, the key to successful steam cleaning lies in choosing the right equipment, preparing your upholstery correctly, and following safe and thorough cleaning practices. Regular maintenance will help preserve the cleanliness and integrity of your upholstery, allowing you to enjoy the benefits of steam cleaning for years to come.
FAQs Regarding Steam Cleaning Upholstery
- Q1: Can all types of upholstery fabric be steam cleaned?
A1: Not all fabrics are suitable for steam cleaning. It’s important to check the manufacturer’s label or consult with a professional cleaner if you’re unsure. Materials like suede, velvet, or delicate fabrics may be damaged by steam cleaning. - Q2: How long does the drying process take after steam cleaning?
A2: The drying process can vary depending on the fabric and room conditions but generally takes a few hours. Expedite drying by ensuring good ventilation, using fans, or dehumidifiers if necessary. - Q3: Can I remove all types of stains with steam cleaning?
A3: While steam cleaning is effective for many stains, some may require pre-treatment with a specialized cleaning solution. Steam cleaning is great for sanitizing and removing embedded dirt but may not eliminate all types of stains. - Q4: How often should I steam clean my upholstery?
A4: Typically, it’s recommended to steam clean your upholstery every 12 to 18 months, but this can vary based on usage, the presence of pets or children, or if someone in the household has allergies. - Q5: Is it safe to add cleaning solutions to the steam cleaner?
A5: Generally, it’s not recommended to add cleaning solutions to the steam cleaner water as this can damage the machine. Apply the cleaning solution separately, if needed, and ensure it’s thoroughly rinsed before steam cleaning.
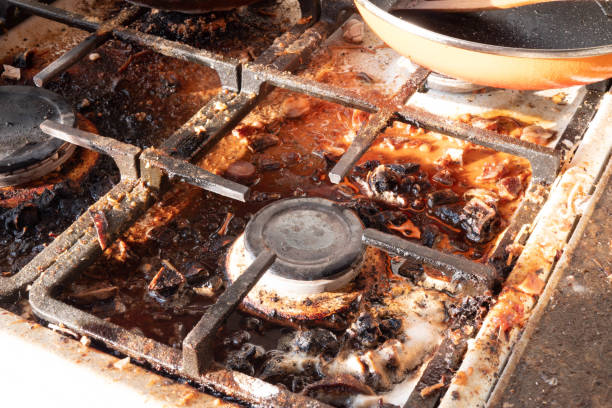
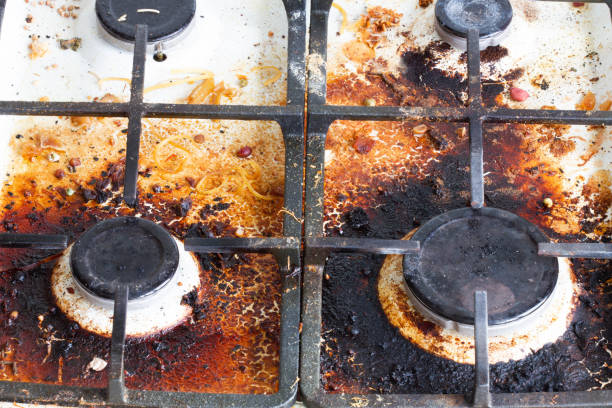
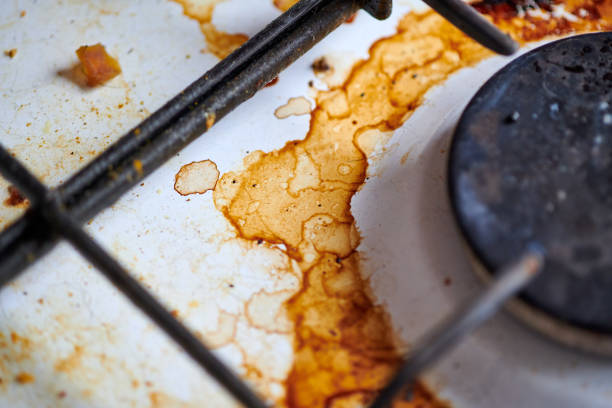
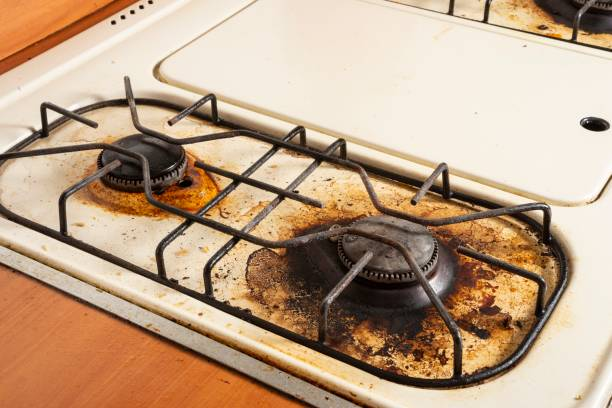
How to remove burnt-on grease from a stove top?
Dealing with burnt-on grease on your stove top can be a daunting kitchen chore, yet it’s an all-too-common occurrence in households everywhere. Whether you’re cooking up a storm on gas stoves, electric stovetops, or the sleek surface of a glass stovetop, the residue from burnt foods can leave behind stubborn grease that refuses to budge. But fear not, because the solution doesn’t always require harsh chemicals or endless scrubbing. In this comprehensive guide, we will reveal effective methods for removing burnt-on grease and restoring the shine to your hardworking stove tops.
Understanding the Challenge of Burnt-On Grease
Before diving into the cleaning process, it’s important to recognize why burnt-on grease is such a tough adversary. Grease stains can carbonize and harden on stovetops, especially after repeated heating. This makes removing burnt-on residue more challenging than dealing with fresh spills.
Types of Stove Tops and their Cleaning Considerations:
- Gas Stoves: These stoves feature burners and grates that are susceptible to accumulating food residue and burnt-on foods. The complexity of their design often requires individual parts to be cleaned separately.
- Glass Stoves: Known for their smooth glass top, these stoves offer a sleek design but can be prone to scratches if not cleaned properly. Removing burnt-on grease needs a gentle yet effective approach to preserve their appearance.
- Electric Stoves: Electric stovetops often come with coil burners or glass surfaces and can vary in their cleaning needs based on the type of surface they possess.
Why Burnt-On Grease is Tough to Remove:
Burnt-on grease adheres firmly to stove tops due to the high cooking temperatures that effectively ‘bake’ the residue onto the surface. This carbonized layer is not only unsightly but it can also interfere with the efficiency of your cooking appliance.
Pre-Cleaning Preparations
Safety First: Preparing to Clean:
To safely start the cleaning process, ensure that the stove is turned off and completely cool. Wearing gloves can protect your hands from both the grime and any cleaning agents used during the process.
Gathering Your Cleaning Supplies:
A well-stocked cleaning arsenal is your best friend when tackling stubborn grease. You will need:
- Baking soda
- Vinegar or lemon juice
- A spray bottle
- Microfiber cloths or non-abrasive scrub pads
- A plastic scraper or credit card
- Commercial degreaser (optional)
With your supplies on hand, you’re well-equipped to face even the most stubborn burnt-on stains.
Step-by-Step Guide to Removing Burnt-On Grease
Home Remedies for Grease Removal:
- Baking Soda and Vinegar Method:
- Sprinkle baking soda liberally over the burnt-on grease.
- Mix equal parts of vinegar and water in a spray bottle, then apply it to the baking soda covered area.
- Allow the mixture to fizz and sit for 10-15 minutes.
- Gently scrub the area with a non-abrasive pad, then wipe clean.
- Lemon and Baking Soda Method:
- Create a paste with baking soda and lemon juice.
- Apply and leave it on the grease stain for about 15 minutes.
- Scrub gently with a scrub pad, following the grain of the stove top if applicable.
- Wipe away the residue with a damp cloth.
The Importance of Regular Maintenance:
Maintaining clean stove burners and surfaces is essential not only for aesthetics but also for functionality. A clean stove top will heat more evenly and reduce the risk of further burnt-on stains.
| Simple Steps for Regular Stove Top Maintenance |
|---|
| Wipe down after every use to prevent build-up. |
| Treat spills immediately to minimize staining. |
| Schedule a deep-clean session bi-weekly. |
Incorporating regular maintenance practices like promptly removing burnt-on foods and then wiping the surface clean after cooking will help prevent the accumulation of burnt-on grease, making deep cleaning sessions less of a burden.
Tips and Tricks for Keeping Your Stove Top Grease-Free
After a deep clean, the key to preventing stubborn grease buildup lies in consistent and effective maintenance. This doesn’t have to be tiresome or time-consuming. Adopting simple cleaning habits can make a world of difference.
Daily Maintenance Tips:
Incorporate quick, daily wipe-downs into your routine. After the stove has cooled from cooking, simply taking a wet cloth and a mild detergent, or an appropriate cleaner for glass stovetops, and wiping the surface can maintain a streak-free shine. It’s also effective in dislodging any food particles before they have a chance to become burnt-on residue. Use microfiber cloths as they are gentle and won’t scratch delicate surfaces like those of glass stoves.
Weekly Cleaning Routines to Implement:
- Set aside some time each week for a more thorough stove top cleaning session.
- Here’s a simple checklist for your weekly routine:
- Remove grates and knobs from gas stoves and soak them in soapy water.
- Use a dedicated stove cleaner or a DIY solution to clean the surface.
- Pay special attention to areas surrounding the burners where spills often accumulate.
- Rinse and dry all removed parts before reassembling them.
By adhering to these habits, you’ll greatly reduce the need for labor-intensive scrubs in the future.
Solutions for Stubborn Grease Stains
Sometimes, despite our best efforts, tough grease stains persist. Here’s what you can do when faced with particularly stubborn problems.
Abrasive Methods: Pros and Cons:
While abrasive methods can be effective, they should be used with caution. Abrasive cleaners or scouring pads can remove the toughest of burnt-on grease but can also scratch the surface of glass top stoves and other delicate materials. If you choose to use abrasive methods, do so gently and with the least abrasive material possible.
When to Call in the Professionals:
If you’ve tried every method and still can’t get your stove top clean, it might be time to call in a professional. They have specialized tools and products that can safely remove the most stubborn burnt-on grease. This is particularly advisable for expensive stove tops where damage might lead to costly repairs or replacements.
Conclusion
Removing burnt-on grease from your stove top is undeniably a chore that can test your patience. Yet, with the right techniques, tools, and a consistent cleaning regimen, your stove can be restored to its former glory. Remember, whether it’s a quick daily wipe down or a thorough weekly cleaning, the key to managing burnt-on grease lies in addressing spills as soon as they occur and maintaining your stove top regularly. With this guide in hand, you’re equipped not only to tackle that stubborn grease but also to keep your stove tops spotless and functioning perfectly for all your culinary adventures.
FAQ
- What is the safest way to clean a glass stove top without scratching it? The safest way to clean a glass stove top is by using a soft cloth or sponge, along with a cleaning solution of baking soda and water or a cleaner specifically designed for glass surfaces. Avoid using abrasive pads or harsh chemicals that could damage the smooth surface.
- Can I use steel wool or a metal scrubber on my gas stove grates? It’s generally not recommended to use steel wool or metal scrubbers on gas stove grates as these can scratch and damage the finish. For heavy-duty cleaning, soaking the grates in soapy water and using a non-metallic brush can be effective without risking harm.
- How often should I clean the stove top to prevent burnt-on grease from accumulating? To prevent the accumulation of burnt-on grease, it’s ideal to clean the stove top lightly every day after use and perform a more thorough cleaning weekly.
- Are there any natural solutions for removing burnt-on grease? Yes, baking soda and vinegar are natural solutions that work well for removing burnt-on grease. A lemon and baking soda paste can also be used for its natural acidic properties which help in breaking down grease.
- What should I do if a commercial cleaner does not remove all the burnt-on grease? If a commercial cleaner doesn’t remove all the burnt-on grease, you can try a more concentrated application or allow it to sit for a longer period before gently scrubbing. If the grease is still stubborn, consider consulting a professional cleaning service, especially if the area is extensive or if you’re worried about damaging your stove top.
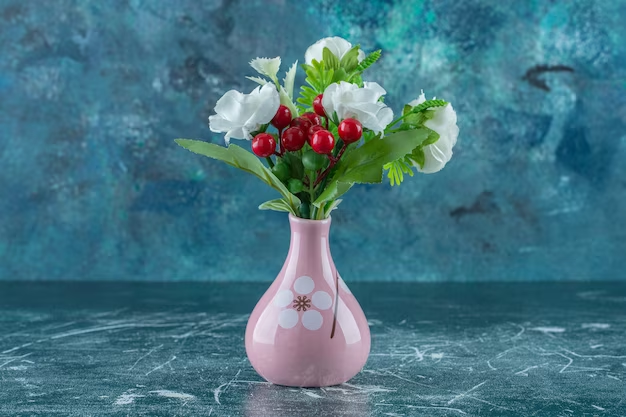
What can i add to water to keep flowers fresh
Flowers, in their silent beauty, have the power to convey messages and emotions with a delicacy no words can mirror. As bearers of joy, it’s only natural we wish to prolong their allure. A common inquiry arises: what can you add to water to keep flowers fresh? The answer is sweet and simple—household ingredients such as sugar, which acts as sustenance, while acidic substances like lemon juice or vinegar help fend off bacteria, and a dash of bleach ensures the water stays clear. Embracing these additives is a key step in cut flower preservation for extended vase life. This guide aims to unravel the mysteries of floral longevity and provides actionable advice to enjoy your blossoms for longer periods.
Scientific Background of Flower Freshness
The quest to understand how to keep flowers fresh in a vase delves into the botanical principles that govern plant survival. Cut flowers, once separated from their life-giving roots, embark on a race against time, seeking nourishment and hydration through their stalks. Many wonder, do cut flowers last longer in warm or cold water? Research suggests that lukewarm water is often more beneficial as it aids in the absorption process, which can be crucial for flower vitality. Alongside temperature, the preservative qualities—stemming from the combination of sugar, bleach, and an acidic pH—are pivotal in thwarting stem blockage and ensuring flowers can drink their fill.

Ingredients to Add to Flower Water
If you’re pondering, what can i put in water to keep flowers fresh, you needn’t look farther than your kitchen. A myriad of commonplace items awaits their calling to refresh and rejuvenate your floral friends:
- Sugar: By sweetening the water with a sprinkle of sugar, you offer flowers a substitute for the nutrients they miss post-harvest.
- Bleach: A seemingly odd choice, bleach is actually a floral sentinel that keeps the water free from harmful microorganisms.
| Ingredients | Quantity | Purpose |
|---|---|---|
| Sugar | 1-2 tablespoons | Acts as food for the flowers |
| Bleach | 1/4 teaspoon | Prevents bacterial growth |
| Apple Cider Vinegar | 2 tablespoons | Lowers pH, promoting longevity |
| Lemon/Lime Juice | 2 tablespoons | Acidifier, acts against bacteria |
Adding just the right amount of bleach and sugar can be a delicate balancing act. By also considering the appropriateness of the water temperature, flower enthusiasts can find themselves mastering the fine art of floral care with surprising ease.
How to Keep Flowers Fresh in a Vase Vinegar
For those wondering how to keep flowers fresh in a vase vinegar addition is key. This particular pairing of vinegar for pH balance and sugar for nourishment can act like a fountain of youth for your petaled treasures.
Step-by-Step Guide for Preparing Your Flower Water
- A pristine vase is the starting block to a long-lasting arrangement. No bacteria means no impediments to your flowers’ absorption capabilities.
- Pour in lukewarm water to facilitate an amiable environment that enables efficient stem absorption. Stagnant or the wrong temperature water can result in flowers wilting prematurely, so it’s advised to maintain optimal conditions for their refreshment.
Every two to three days, changing the water and trimming the stems can drastically increase the vase life of your flowers. Remembering these key points not only benefits the flowers but also brings sustained joy to any room.

Additional Tips for Keeping Flowers Fresh Longer
Beyond answering the question, “What can I add to water to keep flowers fresh?” there are other measures you can take to ensure your blooms endure. It’s about creating a holistic environment that fosters longevity and beauty.
- Proper Placement of Flowers: Position your flowers out of direct sunlight, away from heating or cooling vents, and distant from ripening fruit to avoid the ethylene gas it emits.
- Keeping Flowers Cool: A cooler environment slows down aging; thus, placing flowers in a cool spot can significantly prolong their life. Some even recommend putting them in the refrigerator overnight for an extra freshness boost.
- Avoiding Ethylene Gas: Ripening fruits and vegetables emit ethylene gas, which accelerates floral aging. Keep your arrangements in a separate space to preserve their youthful vigor.
- Regular Trimming of Stems: Snipping the stems at an angle every time you change the water can enhance their water intake. Remove any leaves that fall below the waterline to prevent bacterial growth.
Using these techniques alongside your preservative solutions can provide your flowers with the optimal environment for a prolonged display of beauty.

FAQs After Conclusion
- What can I add to water to keep flowers fresh? You can add a teaspoon of sugar, a few drops of bleach, or two tablespoons each of apple cider vinegar and sugar to the water. All serve to feed the flowers and inhibit bacterial growth, helping them to stay fresh longer.
- How often should I change the flower water? It’s best to change the water every two to three days, which helps prevent microbial growth and provides consistent fresh nutrients for your flowers.
- Is it safe to use bleach in the water for flowers? Yes, in small quantities, using bleach is safe and helps keep the water clear of bacteria that can cause the flowers to degrade faster.
- Can I use any type of sugar as a preservative for flowers? Regular white sugar is typically recommended, but clear sodas containing sugar can also serve a similar purpose when added to flower water.
- Do homemade preservatives work as well as commercial ones? Homemade solutions can be effective, but commercial preservatives are specifically formulated with the right balance of ingredients to extend the life of cut flowers.
Implementing these tips and techniques will provide a comprehensive approach to keeping your flowers fresh and vibrant, ensuring that the beauty of your arrangement can be enjoyed for as long as possible. Whether you are a seasoned floral enthusiast or just someone who enjoys the occasional bouquet, these insights should help your flowers maintain their splendor. Remember, experimentation is key, and finding the right method for your particular blooms may take some practice, but it is worth the effort to savor their stunning display day after day.
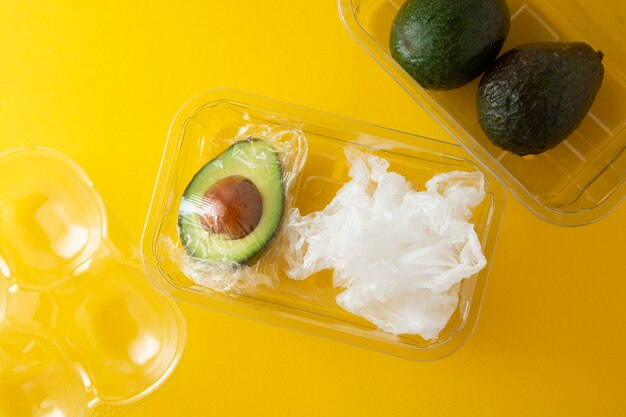
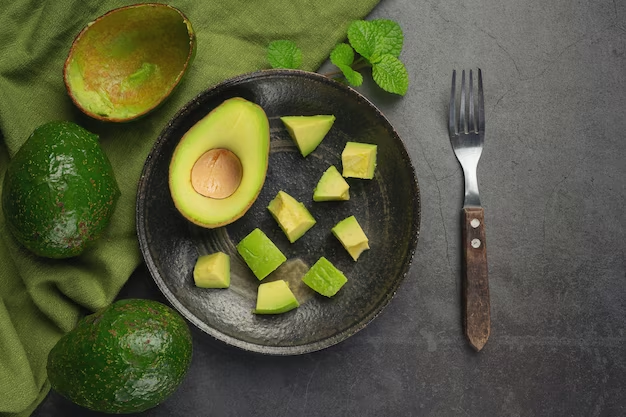
How to keep an avocado fresh after cutting it
Avocados are not just a tasty addition to myriad dishes; they are packed with nutrients and have a rich, creamy texture that makes them a favorite for many. But one of the greatest culinary quandaries arises after you’ve sliced into that smooth green flesh – how do you keep the cut avocado fresh? The answer lies in minimizing the fruit’s exposure to air, which leads to oxidation and browning. Specifically, we’ll explore how to keep an avocado from turning brown in the refrigerator and other effective methods to ensure your avocados stay delectably green and fresh post-cutting.
Understanding Avocado Browning
When it comes to keeping a cut avocado fresh, it’s crucial to understand why the browning occurs in the first place. Avocado browning is a natural reaction to oxygen exposure, similar to what happens to apples or bananas when sliced. One might ponder, “How do you keep avocados from turning brown after you’ve gone through the effort of slicing them?” The fruit contains an enzyme called polyphenol oxidase, which, when in contact with oxygen in the air, converts the polyphenols in the avocado into quinones. These quinones then link together to form pigmented polymers, resulting in the brown color that we often see on the surface of cut avocados.
Methods to Keep Avocado Fresh
The quest on how to store cut avocado without it turning brown brings us to several tried and tested methods that can significantly slow down the oxidation process of avocados. Below are some of the most effective ways:
- Storing with the pit: The question of how to store half an avocado without lemon involves simple solutions, such as this. By leaving the pit in the remaining half of the avocado, you reduce the surface area exposed to oxygen. It’s a simple yet effective method, reducing the need for acidic agents like lemon or lime.
- Utilizing Lemon or Lime Juice: Speaking of acidity, this is another answer to “how do you keep avocados from turning brown?” The citric acid in lemon or lime juice can markedly reduce oxidation. Simply squeeze a little juice over the cut surface of the avocado, and this acid forms a natural barrier preventing extensive browning.
When you’re pondering how to keep diced avocado from turning brown, remember that the same principles apply whether your avocado is sliced, diced, or halved. Downsizing the steps to preserve smaller pieces can be just as effective.
| Preservation Method | Description | Reason for Effectiveness |
|---|---|---|
| Wrapping in Plastic Wrap | Covers the cut surface, pressing wrap directly onto it. | Reduces air exposure, limiting browning. |
| Storing in Water | Submerges the avocado in a container filled with water. | Water acts as a physical barrier from air. |
| Using Onion Chunks | Stores the cut avocado with large chunks of onions. | Sulfur compounds from the onion slow down oxidation. |
| Vacuum Sealing | Removes air from a bag or container before sealing. | Nearly eliminates oxygen to prevent browning. |
Storing avocados in water is an especially intriguing method when considering how to keep an avocado from turning brown in the refrigerator. This is because cool temperatures combined with water can significantly halt the oxidation process. While water storage might not be the first method that comes to mind, it’s a practice worth considering if you’re dealing with a surplus of avocados that you don’t want to waste.
Additional Tips for Avocado Preservation
Aside from the aforementioned methods, additional practices can help maintain that vibrant green hue. Refrigeration, for instance, can slow down the enzyme activity that leads to browning. Understanding how to keep an avocado from turning brown in the refrigerator involves more than cold temperatures; you also need to take into consideration the preparatory steps like proper wrapping or covering to keep the oxygen at bay.
Furthermore, selecting the proper avocado plays a significant role in post-cut preservation. Opting for avocados that are ripe but firm to the touch can make a difference, as the firmer the flesh, the slower the oxidative reactions will occur after cutting into it.
As we continue to delve into some common mistakes that can go wrong in our avocado preservation efforts, we realize that a few missteps can undo our hard work. Let’s look into some of these and how to avoid them.
Common Mistakes to Avoid
- Excessive Air Exposure: Even when stored in the refrigerator, leaving the cut surface of an avocado exposed to air is a surefire way to invite browning. Always ensure that your avocado is covered snugly with a barrier that prevents air from reaching the flesh.
- Delaying Preservation Steps: Once an avocado is cut, the clock starts ticking. Waiting too long before implementing your chosen preservation technique can allow browning to commence before you’ve even had a chance to slow it down.
- Inadequate Storage Conditions: Not all sections of your refrigerator offer the same conditions. The back of the fridge tends to be cooler and might be better for prolonging the freshness of your avocado.
- Ignoring Ripeness: Attempting to preserve an already overripe avocado could be futile due to the increased rate of enzymatic reactions in softer, riper fruit.
Here are some additional tips and tricks to avoid common missteps:
- Don’t Skip the Acid: Even if you’re storing with the pit, a little lemon or lime juice.
- Check for Seal: When using plastic wrap or airtight containers, make certain there are no gaps.
Conclusion
The battle against brown avocados is one that can be won with the proper knowledge and techniques. Remembering simple truths—like avocados continuing to ripen even after they’ve been cut—can guide your storage choices, ensuring you savor every last bit of that creamy, green goodness. Whether you’re a guacamole enthusiast or an avocado toast connoisseur, the methods discussed are sure to aid you in your culinary endeavors, helping to reduce food waste and maintain quality.
Implementing these strategies will extend the shelf life of your cut avocado, but there’s always more to learn about this beloved fruit. To further that knowledge, we’ve compiled a list of frequently asked questions to clear up any lingering curiosities.

FAQ
1. Can you eat brown avocado?
Yes, a little browning on an avocado is generally harmless and primarily affects the fruit’s appearance and texture, not its safety for consumption. However, if the fruit smells off or exhibits mold, it’s best to discard it.
2. How long does it take for a cut avocado to turn brown?
A cut avocado can start to brown within a few hours if left exposed to air. Utilizing the preservation techniques mentioned can extend its fresh look from a few hours to a couple of days.
3. Can I freeze a cut avocado?
Yes, you can freeze cut avocado. The best method is to puree it with a bit of lemon juice and store it in an airtight container or freezer bag. Thaw it in the refrigerator before using.
4. What is the best way to store an open avocado if I don’t have lemon juice?
The pit-preserving method is effective without the use of lemon juice. Alternatively, storing your cut avocado in an airtight container with a piece of onion can also prevent browning.
5. Is there a way to revive a browned avocado?
Once an avocado has browned, you can’t reverse the oxidation process. However, if the browning is only surface-level, simply scraping off the top layer can reveal greener flesh underneath.
With these preservation methods and tips, along with the answers to common questions, you now have the arsenal you need to keep your avocados deliciously fresh after they’ve been cut. So go ahead, whip up that batch of guacamole, secure in the knowledge that any leftovers will be just as vibrant tomorrow.

How to remove the smell of tobacco in an apartment at home: independently, quickly and effectively, using folk remedies
Many have faced the problem of how to get rid of the smell of tobacco in an apartment quickly at home after guests leave your home, leaving behind an unpleasant aroma of cigarettes. This article will teach you how to quickly remove the smell of cigarettes from a room quickly and effectively, using simple methods that are accessible to everyone.
Reasons for the persistence of the odor of tobacco
The persistence of the odor of tobacco is explained by the chemical composition of tobacco smoke, which contains tars and toxins that can penetrate the pores of surfaces in your apartment. For those who are interested in how to get rid of the smell of tobacco in a room where they constantly smoke, it is important to understand that it will be more difficult for smokers to do this due to the regular renewal of the smell.
Preliminary steps before removing the smell
First of all, it is useful to know how long it takes for the smell of cigarettes to disappear from a room with an open window and a closed door. Typically, a few hours of active ventilation are enough to begin eliminating the odor. Open windows wide and keep doors closed to concentrate airflow and speed up the release of tobacco smoke.
After this, you need to do a thorough cleaning. This involves wet cleaning of surfaces, adding to this process specialized products that can decompose and neutralize nicotine and tar molecules.
Folk remedies to combat the smell of tobacco
Traditional methods of combating the smell of tobacco include the use of vinegar and soda. Vinegar, thanks to its disinfectant and absorbent properties, can significantly freshen the air in the room, neutralizing the smell of cigarettes. To do this, mix equal parts of vinegar and water, place in a spray bottle and spray textile surfaces.
Another reliable remedy is baking soda, which can be sprinkled on carpets and furniture, and then vacuumed thoroughly after a while. Baking soda not only neutralizes odors, but also removes possible stains.
Citrus fruits and coffee are also often used to remove unpleasant odors. Here are some effective ways to use them:
- Place lemon, lime or orange peels around the room. Their aroma freshens the air and fights tobacco odor.
- Place a saucer of ground coffee in the room, which will naturally absorb unwanted odors.
Modern methods of odor neutralization
h2>
Modern means will also help in the fight against unpleasant odors. One of the effective methods is ozonation of the room, which allows you to destroy not only the smell, but also the microorganisms that are its sources. This method requires the use of special equipment and must be carried out by specialists.
Aerosols and gels for the home, which are specially designed to combat tobacco smoke, can also become your helpers. Products with silver ions or activated carbon can not only mask, but completely neutralize unpleasant odors.
Prevention of tobacco odor
| Method | Description |
|---|---|
| Regular ventilation | Ventilate the room regularly to eliminate tobacco odors and provide fresh air. |
| Use air purifiers | Install air purifiers with filters to remove odors and particles from the air. |
| Using air scenters | Install air fresheners or diffusers with essential oils to impart freshness and a pleasant smell in the room. |
| Cleaning furniture and textiles | Regularly clean furniture, carpets and textile surfaces, as they can absorb the smell of tobacco. |
| Contact professionals | If there is a persistent smell of tobacco, contact a cleaning professional. |
Conclusion and useful tips
Removing the smell of tobacco from an apartment is a process that requires time and attention. Use a combination of different methods to achieve the best result. Freshen the air regularly and prevent smoking indoors to avoid problems with unpleasant odors in the future.
FAQ:
-
Which method is the most effective for removing tobacco odor?
The effectiveness of the method depends on the degree of penetration of the odor into the materials and the duration smoking. The combination of professional ozonation and the use of specialized cleaning products is considered one of the most effective.
-
Is it possible to completely get rid of the smell if you have smoked for a long time and a lot?
Yes, this is possible, but it will require a serious approach to cleaning all surfaces and perhaps the use of professional methods such as ozonation.
-
How long does it take for the smell of tobacco to disappear naturally?
Weathering time depends on many factors, including smoking intensity and location. With the window open and the door closed, this can take anywhere from a few hours to a few days.
-
Can houseplants be used to combat odor?
Some houseplants may improve air quality, but they are not able to completely neutralize the strong smell of tobacco.
-
How to prevent the smell of tobacco from penetrating from neighboring rooms?
Seal cracks and gaps in doors and windows, regularly ventilate the room and use air purification devices with a good filter.
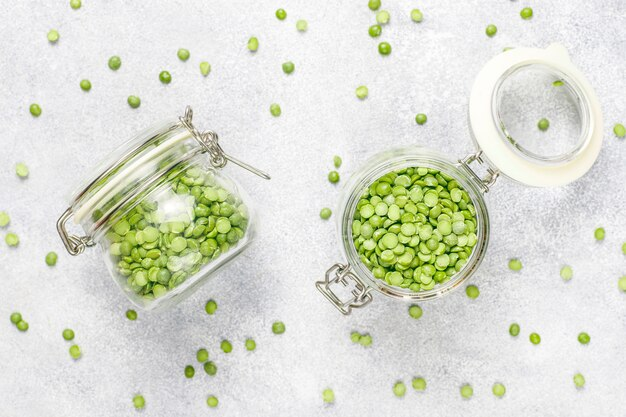
How to preserve green peas at home for the winter: recipes without sterilization in jars
When thinking about how to preserve green peas for the winter at home without sterilization, many housewives choose methods that require minimal time investment and ensuring the preservation of the taste of peas. This method does not require the use of complex technologies and allows you to preserve all useful vitamins and microelements. In this article, we will explain the basic principles and share simple recipes that will help you seal green peas for the winter at home without sterilization, ensuring their safety and taste.
Selecting and preparing green peas for canning
Canning green peas at home for the winter without sterilization begins with careful selection and preparation of the vegetable. Ripe and elastic peas are the key to successful harvesting. The initial product must be fresh and of high quality, because it is during the harvest season that vegetables have an optimal range of taste and beneficial properties. Immediately after harvesting, the peas should be carefully inspected, discarding those pods that are damaged, as they can spoil the entire batch of canned products.
Washed and peeled peas is the next important step. Before you start canning, you need to carry out several preparatory procedures:
- Separate the grains from the pods.
- Thoroughly clean the grains from possible contaminants under running water.
Now that the peas are ready, you can move on to the next stage – the actual canning.
Necessary ingredients and materials
In order to prepare green peas for the winter in at home without sterilization, it is important to prepare all the necessary ingredients and materials. The list of what you will need includes:
Ingredients:
- Fresh green peas
- Clean water
- Salt no additives
- Sugar (optional for sweetening)
- Vinegar (if you want to add preservative properties)
- Bay leaf, dill, and other herbs for flavor
Materials:
- Sterilized glass jars
- Sealing lids
- Large saucepan for preparing saline solution
- Towels for drying jars
Be sure to pre-wash the jars and lids and dry them to avoid moisture getting into the preservation:
- Jars should be well wash using baking soda, then rinse and dry.
- Place the jars on a clean towel, necks up, and let them dry completely.
Once preparation is complete, you can begin the process of canning itself.
Step-by-step instructions: Recipes for canning green peas without sterilization
Canning green peas without sterilization involves several simple steps. This method allows you to preserve the maximum amount of nutrients, and also gives the peas a pleasant taste and aroma.
Recipe using citric acid:
- Place the prepared green peas in jars, leaving free space space to the edges.
- Prepare the brine according to the following proportions: 1 liter of water, 2 tablespoons of sugar, 1 tablespoon of salt and half a teaspoon of citric acid.
Pour in hot brine into jars of peas, make sure the liquid completely covers the peas and screw on the lids. Leave the jars upside down for several hours to check the seal.
Recipe with vinegar and spices:
- Divide portions of peas among the jars, up to two-thirds of the volume of each.
- Prepare the marinade by adding vinegar, bay leaves, a few black peppercorns and salt to taste to boiling water.
Fill the jars with peas with the hot marinade, screw on the lids and turn them over to cool . It is important that the jars are hermetically sealed to prevent spoilage of the product.
Tips and tricks for successful canning without sterilization
In order for harvesting green peas for the winter at home without sterilization to be successful, you must follow a few important points:
- Always leave a small space between the liquid level and the lid to prevent leakage.
- Use only fresh and high-quality ingredients.
- Before rolling check the integrity of the jar and lid.
Storage and use of canned green peas
Proper storage of canned green peas is the key to the fact that the product will retain its properties throughout the winter period.
- Store jars in a cool, dark place, away from direct sunlight.
- Check for seals before use.
Canned peas may be used in a range of dishes – from soups to side dishes, adding rich flavor and nutritional value.
Conclusions
Home canning green peas is not only an economical, but also a healthy way to prepare food for winter. Thanks to the simplicity and availability of ingredients, anyone can prepare delicious and healthy canned food in the comfort of their own home.
Frequently asked questions
Question 1: How long can you store home canned food?
Home canned food can be stored for up to 1 year, provided the jars are sealed airtight and stored in a cool place.
Question 2: Can peas be canned in the freezer?
Yes, green peas can also be preserved by freezing, but they must first be blanched.
Question 3: Can you make changes to the recipe?
Try different spices and herbs, but follow the necessary proportions of salt and vinegar for safe preservation.
Question 4: What to do if the jar is not sealed tightly?
If the jar is not sealed tightly, its contents should be consumed as soon as possible, otherwise it will may spoil.
Question 5: What other vegetables can be canned using this method?
Cucumbers, tomatoes, bell peppers and many other vegetables can also be canned using this method.