
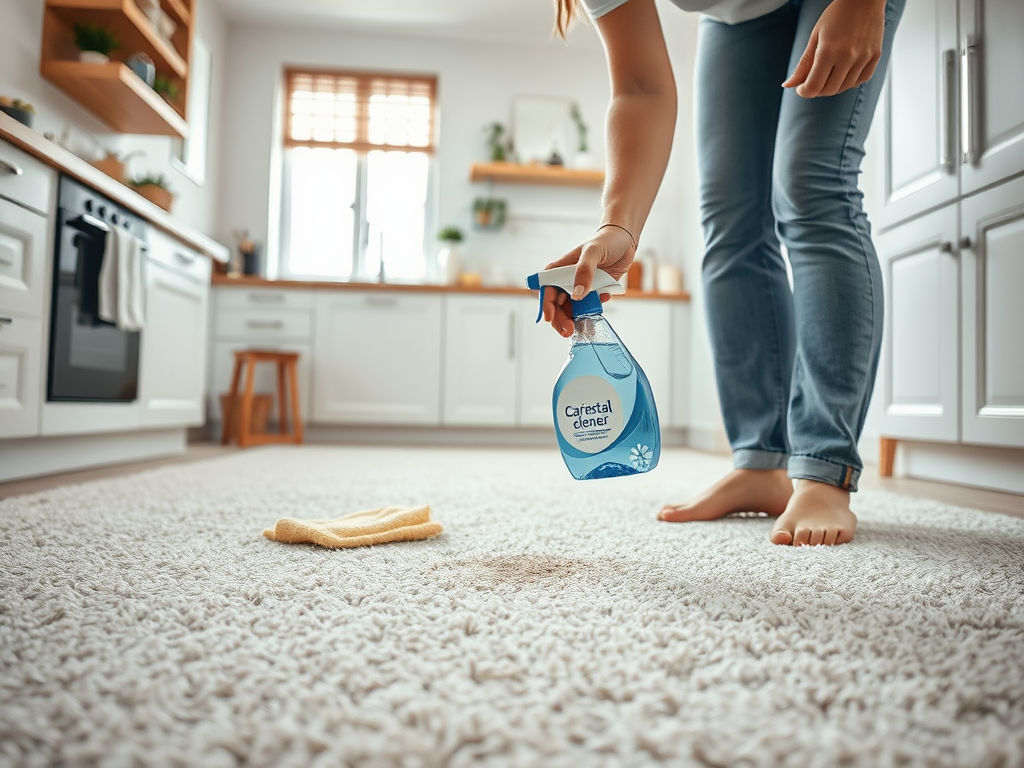
Best Carpet Spot Cleaner: Choosing the Right Product for Your Needs
Finding the right carpet spot cleaner can feel like navigating a labyrinth of options, each boasting unique ingredients and cleaning properties. A dependable spot cleaner is essential for maintaining the beauty of your carpets, especially when faced with the inevitability of spills and stains. Everyone knows that accidents happen, whether it’s a glass of red wine at a gathering or a beloved pet having an unfortunate moment. Understanding what makes one cleaner better suited to your needs compared to another can save you time and frustration in the long run. Rather than treating each stain as a disaster, you can approach cleaning with confidence and equip yourself with the right products and methods. This guide aims to break down the complexities of carpet spot cleaners to help you discover which one is truly the best for your unique circumstances.
Before diving into the specifics of various cleaners and their functionalities, it’s vital to grasp how these products operate. Most carpet spot cleaners work by penetrating and breaking down stains through a combination of cleaning agents, often enhanced with enzymes, detergents, and surfactants. Though they all share a common goal, the effectiveness and suitability can dramatically differ based on the type of carpet, the nature of the stain, and specific formulas. In the sections that follow, we will explore the different varieties of carpet spot cleaners on the market, the factors to consider in your selection process, and crucial tips for optimal results.
Understanding Carpet Spot Cleaners
When it comes to carpet spot cleaners, they generally fall into one of several categories. Understanding these categories helps narrow down options and better can assist consumers in selecting the right solution for their needs. Here’s a breakdown of some common types:
- Foam Carpet Cleaners: These expand upon application for effective penetration into fibers.
- Liquid Carpet Cleaners: Quick to apply and versatile for use with different cleaning tools.
- Enzyme-Based Cleaners: Utilize natural enzymes for eliminating organic stains effectively.
- Portable Carpet Cleaning Machines: Provide heavy-duty assistance for larger messes and persistent stains.
Factors to Consider When Choosing a Carpet Spot Cleaner
Choosing the best carpet spot cleaner means considering several factors that can influence effectiveness and safety. Each cleaning task may require different solutions and approaches. Below are some critical elements to take into account when making your selection.
| Factor | Considerations |
|---|---|
| Fabric Compatibility | Ensure the cleaner suits your specific carpet material to avoid damage. |
| Stain Type | Different stains like grease, ink, and pet accidents require tailored solutions. |
| Environmental Concerns | Look for biodegradable or non-toxic options for a safer cleaning experience. |
| Ease of Use | Consider products that offer user-friendly features for a hassle-free application. |
When selecting your carpet spot cleaner, fabric compatibility is an absolute must. It’s easy to overlook, but applying a cleaner incompatible with your carpet material can lead to costly damage. Stain type is another crucial consideration; understanding whether you’re facing organic stains or tougher substances helps you choose a cleaner specialized for that purpose. If you are concerned about environmental impact, explore eco-friendly options that do not contain harsh chemicals. Lastly, reviewing the ease of use can save time and ensure efficient cleaning, helping you tackle any mess with confidence.
Tips for Effective Spot Cleaning
Once you have selected a suitable carpet spot cleaner, employing effective cleaning techniques will enhance your results significantly. Adopting a methodical approach not only aids in removing stains but also helps extend the life of your carpet. Here are some essential tips for effective spot cleaning:
- Pre-Test the Cleaner: Always conduct a patch test in an inconspicuous area before full application.
- Blot, Don’t Rub: Blotting absorbs the stain better, whereas rubbing can spread it further.
- Follow Manufacturer Instructions: Strictly adhere to the guidelines provided for optimal results.
Using these techniques can make the difference between a quick cleanup and a long, frustrating ordeal. You’ll find that a patch test not only gives you confidence but also safeguards your carpet’s integrity. Blotting an area gently allows for absorption without damaging the fibers, which is crucial for effective stain removal. Also, make sure to follow the guidelines specific to each cleaner; this ensures that you’re utilizing it in the best possible way, achieving the desired results while protecting your carpet. Over time, following these simple tips will keep your carpeting looking pristine and fresh.
Conclusion
Choosing the best carpet spot cleaner is essential for maintaining the aesthetic and longevity of your carpets. By understanding the various types available, evaluating your specific needs, and employing effective cleaning practices, you can make informed decisions. Navigate through the many options by considering factors such as fabric compatibility, stain type, environmental concerns, and ease of use. Equipped with the right information and techniques, you’ll establish a successful cleaning routine that allows stains to be treated swiftly and effectively. Ultimately, protecting your investment in carpets has never been more accessible. You can take the hassle out of cleaning with a little knowledge and the right product in hand.
Frequently Asked Questions
- What types of stains can carpet spot cleaners remove?
Carpet spot cleaners can typically remove a variety of stains, including food stains, pet accidents, grease, and more, depending on the formula. - Are carpet spot cleaners safe for pets?
Many carpet spot cleaners are pet-friendly, but it’s important to check for specific non-toxic or eco-friendly labeling. - How often should I use a carpet spot cleaner?
Spot cleaning should be done as soon as a spill occurs to prevent stains from setting in; regular maintenance is recommended to keep carpets clean. - Is it necessary to rinse after using a carpet spot cleaner?
Some cleaners may require rinsing, while others do not. Always read the product instructions for best practices. - Can I use a carpet spot cleaner on upholstered furniture?
Some carpet spot cleaners can also be used on upholstery, but always read the label to ensure compatibility with fabrics.

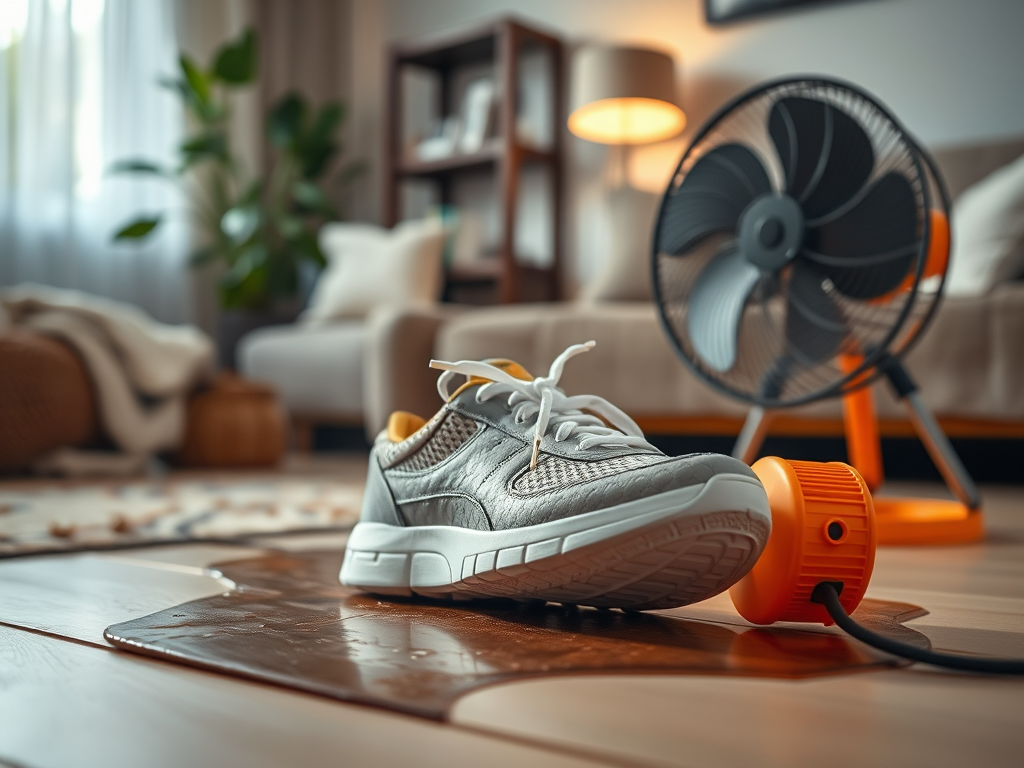
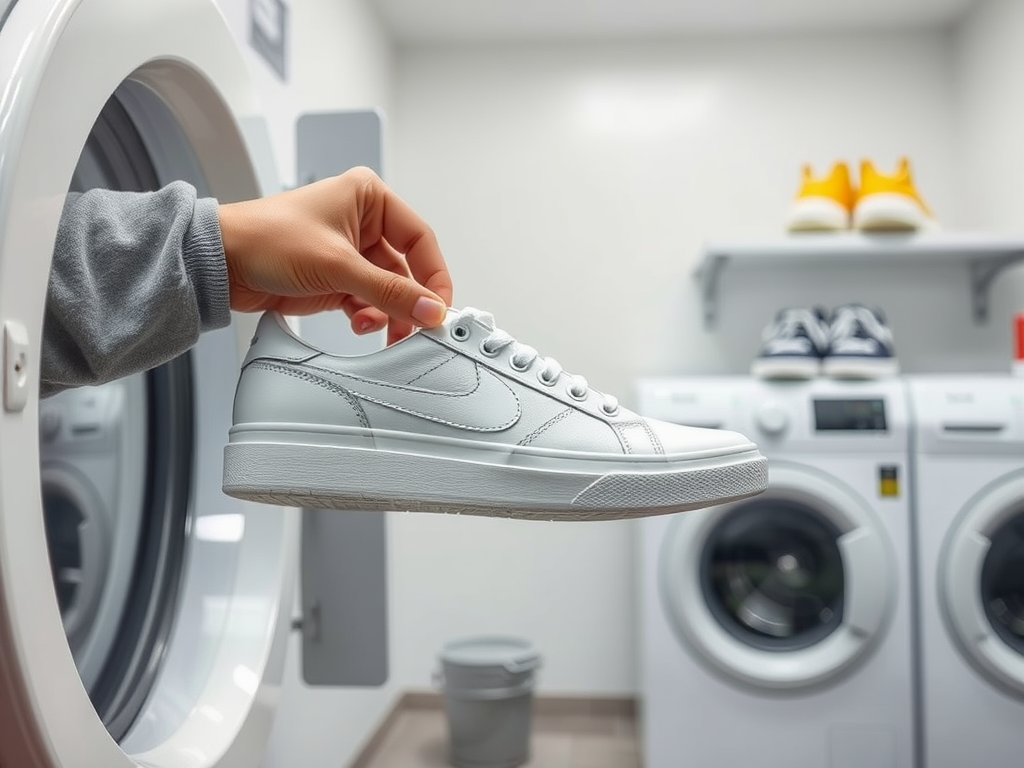
Drying Sneakers in the Dryer: Common Mistakes to Avoid
When it comes to keeping your favorite pair of sneakers clean and fresh, the process of drying them can often take a wrong turn. Many people turn to their dryers, thinking it’s a quick fix, without realizing the potential damage they are causing. The truth is, drying sneakers in the dryer is not as straightforward as it seems. Even if you want to save time, this method can lead to irreversible harm to your footwear. From disfigured shapes to compromised materials, there are numerous pitfalls one can encounter. Understanding the risks and mistakes associated with this approach can save you from a costly replacement down the road and extend the life of your cherished sneakers.
Using a dryer to dry your sneakers requires careful consideration of various factors. Sneakers come in different materials, each responding uniquely to heat and tumbling. It’s crucial to recognize that what works for one type of sneaker may not be suitable for another. Moreover, many individuals overlook little details that can dramatically affect the outcome. In this article, we will explore common mistakes people make when drying their sneakers in a dryer while also offering alternative drying methods that could prove gentler and more effective. So, let’s dive into the hazards of this seemingly innocuous activity.
Why Drying Sneakers in the Dryer Can Be Risky
Drying your sneakers in the dryer presents a myriad of risks that can drastically affect their longevity. First, the heat settings in a typical dryer can prove detrimental, especially to materials like suede or certain types of synthetic fabrics. These materials can shrink, warp, or even become discolored. Additionally, the adhesive used in many sneakers can weaken or break down under high heat, leading to shoe parts becoming detached. Not only can this render your sneakers unwearable, but it can also result in damage to the dryer itself. Mixing different materials in the dryer can also create clumps or tangles that exacerbate the situation. It is worth taking a moment to consider the implications of what seems like a convenient process.
Common Mistakes to Avoid When Drying Sneakers
Before tossing your sneakers into the dryer, it’s essential to be aware of the common mistakes people make that could lead to damaging outcomes. Below are the most frequent errors that can occur during this process.
- Ignoring Care Labels: Always check the care label on your sneakers for specific drying instructions.
- Overloading the Dryer: Filling the dryer past its limit can cause uneven drying and increase the chance of damage.
- Using High Heat Settings: High temperatures can warp or shrink your sneakers, ruining them in the process.
- Material Type: Different materials react differently to heat.
- Dryer Settings: Always opt for low heat or air-dry settings.
- Safety Measures: Ensure your dryer is clean and in good working order to prevent hazards.
Now, let’s take a closer look at specific mistakes that can lead to undesirable results.
| Mistake | Consequence |
|---|---|
| Not using a dryer basket or pillows | Increased risk of knocking and damaging shoes |
| Neglecting to clean the dryer filter | Decreased efficiency and potential fire hazards |
| Mixing shoes with other clothes | Tangling and damage during the drying cycle |
Alternatives to Drying Sneakers in the Dryer
If you’re hesitant about using the dryer to dry your sneakers, you’re not alone. Thankfully, there are many alternative methods that can be far gentler on your shoes. Air drying is one of the most commonly recommended methods. To do this, remove the insoles and laces, then stuff your sneakers with newspaper or paper towels to absorb moisture. This method is simple and requires no equipment. Another technique is placing them in a well-ventilated area or using a fan to speed up the drying process. You can also consider investing in a shoe dryer, designed specifically for this purpose.
Conclusion
In conclusion, drying sneakers in the dryer can be fraught with risks that could easily be avoided. By recognizing these common mistakes and taking the time to explore alternative drying methods, you can significantly extend the life of your favorite footwear. It’s essential to be more mindful of the potential damage that can occur from seemingly small oversights. Proper sneaker care goes a long way, not only preserving aesthetics but also functionality. When it comes to drying, patience is a virtue that truly pays off.
Frequently Asked Questions
- Can I dry all types of sneakers in the dryer? No, not all sneakers are suitable for drying in the dryer. Check the care label for specific guidance.
- What happens if I accidentally dry my sneakers in high heat? High heat can cause materials to shrink, warp, or break down adhesives, potentially ruining your sneakers.
- Are there any quick methods for drying sneakers without a dryer? Yes, methods include stuffing them with newspaper, using a fan, or placing them in a well-ventilated area to speed up the drying process.
- Should I dry my sneakers with other clothes? It’s best to avoid drying sneakers with other clothes to prevent tangling and damage.
- How long does it usually take to dry sneakers properly? Air drying can take anywhere from a few hours to overnight, depending on the conditions and the materials.

Creating a Natural Wasp Repellent Garden: Plants That Keep Wasps Away
Imagine enjoying a sunny afternoon in your garden, only to find a swarm of wasps buzzing around, ruining your peaceful moment. This common scenario has many gardening enthusiasts seeking more effective, eco-friendly solutions. Rather than relying on harsh chemicals to keep these stingers at bay, you can take an innovative approach by creating a wasp-repellent garden filled with specific plants. These plants not only keep wasps away but also enhance the aesthetic appeal and ecological health of your garden. Here, we’ll explore the fascinating world of natural wasp repellent plants, breaking down which ones work best and how to properly integrate them into your landscape.
Understanding the natural behavior of wasps is essential to effectively warding them off. They are often attracted to sweet scents, open food sources, and flowering plants that provide nourishment. Different gardens attract different species, and therefore, knowing the types prevalent in your area can significantly inform your strategy. With the right garden layout and plant selection, you can discourage these pests from invading your sanctuary. This article delves into key plants that naturally deter wasps, effective layout tips, and maintenance strategies that promote a harmonious, wasp-free environment.
Understanding Wasp Behavior
To effectively repel wasps, one must first understand their behaviors and preferences. Wasps are drawn to places where food and shelter are readily available, particularly during late summer when their foraging becomes more intense. Certain flowering plants tend to attract these insects, thereby increasing your chances of an encounter. Conversely, some plants emit natural scents that deter wasps, making them ideal for a garden designed with pest control in mind. Recognizing the elements that entice wasps allows for informed gardening decisions to keep your garden tranquil.
Key Plants to Include in Your Wasp Repellent Garden

Creating a wasp-repellent garden starts with selecting the right plants. Below are several types of plants, forming the backbone of your eco-friendly strategy.
Herbs That Deter Wasps
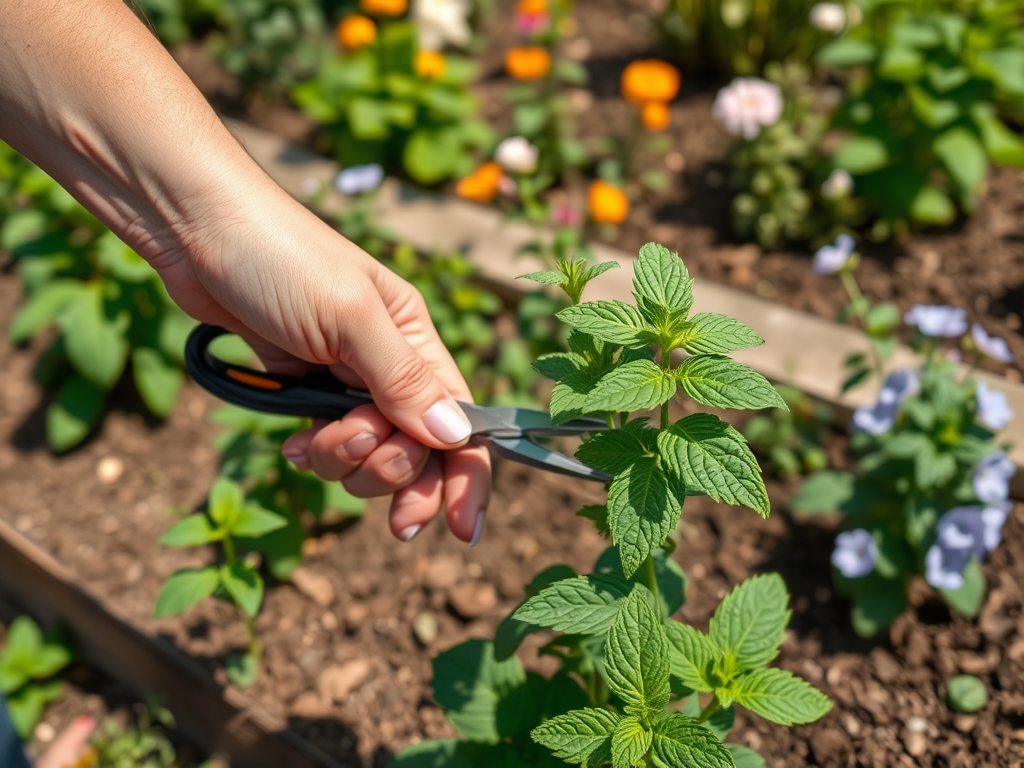
- Mint: This aromatic herb not only adds flavor to your dishes but also effectively keeps wasps at bay with its strong scent.
- Basil: Known for its culinary uses, basil also serves as an effective wasp repellent and grows well in containers.
- Rosemary: The robust smell of rosemary is unappealing to wasps and makes it a great addition to any garden.
Flowering Plants That Keep Wasps Away
- Marigold: These vibrant flowers not only enhance your garden’s beauty but also repel wasps with their pungent aroma.
- Geranium: Known for their colorful blooms, geraniums act as natural repellents against these pests.
- Citronella: Often used in candles and sprays, this plant’s distinct scent is a powerful deterrent.
Bushes and Shrubs That Help
- Lemon Balm: This bushy herb emits a strong lemon scent that is known to deter wasps, making it an excellent choice.
- Eucalyptus: With its refreshing aroma, eucalyptus not only repels wasps but is also an attractive addition to any garden.
| Plant Type | Benefits | Growth Environment |
|---|---|---|
| Mint | Deters wasps with strong aroma | Partial shade to full sun |
| Marigold | Bright colors, pest-repelling | Full sun |
| Eucalyptus | Refreshing scent that repels | Sunny areas with well-drained soil |
Creating the Perfect Garden Layout
Once you’ve chosen your wasp-repellent plants, the next step is to arrange them thoughtfully within your garden. Consider clustering certain plants together to heighten their efficiency, especially around seating areas or picnic spots. Keeping herbs and flowering plants near your dining locations can create a natural barrier against wasps. Additionally, maintaining an organized layout prevents overgrowth, which could attract unwanted pests. Ultimately, strategic placement of your plants will enhance their repelling power while creating a visually appealing environment.
Additional Tips for Maintaining a Wasp-Free Garden
To supplement your efforts in keeping wasps away, regular garden maintenance should not be overlooked. Here are some actionable tips to maintain a wasp-free environment:
- Regularly prune plants to avoid overgrowth and reduce potential nesting areas.
- Keep the area clean by promptly removing any food debris or food containers.
- Consider companion planting with other types of beneficial plants that either repel or attract natural predators of wasps.
Conclusion
By creating a natural wasp-repellent garden, you not only enhance the beauty of your outdoor space but also create a safer environment for relaxation and recreation. Employing natural plants for pest control is a sustainable approach that benefits your garden’s ecosystem. Plants like mint, marigold, and eucalyptus provide dual functions—keeping wasps at bay while enriching your landscape. Thus, venture into this eco-friendly gardening strategy and enjoy the outdoors with confidence, knowing your wasp-repellent garden will keep pesky wasps away.
Frequently Asked Questions
- What are the best plants to repel wasps? Mint, basil, marigold, and geranium are among the best plants to deter wasps.
- How can I design my garden to keep wasps away? Use a combination of repelling herbs and flowers and strategically place them near areas where you wish to deter wasps.
- Are there other methods to keep wasps from invading my garden? Yes, maintaining a clean garden, using traps, and planting certain repellents can help.
- Is a wasp-repellent garden safe for other beneficial insects? Yes, many wasp-repellent plants also attract beneficial insects, contributing to a balanced ecosystem.
- Can I grow these plants in containers? Absolutely! Many wasp-repelling plants thrive in containers, making them flexible for various spaces.

Can Weevils Fly? Debunking Common Myths About These Insects
Weevils are often overlooked when it comes to interesting and curious insects. With their characteristic elongated snouts and diverse appearances, they spark intrigue among many who encounter them. But a prevalent question lingers in the minds of many: can weevils fly? Understanding weevils entails much more than simple observation; it requires delving into their biology, behavior, and habits. The myths surrounding their flying capabilities contribute to widespread misconceptions about these fascinating beetles. This article aims to unravel the truth, explore the various types of weevils, and clarify their potential for flight.
What Are Weevils?

Weevils belong to the family of beetles known scientifically as Curculionidae, renowned for their distinctive snouts. These insects are an incredibly diverse group, with thousands of species documented worldwide. Not only do they have unique physical traits, but they also occupy a wide range of ecological niches—from gardens and farms to household pantries. Each species possesses characteristics that help them adapt to their environments. Understanding weevils is fundamental in appreciating their role in nature and their impact on human endeavors, particularly in agriculture.
Types of Weevils
- Grain Weevil: Infests stored grains and significantly affects food supplies.
- Rice Weevil: Known for its damaging effects on rice; it’s a common pest in many households.
- Cotton Weevil: A notorious pest that targets cotton crops, leading to economic losses.
- Acorn Weevil: Typically found in forests, known for its interesting life cycle involving oak trees.
Habitat and Behavior
Weevils can be found in a variety of habitats such as woodlands, fields, and even urban areas. Their preferred living environments often correlate with the types of food they consume, which can include seeds, leaves, and stored grains. These pests exhibit behaviors that make them adept at survival, including their ability to hide from predators. Additionally, certain weevils have developed beneficial relationships with plants, helping to pollinate while also feeding. Understanding their behavior is crucial in both ecological terms and for managing their impact on crops.
Do Weevils Have Wings?
The anatomy of weevils raises an interesting question about their ability to fly. While many insects have evolved wings that allow for significant airborne mobility, weevils exhibit unique adaptations that affect their flight capabilities. Most weevils possess what is known as ‘elytra,’ which are hardened forewings that cover their back and serve as protection. However, the structure of these wings varies among species and has implications for whether they can actually take to the air. Not all weevils have functional wings for flight, and many are primarily ground-dwelling creatures.
To comprehend the potential for flight in weevils, it’s essential to understand the anatomical structure of their wings. Unlike many flying insects, weevil wings can be quite short or even non-functional. This leads to differences in the way they move and travel. The variations can also provide insights into evolutionary adaptations to their environments. For instance, while some weevils may retain the capability for flight, others have adapted to a more terrestrial lifestyle, relying on crawling for movement instead. This diversity is a remarkable example of nature’s ability to adapt for survival.
Common Myths About Weevils
As with many aspects of nature, myths about weevils and their flying capabilities abound. These misconceptions often stem from a lack of understanding about their biology and behavior. It’s essential to address these myths to set the record straight. Here, we’ll debunk some prevalent beliefs regarding weevils.
Myth 1: All Weevils Can Fly
Many people assume that the presence of wings equates to the ability to fly. In reality, this is far from the truth. A significant proportion of weevil species are incapable of flight due to their wing structure. While some weevils may use their wings to glide short distances in specific situations, most prefer to remain grounded where they can safely navigate their environment in search of food.
Myth 2: Weevils Use Flight as Their Primary Mode of Travel
Another common misconception is that weevils primarily rely on flight for movement. In fact, this is not accurate. While the ability to fly exists among some weevil species, most weevils utilize walking as their primary means of travel. They tend to crawl around in search of resources, using flight sparingly, primarily during certain environmental conditions or when escaping predators. Understanding these behavior patterns provides perspective on how these insects interact with their environment.
Why Some Weevils Do Fly
Despite common myths, some weevil species do possess the ability to take to the air under certain circumstances. Various factors trigger this rare activity, including changes in environment, food scarcity, and reproductive behaviors. The selective nature of flight in weevils points towards its role in broader ecological functions. Understanding these triggers helps to illuminate the weevil’s existence and its adaptations to survival.
- Food Scarcity: When food supplies diminish, flying may help weevils locate new resources.
- Mating: Males may fly to attract females or to reach reproductive areas.
- Predator Evacuation: Weevils might take flight to escape predation, ensuring their survival and continuing their lifecycle.
| Weevil Species | Ability to Fly | Main Habitat |
|---|---|---|
| Grain Weevil | Yes | Stored grains |
| Rice Weevil | Yes | Rice storage |
| Cotton Weevil | No | Cotton fields |
| Acorn Weevil | No | Forests |
Conclusion
In summary, we’ve journeyed through the intriguing world of weevils, addressing the vital question of whether these beetles can fly. While some weevil species possess wings and the ability to take to the air, the majority do not utilize flight as a primary mode of travel. The common myths surrounding their abilities often stem from a misunderstanding of their unique biological adaptations. By clarifying these myths, we gain a more nuanced understanding of weevils—an entirely fascinating and ecologically significant group of insects. Whether infesting crops or residing in gardens, weevils continue to play critical roles in agricultural ecosystems.
Frequently Asked Questions
- Can all weevils fly?
No, not all weevils have the ability to fly. Many species are ground-dwelling insects and do not possess the necessary anatomical structures for flight. - What is the purpose of a weevil’s wings if they can’t fly?
The wings may assist in other functions such as balance during movement or protection during their lifecycle stages. - How far can flying weevils travel?
Flying weevils can travel short distances, often in search of food or mates, but their flight is typically not extensive. - Are flying weevils a concern for households?
While they can infest food products, their flying ability generally does not make them a greater threat compared to non-flying species. - Can weevils be prevented from entering homes?
Yes, proper food storage, regular cleaning, and sealing entry points can help prevent weevils from becoming a household nuisance.

How to Choose the Right Color for Your Bathtub Resurfacing Project
Choosing the right color for your bathtub resurfacing project isn’t just about aesthetics; it’s an opportunity to express your personal style and rejuvenate your bathroom. The color can invoke various feelings and set a specific mood for the space, transforming it into a relaxing oasis or a vibrant, energetic environment. Understanding the psychological effects of color and how they interact with light and other elements of your bathroom can be daunting. However, with the right guidance, you can confidently navigate this decision-making process. Whether you’re considering a classic white tub or an eye-catching bold color, the right choice will truly elevate your bathroom aesthetics and functionality.
Before diving into color selection, it’s essential to understand how different hues can drastically alter the perception of a space. This article will explore how to choose the right bathtub color by considering various factors, exploring color options, and making informed choices based on existing décor and personal preferences. By the end, you’ll be well-equipped to make a choice that not only complements your bathroom but also resonates with your unique style.
Understanding the Impact of Color on Your Space
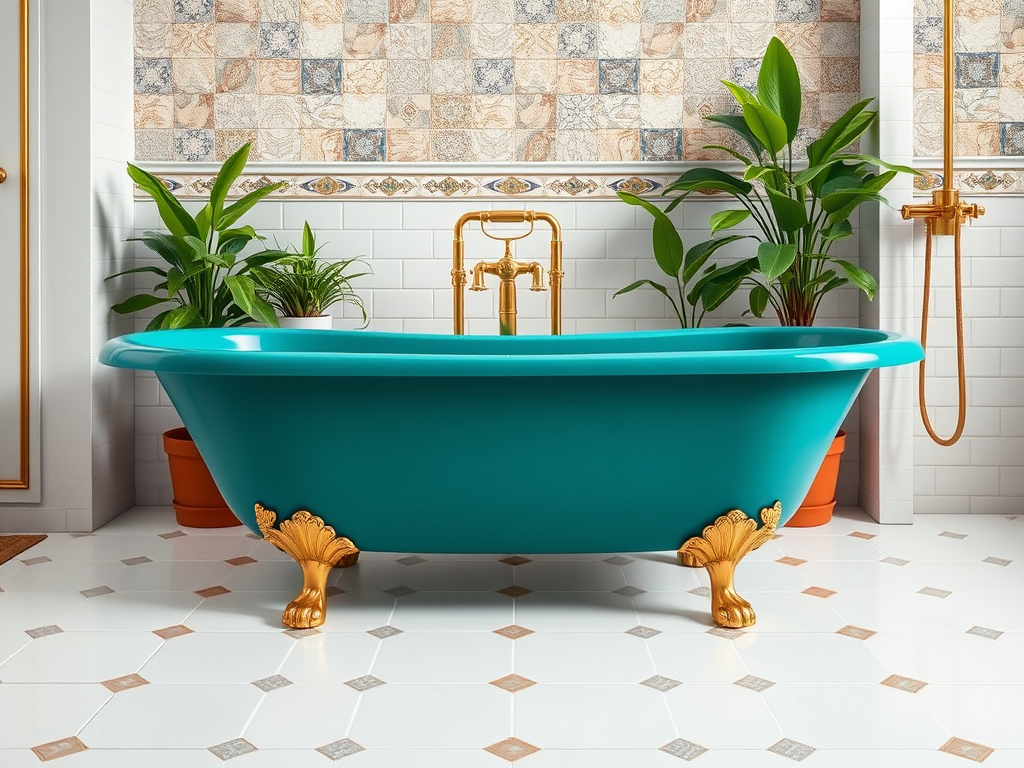
Choosing the right color for your bathtub can significantly influence the overall ambiance of your bathroom. The color you select should complement your existing décor while also reflecting your personal style. Colors evoke emotions and experiences, which is why understanding their impact is crucial. For example, blue shades are often associated with calmness and tranquility, making them ideal for a relaxing bath experience. On the other hand, vibrant colors like red can energize the space. It’s important to consider the long-term effects of color as you will be living with your choice day in and day out.
Factors to Consider When Choosing a Bathtub Color

One of the first steps in the bathtub resurfacing process is determining the color that best suits your needs. Here are several key factors to keep in mind:
Bathroom Size and Lighting
The size of your bathroom and the amount of light it receives can greatly affect how colors appear. It’s crucial to consider how light interacts with colors, allowing them to shift in hue and intensity throughout the day.
- Smaller Bathrooms: Lighter colors may help the space feel more open and airy, while dark colors can create a cozy atmosphere.
- Lighting: Natural light enhances certain shades, so consider testing colors under different lighting conditions.
Existing Décor and Fixtures
Your choice should harmonize with your existing bathroom features. A cohesive look contributes to a more sophisticated environment. To achieve this, keep the following in mind:
- Tiles and Countertops: Ensure your bathtub color coordinates well with these elements to create a unified aesthetic.
- Fixtures: Look at the finishes of faucets and other hardware to ensure a balanced look throughout the space.
By paying attention to these elements, you can ensure a visually appealing space that feels intentional and polished.
Exploring Color Options for Bathtub Resurfacing
With a clearer understanding of what factors to consider, it’s time to explore different color options. Each color has its own unique character, and the right choice can elevate your bathroom design:
| Color Type | Description | Best For |
|---|---|---|
| Neutral Colors | Timeless and versatile options that can complement almost any bathroom décor. | Classic look, harmonizing with various styles. |
| Bold Colors | Vivid shades that create eye-catching statements and enhance modern designs. | Contemporary or eclectic spaces. |
| Pastel Shades | Soft colors that provide a tranquil and serene atmosphere. | Vintage or whimsical designs. |
With this foundation, you can proceed to explore specific color options and how they align with your personal taste and bathroom theme. Make sure to visualize how these colors can come together harmoniously in your space.
Conclusion
Choosing the right color for your bathtub resurfacing project is instrumental in transforming your bathroom space. By considering factors such as bathroom size, lighting, existing décor, and your personal preferences, you can arrive at a color that enhances your bathroom while aligning with your style. Take your time with the decision process, and don’t hesitate to seek inspiration from various sources—whether it’s a design magazine, online platforms, or visits to showrooms. Ultimately, the end result should be a space that feels inviting and reflects your unique personality.
Frequently Asked Questions
- What are the most popular colors for bathtub resurfacing? Popular choices include white, light grey, and soft pastels, as they are versatile and timeless.
- Can I match my bathtub color with wall paint? Absolutely! Just ensure that the overall tone complements both the bathtub and the wall colors.
- How do different colors affect bathroom space? Lighter colors can create an illusion of space, while darker hues can make a large bathroom feel cozier and intimate.
- Is it okay to choose a trendy color? While trendy colors can enhance your space, it’s wise to consider how they will age over time and whether you will still enjoy them in the future.
- Should I test paint samples before deciding? Yes, it’s advisable to test samples in your bathroom’s lighting to see how they look throughout different times of the day.

The Role of Grow Lamps in Indoor Plant Care for Beginners
Indoor gardening has become a refuge for many city dwellers sheltering amidst concrete jungles, where the sun’s rays might not always reach. A multitude of individuals have found immense joy in nurturing indoor plants, which not only beautify their spaces but significantly improve indoor air quality. However, as any seasoned gardener knows, successful indoor plant care requires more than merely displaying greenery on a windowsill; it necessitates meticulous attention to light sources. For beginners, grasping the crucial role of grow lamps can transform their plant care journey and lead to flourishing foliage. This article delves into the indispensable function of grow lamps, breaking down their types, benefits, and effective usage strategies that will empower new gardeners to unlock the full potential of their indoor plants.
Grow lamps are artificial lighting solutions specifically crafted to replicate the sunlight that plants crave for photosynthesis. When the natural light is inadequate, particularly in winter months or in rooms with limited sunlight, these lamps step in as bright proxies for the sun. For beginners unfamiliar with the intricacies of indoor gardening, understanding grow lamps can seem daunting; however, once familiarized, they can serve as a bridge to creating conditions that promote robust plant growth. Not only do these lamps help plants thrive, but they also support diverse plant types, allowing newcomers to experiment with various species. By providing adequate illumination, grow lamps combat the issues of common indoor plant failures and empower new gardeners to embrace their green thumbs wholeheartedly.
Understanding Grow Lamps
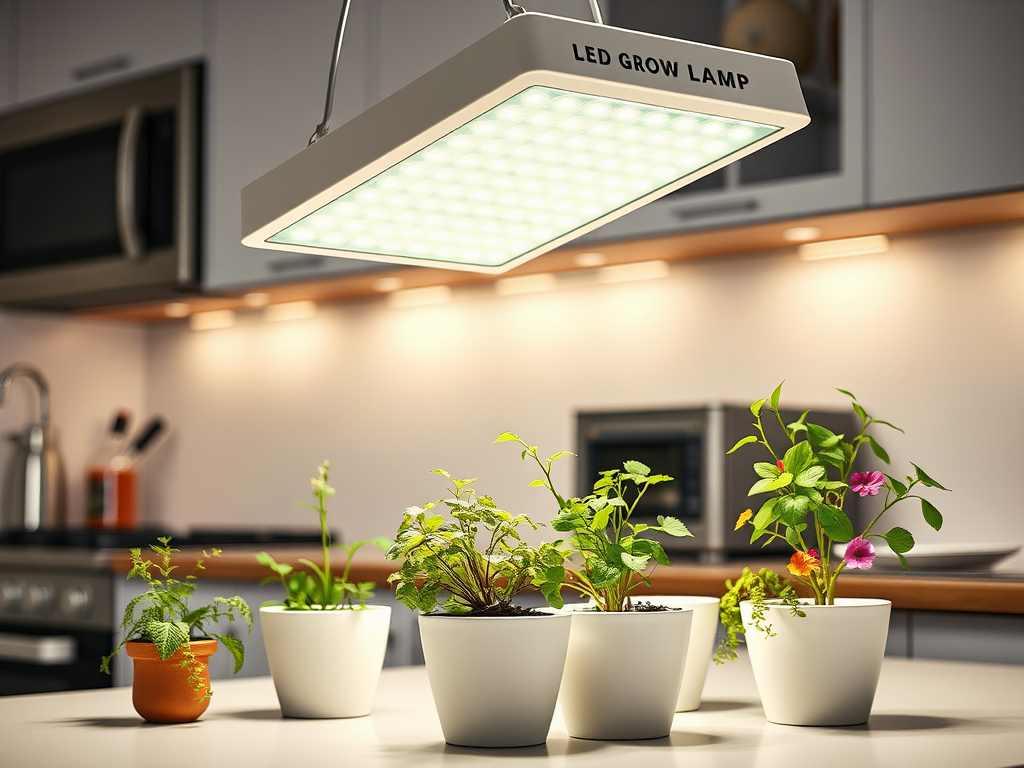
At its core, a grow lamp’s primary function is to offer the right spectrum of light needed for plant growth inside your home. Grow lamps cater specifically to the unique light requirements of varying plant types, making them essential tools for anyone serious about indoor gardening. Implementing them effectively can address issues such as leggy growth and lack of flowering, which often plague plants kept in poor lighting conditions. It’s worth noting that different types of grow lamps are available, each with distinct features and advantages. Familiarizing yourself with these types will allow you to select the right one for your specific plants and growing conditions. Below, we will explore the various types of grow lamps available to help you make an informed decision.
Types of Grow Lamps

| Type of Grow Lamp | Advantages | Considerations |
|---|---|---|
| LED Grow Lamps | Energy-efficient, long-lasting, emits full spectrum light | Higher initial cost |
| Fluorescent Grow Lamps | Affordable, soft light, good for seedlings | May require more frequent replacement |
| High-Intensity Discharge (HID) Lamps | Powerful and effective for larger plants | Produces a lot of heat, requires proper ventilation |
When selecting a grow lamp, understanding the nuances of these options enables effective plant care. Here’s a breakdown of the principal types:
- LED Grow Lamps: Known for their energy efficiency and long lifespan, LED grow lamps emit a full spectrum of light, making them suitable for all growth stages.
- Fluorescent Grow Lamps: These lamps are budget-friendly, providing a soft light that works well for seedlings and shade-loving plants.
- High-Intensity Discharge (HID) Lamps: While powerful and favored for extensive setups, HID lamps produce substantial heat, making ventilation paramount for indoor use.
Benefits of Using Grow Lamps
The incorporation of grow lamps into your indoor gardening toolkit comes with a wealth of benefits that can radically enhance the health of your plants. The clearest advantage is the consistent availability of light that these lamps provide, allowing gardeners to regulate light exposure precisely. This regulation can be pivotal in preventing issues caused by insufficient light, such as slow growth or wilting leaves. Additionally, with the right grow lamp, you can create optimal growing conditions tailored to the needs of specific plants, encouraging rich colors and vibrant growth. Furthermore, grow lamps are particularly valuable during seasons when natural sunlight is scarce; they help maintain stable growth cycles irrespective of seasonal changes. Ultimately, these benefits combine to foster a thriving indoor garden that can bring joy and life into your home.
Choosing the Right Grow Lamp
Selecting the ideal grow lamp requires an understanding of both your plants’ needs and your personal growing conditions. This informed decision will steer you toward the lamp that suits your scenario best. Here are some key factors to consider while making your choice:
- Type of Plants: Assess the specific light requirements for your plants—succulents typically need a higher intensity compared to low-light plants like ferns.
- Space Assessment: Evaluate the dimensions of your growing area to ensure that the lamp not only fits but provides sufficient coverage.
- Budget Constraints: Weigh the upfront cost against the long-term savings on energy and replacements; often, a slightly higher investment in quality can save more down the line.
By keeping these tips in mind, beginners can navigate the myriad options available on the market and choose a grow lamp that meets their needs effectively.
Practical Tips for Using Grow Lamps
To maximize the impact of grow lamps, adherence to best practices is essential. Understanding how to position and use these lamps not only enhances plant health but also prolongs lamp life. Start by adjusting the height of the lamp as needed to ensure your plants receive the optimal amount of light without risking damage. Setting a consistent light schedule is equally crucial; most plants thrive best with around 12-16 hours of light daily, mimicking the natural light cycle. Moreover, continuously monitoring how your plants respond to the grow lamp will allow you to make necessary adjustments based on growth patterns. For beginners, these practices can significantly improve the likelihood of cultivating a verdant indoor space and will advance one’s skills in nurturing plants effectively.
Conclusion
In conclusion, grow lamps serve as indispensable allies in indoor plant care, particularly for those just starting their gardening journey. By grasping the types of grow lamps available and their specific benefits, beginners can make informed decisions that will bolster their indoor gardening endeavors. Furthermore, practical tips around lamp usage can ensure a flourishing indoor garden, regardless of the prevailing natural light conditions. As you embark on this rewarding and green journey, let grow lamps illuminate not just your plants but also your passion for nurturing life indoors.
Frequently Asked Questions
- What is the best type of grow lamp for beginners? LED grow lamps are ideal for beginners due to their efficiency and adaptability.
- How many hours should I keep my grow lamp on? Most plants benefit from 12-16 hours of light per day.
- Do I need a grow lamp for low-light plants? While low-light plants can survive in limited light, using a grow lamp can help promote more vigorous growth.
- Can I use regular light bulbs for plant growth? Regular light bulbs fall short in providing the necessary light spectrum, making grow lamps a more effective choice.
- How far should grow lamps be from plants? The distance varies by lamp type; generally, LEDs should be 12-24 inches above plants, while HID lamps should be placed further due to heat production.
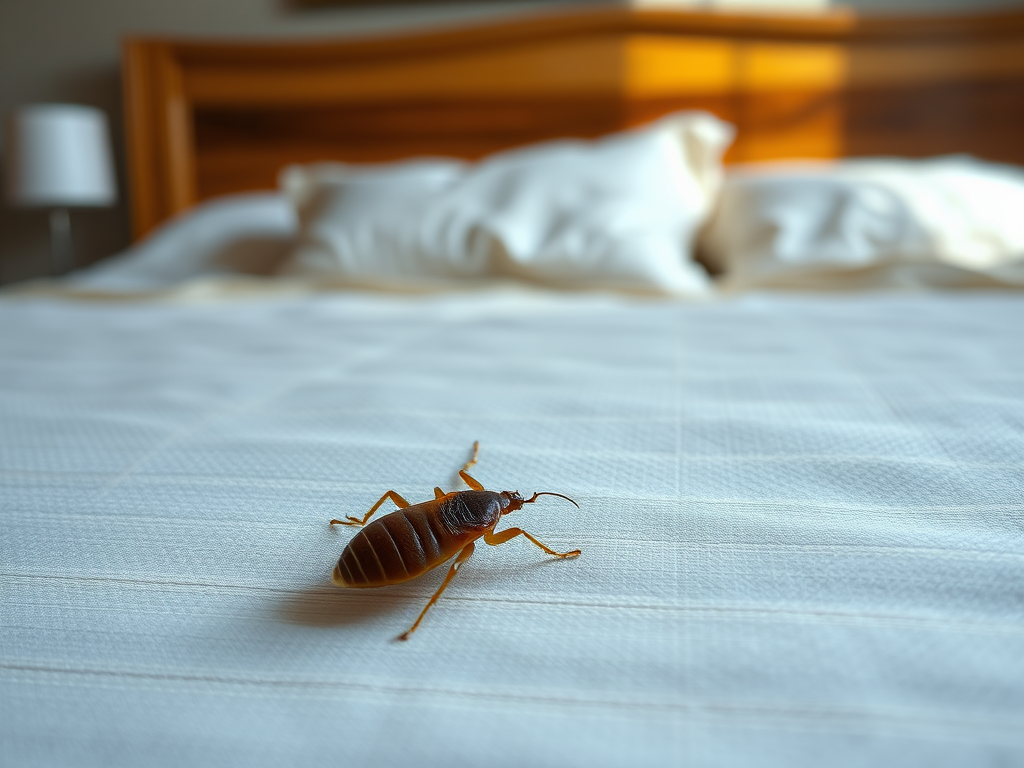
Bed Bugs vs. Beetles: What You Should Know
Understanding the differences between bed bugs and beetles is crucial for effective pest management. These two groups of insects may inhabit your space, but their impacts are vastly different. While bed bugs may disrupt your sleep with their blood-sucking tendencies, beetles can invade your pantry or destroy your furniture. Learning to identify these pests and their behavior is essential, not only for comfort but for safeguarding your property. This article dives deep into their characteristics, signs of infestation, treatment methods, and preventive measures to help you differentiate between the two and take effective action if needed.
Understanding Bed Bugs
Bed bugs belong to the Cimicidae family, and their most notable species is the Cimex lectularius. Historically, bed bugs were common and associated with unsanitary conditions, but their resurgence in recent years is linked to increased travel and lack of awareness. They are nocturnal creatures that feed primarily on human blood, making them a significant nuisance. These pests usually reside in mattresses, box springs, and bedding, but they can also be found in furniture and even behind wall decals. Their life cycle comprises three significant stages: egg, nymph, and adult, with each stage requiring a blood meal to progress. Due to their ability to reproduce quickly and hide well, bed bugs can quickly turn into a serious infestation.
Characteristics of Bed Bugs
Bed bugs are small, flat, and reddish-brown insects, typically about 1/4 inch in size. Their body shape allows them to hide in tiny crevices, making detection challenging. An adult bed bug is roughly the size of an apple seed, and their bodies swell after feeding, becoming more elongated and dark in color. Unlike many insects, bed bugs lack wings, limiting them to crawling, which they do very efficiently. You may also notice the distinct scent of bed bugs if there is a large infestation; they emit a musty odor due to the oils in their secretions. Understanding these characteristics can provide a better chance of identification and treatment.
Recognizing a bed bug infestation early can save you both time and money. Here are some signs to look for:
- Red, itchy bite marks on your skin, often arranged in lines or clusters.
- Small, dark spots of bed bug feces on bedding or walls.
- Shed exoskeletons found near hiding places.
- A musty odor in areas where they congregate.
- Visible live bugs around the seams of mattresses and furniture.
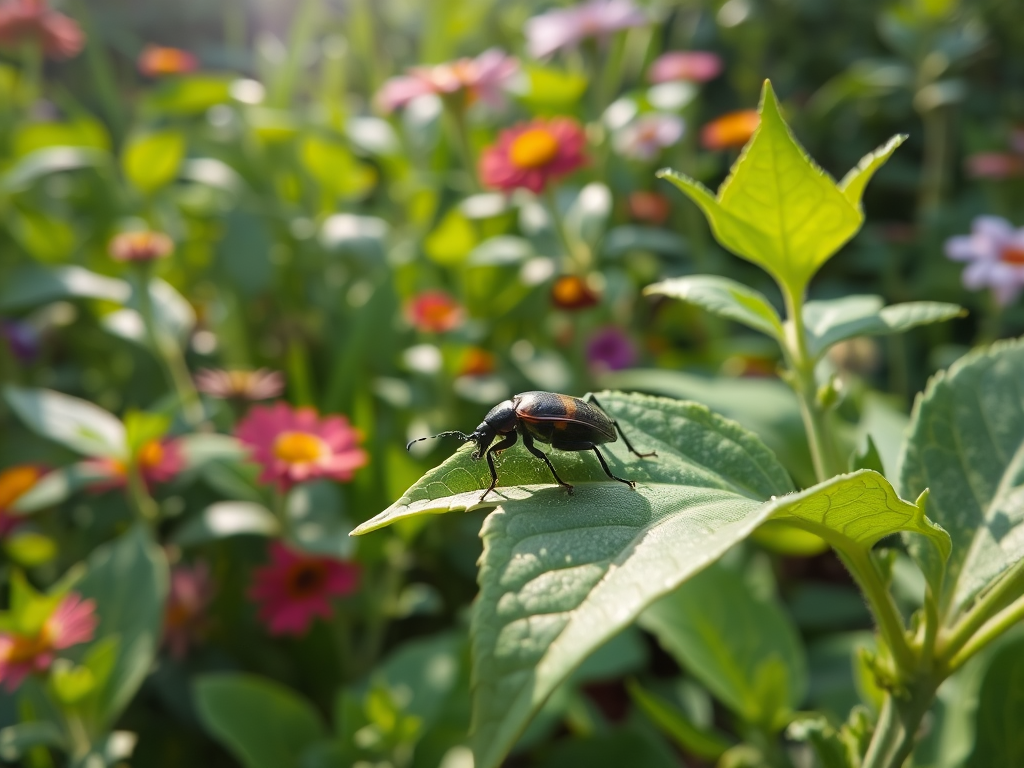
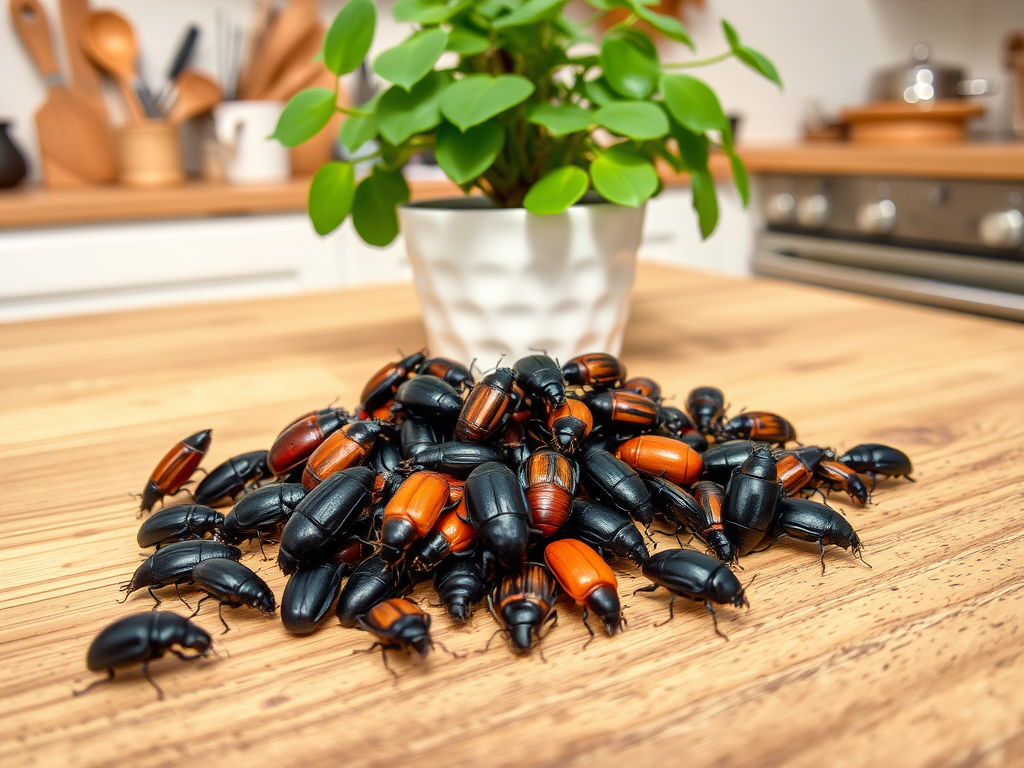
Understanding Beetles
Beetles are one of the most diverse and numerous Coleoptera insects, encompassing approximately 350,000 described species globally. They play various ecological roles, from pollinators to decomposers, but some species can be pests in households. Common household beetles include the carpet beetle, furniture beetle, and pantry beetle. Each type has distinct features and behaviors, turning them into either benign insects or significant nuisances. Beetles reproduce rapidly, which can lead to extensive damage if not managed efficiently. Knowing the differences within this broad group is essential for effective pest control and prevention.
Characteristics of Common Household Beetles
Common household beetles vary in appearance, but many share similar physical traits. Generally, they have hard, shell-like wings and a compact, oval body structure. Here are some distinguishing characteristics:
- Carpet beetles: Oval-shaped, 1/8 inch long, and often have a mottled appearance due to colored scales.
- Furniture beetles: Approximately 1/4 inch long, with a brownish color and elongated cylindrical shape.
- Pantry beetles: Dark brown to black, about 1/8 inch long with a long, narrow body.
Identifying a beetle infestation early can prevent severe damage to your belongings. You may notice:
- Presence of larvae or adults around infested items.
- Holes or irregular shapes in fabrics, carpets, or wood.
- Visible droppings that resemble small black grains.
- Damaged food packages in the pantry.
| Characteristic | Bed Bugs | Beetles |
|---|---|---|
| Size | 1/4 inch | Varies (1/8 – 1/4 inch) |
| Feeding behavior | Parasitic (blood-sucking) | Herbivorous or detritivorous |
| Signs of infestation | Bites, fecal spots, shed skins | Damage to materials, live bugs |
Comparing Bed Bugs and Beetles
When comparing bed bugs and beetles, there are clear distinctions in behavior, habitat preferences, and the impact they have on human health and property. Bed bugs are notorious for feeding on blood, primarily affecting sleeping areas, while beetles can be found in various places depending on their species, including food stores and wooden structures. The importance of understanding these distinctions cannot be overstated, as treatment approaches vary widely. Integrated pest management or consulting professionals is often required for bed bugs, whereas many beetle issues can be handled with improved sanitation and preventive measures.
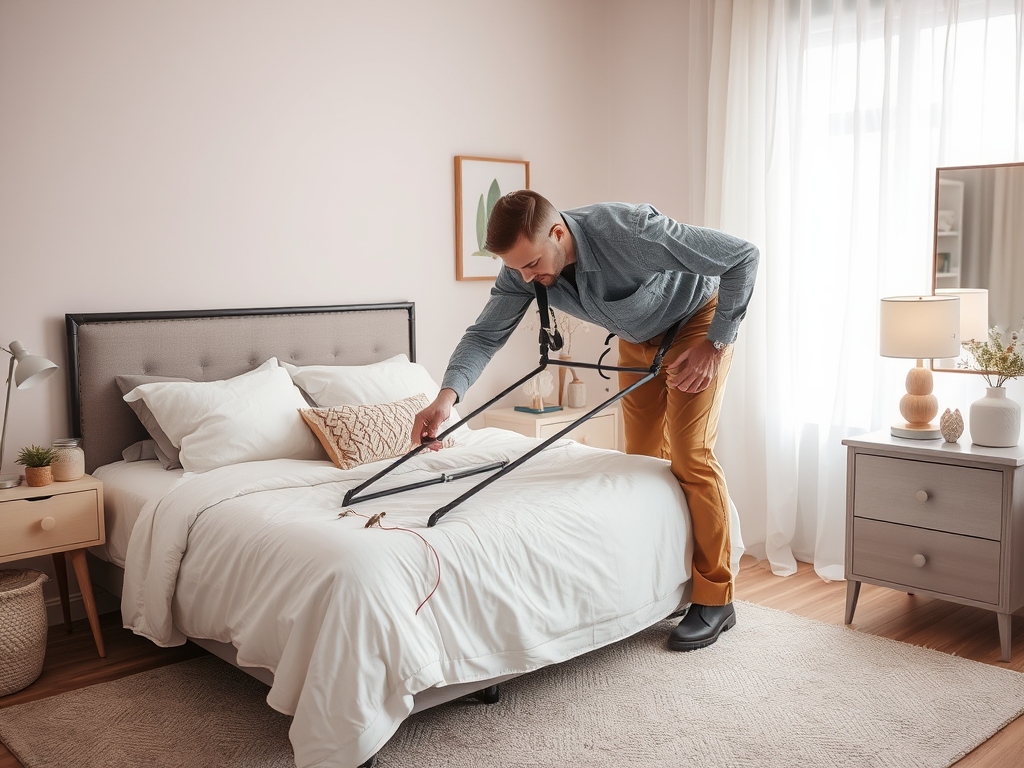
Treatment and Prevention
Effectively treating bed bugs necessitates a thorough approach. Here are some recommended methods:
- Heat treatments, which involve raising the temperature of infested items to kill all life stages.
- Vacuuming infested areas and using encasements for mattresses and box springs.
- Professional extermination services for significant infestations.
On the other hand, treatment for beetles varies by species. In general, here are some prevention measures that can help:
- Regular cleaning and vacuuming to reduce food sources.
- Sealing cracks and crevices to prevent entry.
- Using airtight containers for food storage.
Conclusion
Identifying the differences between bed bugs and beetles is vital for effective pest management. Understanding their unique characteristics, signs of infestation, and treatment options enables homeowners to take appropriate action. While both can be troublesome, their treatment and prevention methods differ significantly. By staying informed and vigilant, you can protect your home from these pests and mitigate their impact on your life.
Frequently Asked Questions
- What is the main difference between bed bugs and beetles? Bed bugs are parasitic insects that feed on human blood, while beetles are a diverse group of insects that can include both beneficial and destructive species.
- Can bed bugs fly? No, bed bugs cannot fly; they are wingless and move by crawling.
- How can I identify a bed bug bite? Bed bug bites often appear as small, red welts in a line or cluster, typically accompanied by itching.
- Do all beetles cause damage to the home? No, not all beetles cause damage. Some species, like ladybugs, are beneficial, while others, like carpet beetles, can be destructive.
- What is the best way to get rid of bed bugs? Professional pest control is often recommended, though high-temperature washing, vacuuming, and using bed bug encasements can also help.
- How do I prevent a beetle infestation? Keeping a clean home, sealing potential entry points, and using traps can help prevent beetle infestations.

The Art of Zipper Repair: When to DIY and When to Seek Help
Zippers are among the most vital components of our clothing and accessories, keeping everything from our pants to our bags securely closed. Yet, how often do we take a moment to appreciate their craftsmanship until something goes awry? Picture this scenario: you’re getting ready for an important event, and your jacket zipper gets stuck or even worse, breaks. It’s enough to send anyone into a panic, but the good news is that not all zipper troubles spell disaster. Knowing whether a zipper issue is a quick DIY fix or something that requires professional help is an art in itself.
Often, we form emotional connections with our belongings. A favorite jacket or a cherished backpack may hold not just our essentials, but memories. This connection can make the decision to repair or replace even more challenging. Understanding the common problems that zippers face and having a strategy for repair can save both your favorite items and your sanity. This guide will help you navigate the waters of zipper repair, exploring when to grab your sewing kit and when to call in the experts.
Understanding Common Zipper Problems

Many of us encounter zipper issues at some point, but not everyone knows what to do about them. Stuck zippers, broken pulls, and misaligned teeth are among the most common offenders. Recognizing these issues is crucial, not just for the effective management of fabrics but also to prevent further damage. Below are some of the frequent problems:
- Stuck zipper: Often caused by dirt or fabric interference.
- Broken pull: A missing or damaged zipper slider renders the zipper useless.
- Misaligned teeth: This may lead to the zipper failing to close properly.
Identifying the problem correctly is the first step toward a solution. Sometimes, a stuck zipper simply requires a gentle nudge or a bit of lubrication, but other times, the issue may run deeper. An accurate diagnosis will help you avoid unnecessary frustration and repair costs.
When to DIY: Simple Repairs

Many people find themselves asking whether they can repair a zipper themselves. Often, the answer is yes. DIY repairs are both convenient and cost-effective, enabling you to extend the life of your favorite items without breaking the bank. Moreover, there’s a satisfying sense of accomplishment that comes from fixing things yourself. However, it’s important to assess your skills and experience before diving in. For simple repairs, the following techniques can be quite effective:
- Replacing a zipper pull: A common and straightforward fix that involves removing the old pull and threading a new one.
- Lubricating a stuck zipper: Using items like soap, silicone spray, or even beeswax can alleviate the issue and restore function.
- Fixing misaligned teeth: Using pliers gently to realign teeth can often solve the problem efficiently.
When opting for DIY repairs, having the right tools and materials is essential. Here’s a brief table outlining some items you might want to keep handy:
| Tool/Material | Purpose |
|---|---|
| Replacement zipper pull | To replace a broken slider. |
| Lubricant (soap, wax) | To help ease a stuck zipper. |
| Pliers | For realigning zipper teeth. |
While these repairs may seem straightforward, being prepared and knowing your limitations is key. Watch tutorials or read instructions first to boost your confidence. It’s always better to do a little homework rather than risk causing more damage to your item.
When to Seek Help: Complex Repairs
However, not all repairs are suitable for the DIY route. Recognizing the signs that indicate a professional should handle a repair is just as crucial. Taking matters into your own hands when you’re faced with complex zipper problems can lead to greater damage and higher costs. Here are some scenarios where you should seek expert help:
- Full zipper replacements: Sometimes, a zipper is so damaged that it needs to be replaced entirely.
- Specialized zippers: Items like high-end garments often come with unique zippers that require expertise.
- Sentimental items: If a cherished item is at stake, it’s often worth the investment in professional help.
These scenarios underline the importance of assessing each situation carefully. Some problems may seem easy to fix but can quickly spiral into larger issues, costing you more in the long run. A skilled tailor or seamstress can correctly identify the problem and restore your item to its former glory without the risk of further damage.
Resources for Assistance
If you find yourself needing professional help, knowing where to look can make all the difference. Here are some reliable resources for zipper repair assistance:
- Local Tailors or Seamstresses: Often, a quick search online can lead you to skilled professionals nearby.
- Online Resources: Websites like Yelp and Facebook groups can provide recommendations and reviews.
- Specialized Services: If you’re on the go, some companies offer postal repair services for zippers.
Conclusion
The art of zipper repair lies in knowing when to roll up your sleeves and when to reach out for help. By understanding common zipper issues and assessing the complexity of the repairs needed, you can make educated decisions that enhance the longevity of your favorite items. Whether opting for a DIY fix or seeking professional help, the right approach can save you both time and money while preserving your cherished belongings.
Frequently Asked Questions
- Can I fix a zipper that separates easily? Yes, you can use a zipper repair kit to replace the slider or realign the teeth.
- What should I do if my zipper gets stuck? Try using a lubricant like soap or candle wax to ease the movement.
- How do I know if I need a new zipper? If the teeth are severely misaligned or the fabric has worn out, it’s best to replace the zipper.
- Is it worth it to repair a zipper on a cheap garment? It may be if the item has sentimental value or if you can easily replace the zipper yourself; otherwise, it might not be worth the effort.
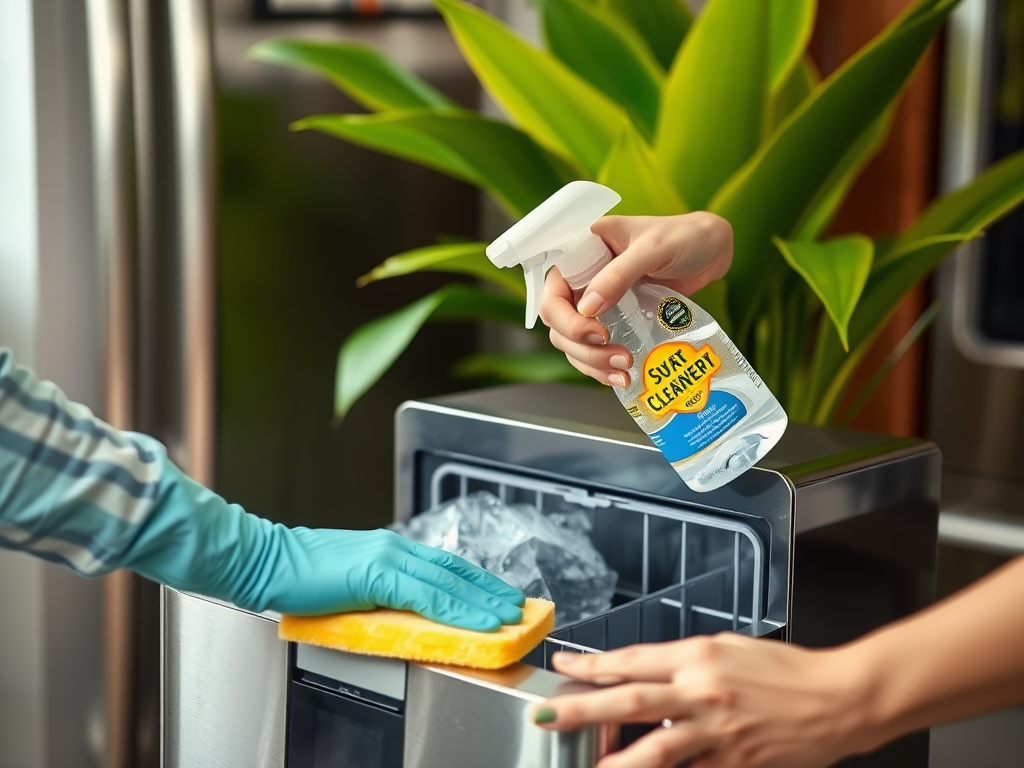
How to Clean Out Your Ice Maker: A Quick Reference
Cleaning your ice maker is a task that often gets overlooked, yet it’s vital for maintaining its efficiency and the quality of the ice it produces. A dirty ice maker can lead to numerous problems, including unpleasant odors, contaminated ice, and even machine malfunctions. This guide will provide a comprehensive yet quick reference for ice maker cleaning, ensuring you enjoy crystal-clear, fresh ice every time. Armed with the right techniques and tools, you’ll ensure your appliance runs smoothly and hygienically. With just a little effort, you can easily reap the benefits of a sparkling clean ice maker.
Neglecting to clean your ice maker can lead to an accumulation of deposits and possible bacteria, which might taint the very ice you expect to be refreshing. By regularly cleaning both the interior and exterior of your ice maker, you’re taking a proactive step towards preventing these issues. Not to mention, a clean machine is a happy machine! So, whether you use it frequently for entertaining guests or just for your daily refreshing drink, it’s important to maintain its cleanliness. This article not only outlines the essential steps for thorough cleaning but also emphasizes the importance of regular maintenance.
Understanding the Importance of Cleaning Your Ice Maker
Regular cleaning of your ice maker brings a multitude of benefits. It enhances the appliance’s performance, allowing it to produce ice more efficiently. Moreover, a clean machine safeguards the health of everyone who consumes the ice, as dirty ice can harbor harmful bacteria. Additionally, a well-maintained ice maker is likely to have a longer lifespan, saving you money on potential repairs or replacements. With this in mind, it’s crucial to integrate cleaning into your routine to keep your ice maker in top condition. Ultimately, investing time in this task will yield fresh, amazing ice for all your needs.
Gathering Necessary Supplies
Before diving into the actual cleaning process, gathering all necessary supplies can help streamline the experience. Here’s a quick list of items that will aid you in cleaning your ice maker effectively:
- White vinegar or a specialized ice maker cleaner
- Soft cloths or sponge
- Bucket or large bowl
- Warm water
- Screwdriver (if necessary for disassembly)
Having these tools on hand ensures you won’t need to run back and forth during the cleaning process, which can lead to losing focus. Each item plays a crucial role in effective cleaning, from the cleaning solution to the cloths that will apply it. And remember, the quality of your supplies can impact both your effectiveness and the safety of the process. Once you’re equipped with the essentials, you’ll be ready to follow the steps that ensure your ice maker shines.
Step-by-Step Cleaning Process
Preparing Your Ice Maker for Cleaning
The first step in cleaning your ice maker involves preparing it properly. This preparation is aimed at ensuring the process can be safely and effectively carried out. Start by turning off the ice maker, which typically involves either a switch or a control panel. Next, unplugging the unit is often a good idea to prevent any electrical issues while cleaning. Once you have safely powered down the machine, empty any remaining ice from the bin. This step is critical as it allows you to access all surfaces that require cleaning.
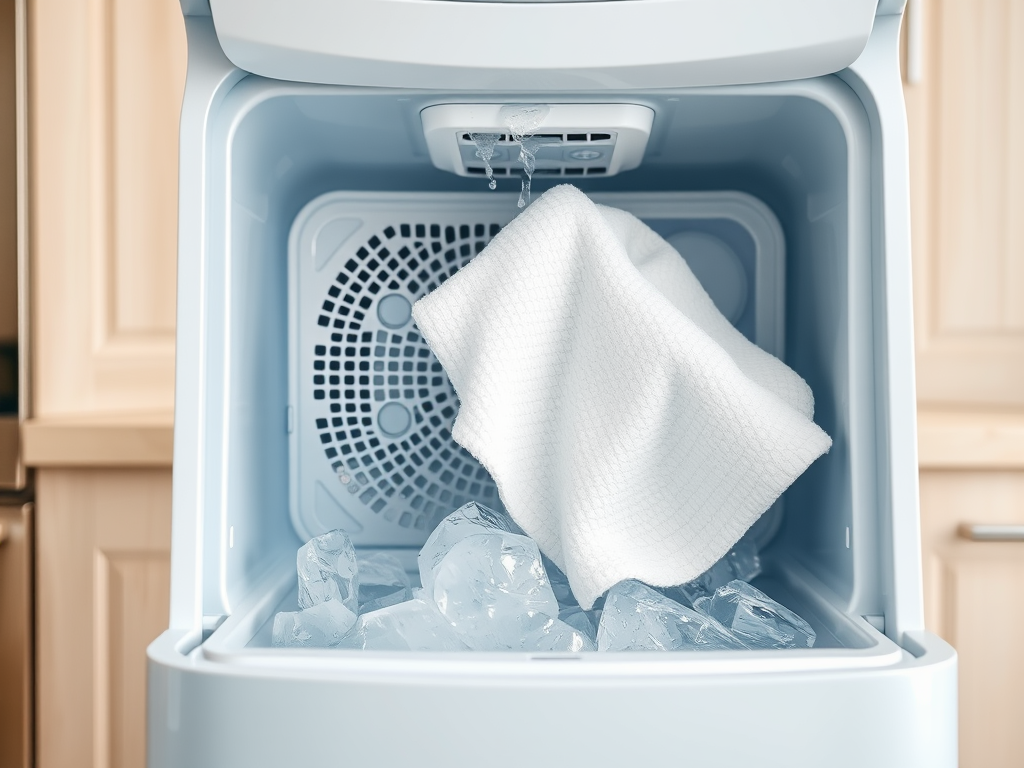
Cleaning the Ice Maker Interior
Now that your ice maker is prepared, it’s time to tackle the interior cleaning. Begin by mixing a cleaning solution using warm water and white vinegar or the designated ice maker cleaner you gathered earlier. An ideal ratio involves equal parts of vinegar and warm water to create an effective cleaning solution. Using a soft cloth or sponge, wipe down all the interior surfaces carefully, ensuring to clear away any buildup or residue. Don’t forget to focus on corners and crevices where grime tends to accumulate.
After you’ve thoroughly cleansed the surfaces, it is imperative to rinse all areas with clean water to eliminate any remaining cleaning agents. This step ensures that your ice is free from any unwanted tastes or odors. If necessary, repeat the process for especially stubborn stains or deposits. Once the interior is sparkling again, you’re set to proceed with additional cleaning tasks.
Descaling Your Ice Maker
Descaling your ice maker is essential to maintaining its efficiency and preventing mineral buildup. Follow these effective steps to ensure your machine remains in great working condition. Begin by pouring the descaler—whether it’s a commercial product or your vinegar solution—into your ice maker, following the manufacturer’s instructions to avoid damage. Allow the solution to sit inside for the recommended time, typically between 10 to 15 minutes, allowing it to work on the buildup.
After the internal components have been treated, it’s important to conduct a cycle to flush out the descaler. This may necessitate running the machine without any ice to clear the solution. Subsequently, run several cycles of plain water to ensure all traces of the descaler are properly rinsed away. This not only protects the quality of the ice produced but extends the life of your machine.
| Cleaning Task | Frequency |
|---|---|
| Deep Clean | Every 3-6 months |
| Descale | Every 6 months |
| Check Condition | Monthly |
Cleaning the Exterior and Surroundings
While the interior is crucial, addressing the exterior of the ice maker is equally important. The outside unit often collects dust and grime that can harbor bacteria. To keep your appliance looking pristine, start by wiping down the outside surfaces with a mild detergent and soft cloth. This simple action prevents residue buildup and can enhance the overall appearance of the ice maker.
Additionally, don’t overlook the area surrounding the ice maker. Cleaning the surrounding space ensures that dust or spills do not contribute to mold growth on or around the unit. Regularly attending to these areas means guests will not only appreciate the quality of the ice, but they’ll also admire your attention to detail in keeping the appliance clean and inviting.
Conclusion
Cleaning your ice maker isn’t just a task—it’s a vital chore that guarantees the machine operates effectively while producing safe and clean ice. The steps provided in this quick reference guide arm you with the knowledge to keep your ice maker in top shape. Through regular maintenance and deep cleaning, you enhance the machine’s performance and ensure the health of those enjoying your beverages. Taking the time to follow these routines will reward you with fresh, delicious ice right when you need it. It’s a small investment of time that pays off big in terms of convenience and safety.
Frequently Asked Questions
- How often should I clean my ice maker? It is recommended to clean your ice maker every 3-6 months, or more frequently if used often.
- Can I use bleach to clean my ice maker? No, it is not advisable to use bleach as it can leave harmful residues. Stick to vinegar or a designated cleaner.
- What should I do if my ice maker smells? A bad odor may indicate the need for cleaning or that ice has been left in the bin too long. Clean it thoroughly to eliminate odors.
- Is it necessary to unplug my ice maker before cleaning? Yes, for safety reasons, make sure to unplug the ice maker before starting the cleaning process.
- How can I prevent mold in my ice maker? Regular cleaning and making sure the ice is used frequently can help prevent mold buildup.
Step-by-Step: How to Clean Shoes Effectively
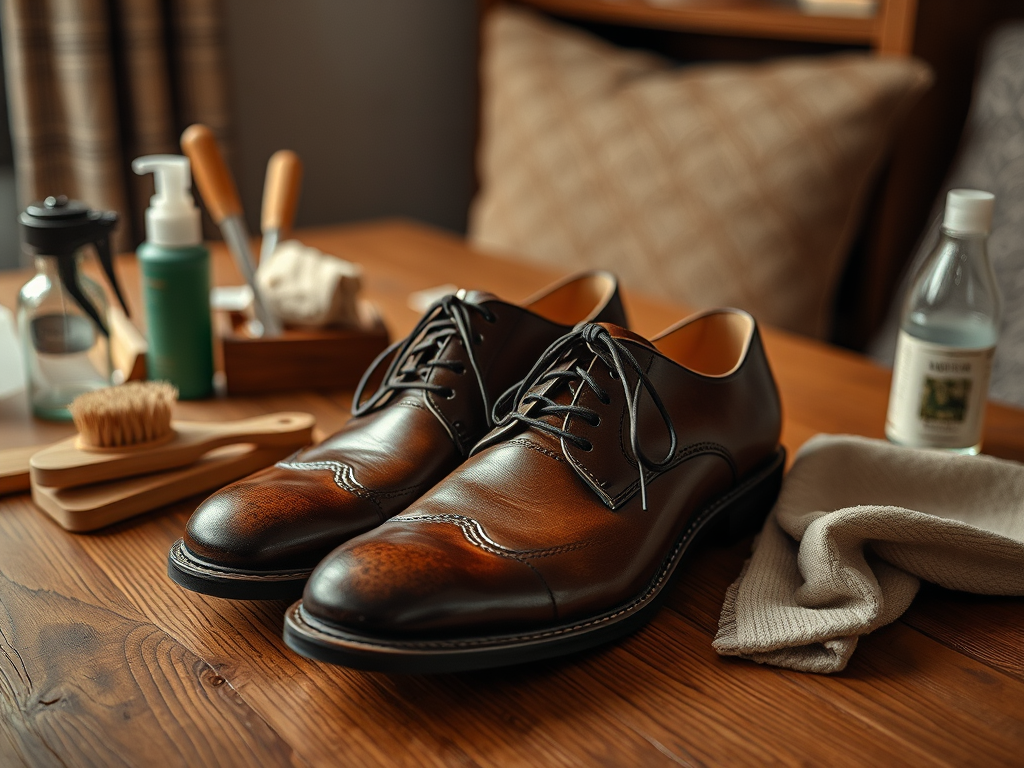
Cleaning your shoes can often feel like a chore, but it’s an essential part of maintaining their appearance and longevity. Nothing can undermine the impact of a stylish outfit quite like dirty shoes. This article will equip you with effective methods to polish your footwear while delving into the nuances of different materials. Whether your shoes are made of delicate leather, sturdy canvas, or breathable mesh, we have all the insights you need to redefine your cleaning routine. Prepare to embark on a journey to discover how to bring your shoes back to life with minimal effort and maximum results.
Before taking the plunge into this cleaning endeavor, it’s vital to assess what type of shoes you own. Each material has distinct properties that necessitate specific cleaning methods. For instance, leather is admired for its elegance but requires a specialized approach to avoid damage. On the other hand, canvas is typically more forgiving, although it can hold onto stains if not addressed promptly. Moreover, assessing the state of your shoes before cleaning can save you time and ensure the best maintenance practices. With the right knowledge, you’ll be able to tackle shoes of any shape, style, or composition!
Assess the Type of Shoes You Own
Your first task involves identifying the materials that form your footwear. This fundamental step will allow you to choose the most effective cleaning solutions. Here’s a quick look at common shoe materials along with their cleaning needs:
- Leather: Durable but requires special care to maintain its shine.
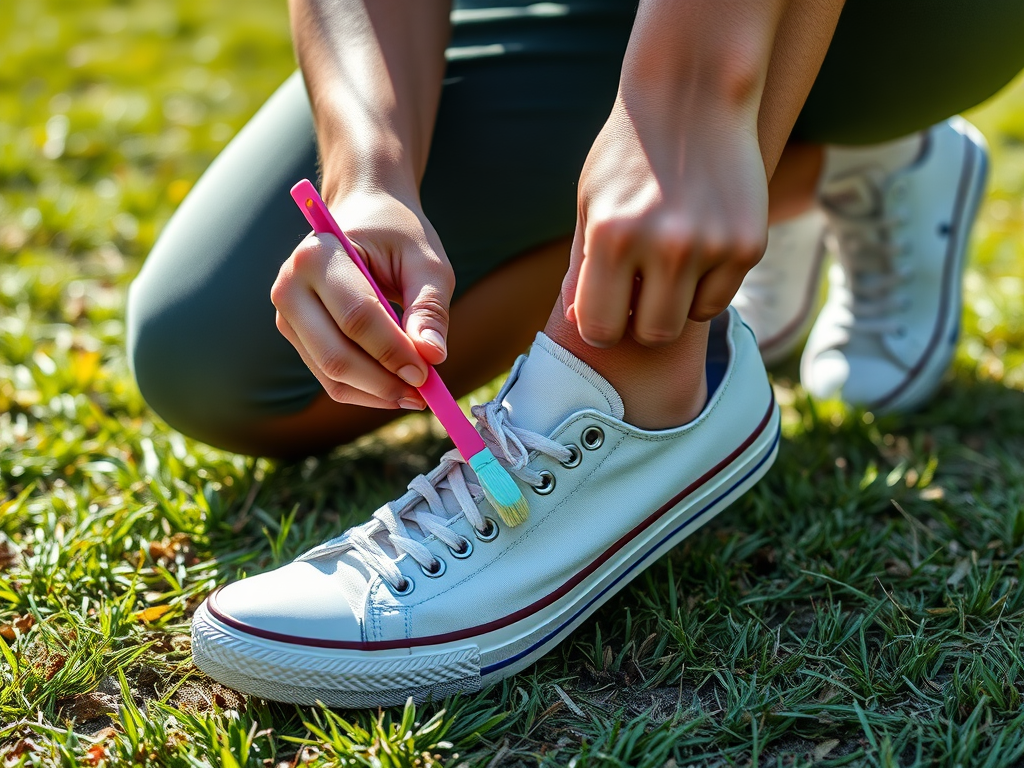
- Canvas: Easier to clean but can trap stains if not treated promptly.
- Suede: Needs delicate handling and specific cleaners to avoid damage.
- Mesh: Breathable and lightweight but can trap dirt and require regular maintenance.
Gather Your Cleaning Supplies

Next, gather the necessary cleaning supplies. Being prepared with the right tools can make your cleaning experience seamless. Here’s a list of essentials to gather before you start:
- Soft-bristled brush
- Mild detergent
- Baking soda
- White vinegar
- Microfiber cloths
- Toothbrush
- Water
Step-by-Step Cleaning Process
The following table outlines the cleaning process for different shoe materials. It provides an easy reference point to ensure you’re using the right techniques:
| Shoe Material | Cleaning Solution | Cleaning Method |
|---|---|---|
| Leather | Water + mild detergent | Gently scrub with a damp cloth, then dry with a microfiber cloth. |
| Canvas | Baking soda + water paste | Apply paste, scrub with a toothbrush, then rinse. |
| Suede | Specialized suede cleaner | Brush the suede to lift dirt, then use the cleaner as directed. |
| Mesh | Mild detergent + water | Soak a cloth in the solution, scrub gently, then rinse and air dry. |
After assessing which type of shoes you own and gathering the necessary supplies, you are ready for the cleaning process. Begin by removing the laces and insoles. This allows you to clean every part of the shoe thoroughly. Following this, brush off any loose dirt with a soft-bristled brush, focusing on seams and grooves where dirt can accumulate. For the cleaning solution, create mixtures tailored to your shoe’s material. For instance, leather shoes benefit from a water and detergent mix, while canvas shoes are best treated with a baking soda paste. Each method ensures that your shoes get the dedicated care they need.
Rinse and allow your shoes to dry completely. It’s essential to do this away from direct sunlight to prevent warping or fading. During the drying process, take the time to pay attention to your laces and insoles. A simple soak in soapy water will work wonders for your laces, and baking soda will help eliminate any lingering odors from the insoles. Finally, once everything has dried effectively, reassemble your shoes, tying them up with freshly cleaned laces, and revel in that newly refreshed look!
Conclusion
To keep your footwear looking sharp, cleaning them effectively is paramount. Not only does this practice extend the lifespan of your shoes, but it also preserves their aesthetic appeal. With just a few straightforward steps, cleaners, and caring methods, you can transform your dirty shoes back to their original glory. Commit to a regular shoe maintenance routine, and you’ll find that keeping them clean is much easier than you initially thought!
Frequently Asked Questions
- How often should I clean my shoes? It depends on how frequently you wear them. A general rule is to clean them every couple of weeks or whenever they’re visibly dirty.
- Can I put my shoes in the washing machine? Some shoes are machine washable; check the care instructions first. Avoid washing leather and suede in the machine.
- What should I do if my shoes have a bad odor? Sprinkle baking soda in the shoes and let it sit overnight to absorb odors.
- Is it safe to use bleach on white shoes? Bleach can be too harsh for most materials. Consider using a white vinegar and water solution instead.
- How can I prevent stains on my shoes? Apply a protective spray suitable for your shoe material and avoid wearing them in muddy or wet conditions whenever possible.